We’ve all felt it, that awkward moment when you get an email with professional content but from a personal email account. The good news is, we are going to guide you towards setting up G Suite for your business.
To start using G Suite for your business or organization, the first step is to sign up. Before signing up, have your domain name, your user name, and an email address that is not in your G Suite domain, handy. If you already have an account, go to admin.google.com to sign in.
Signing up with G Suite
- Fill in your business name, the number of employees, and the country, then click view next step.
- After filling in your name, last name, and current email, click view next step.
- You will be prompted to use a domain you already have or purchase a domain.
- If you have a domain name, click on, Yes, I Have One I Can Use.
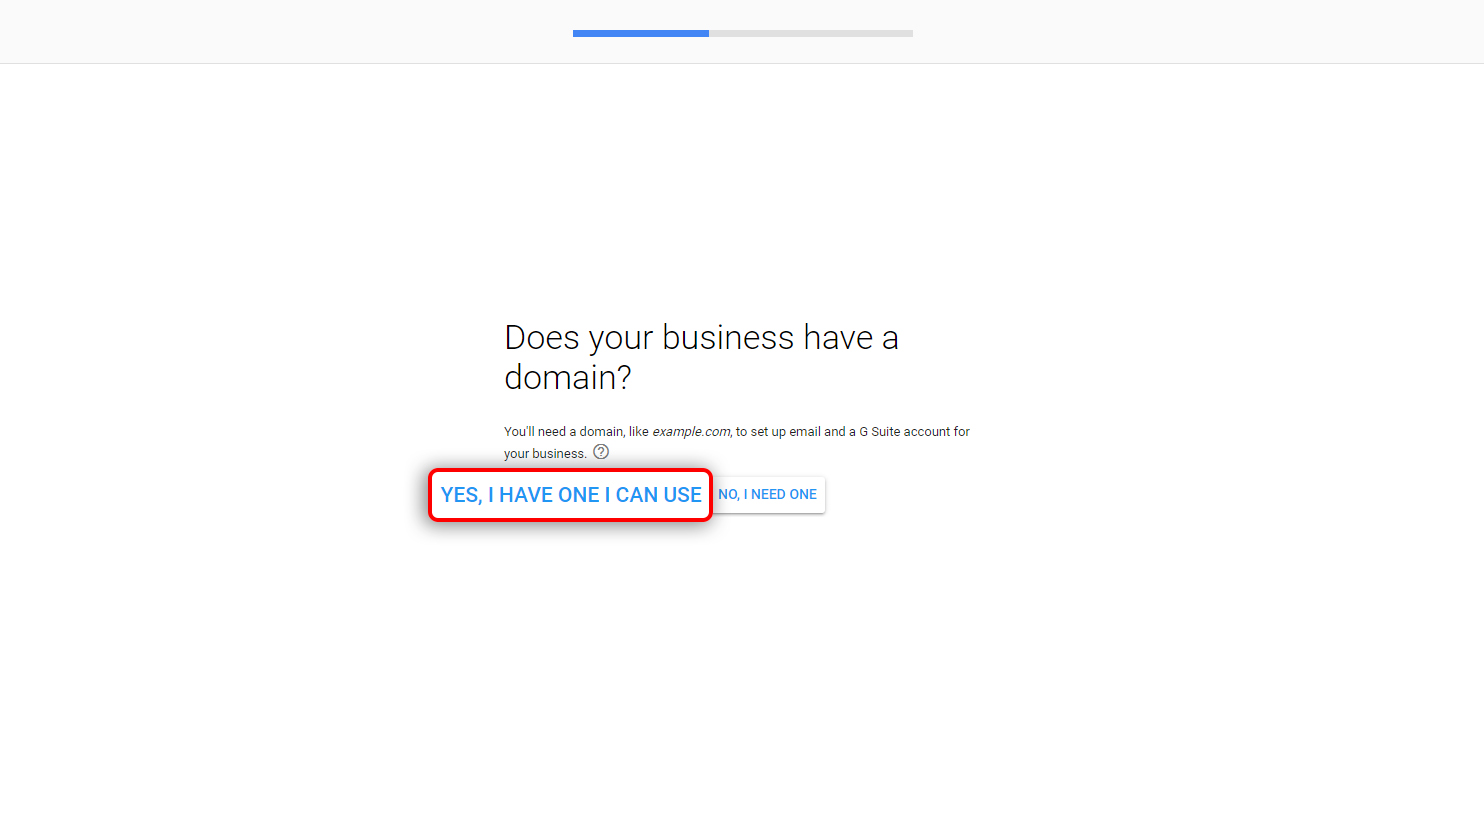
For the purposes of this How To, we will use an existing domain.
- Enter your domain name and go to the next step. Choose this domain to set up the account and move on to the next step.
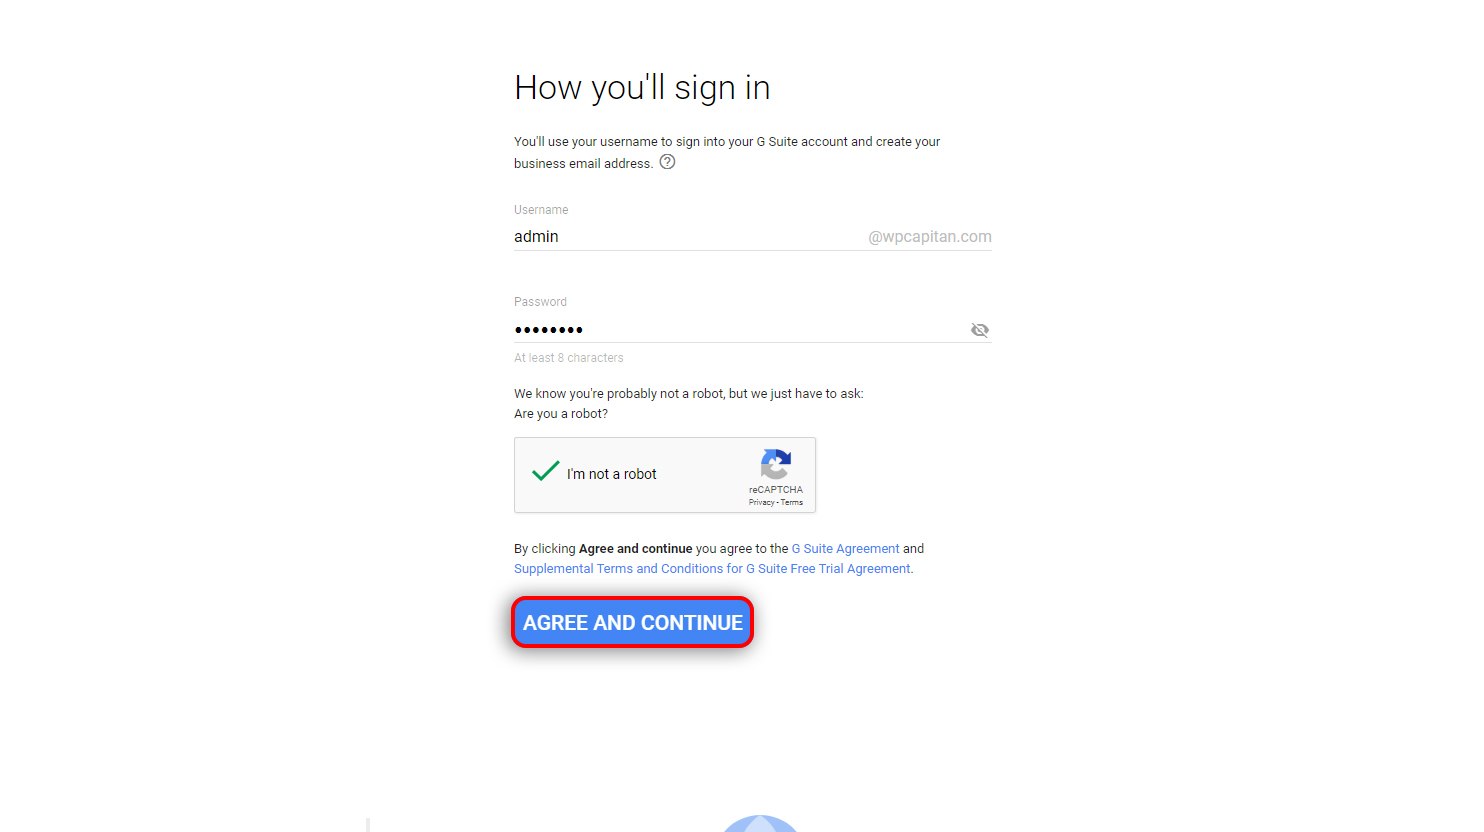
- Choose the username and create a password for your G Suite admin account. For example; admin@yourdomain.com
- Review and fill in payment information then click next.
- Click Continue To Setup and agree with the terms and conditions.
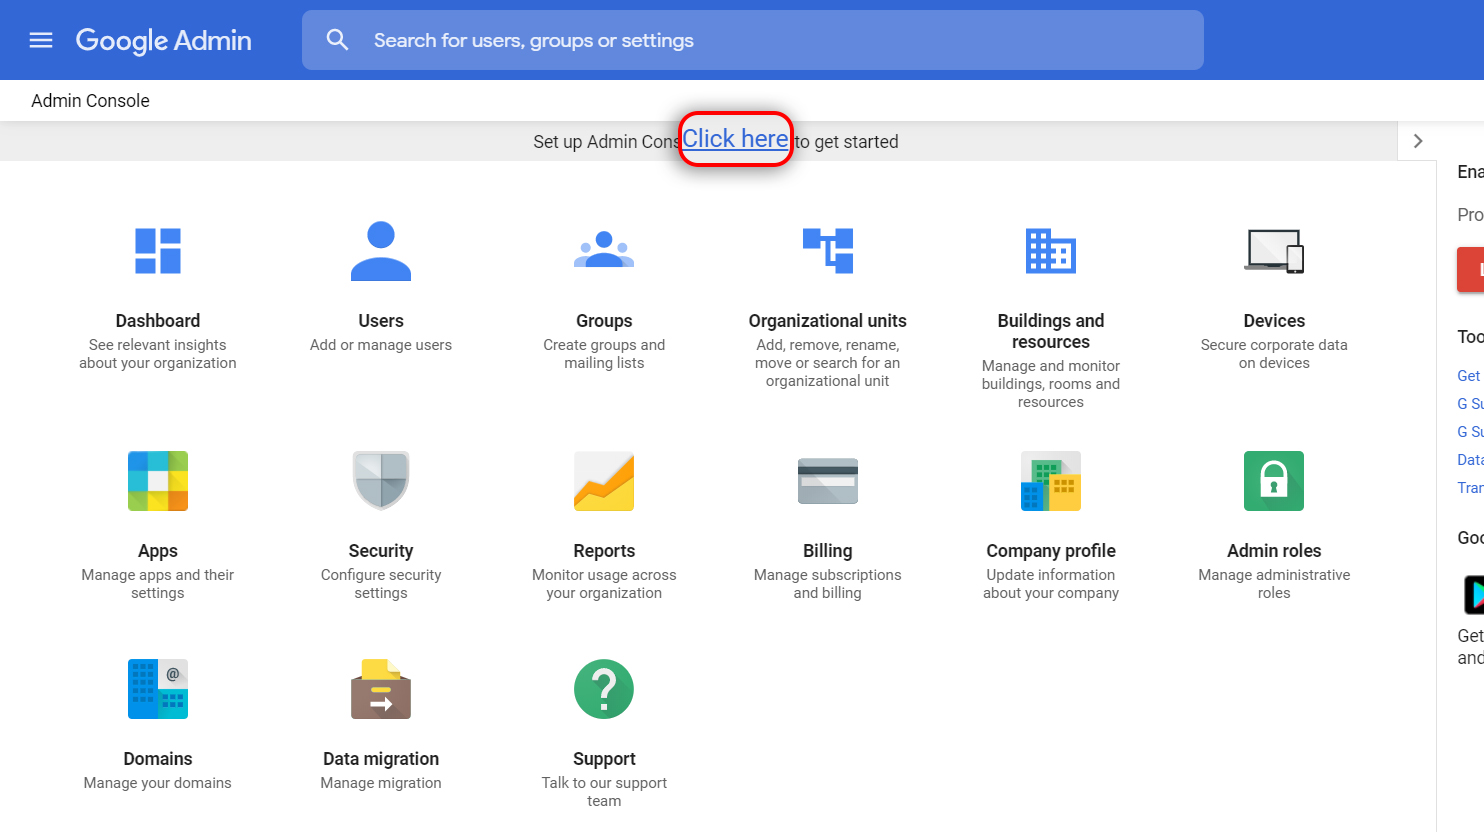
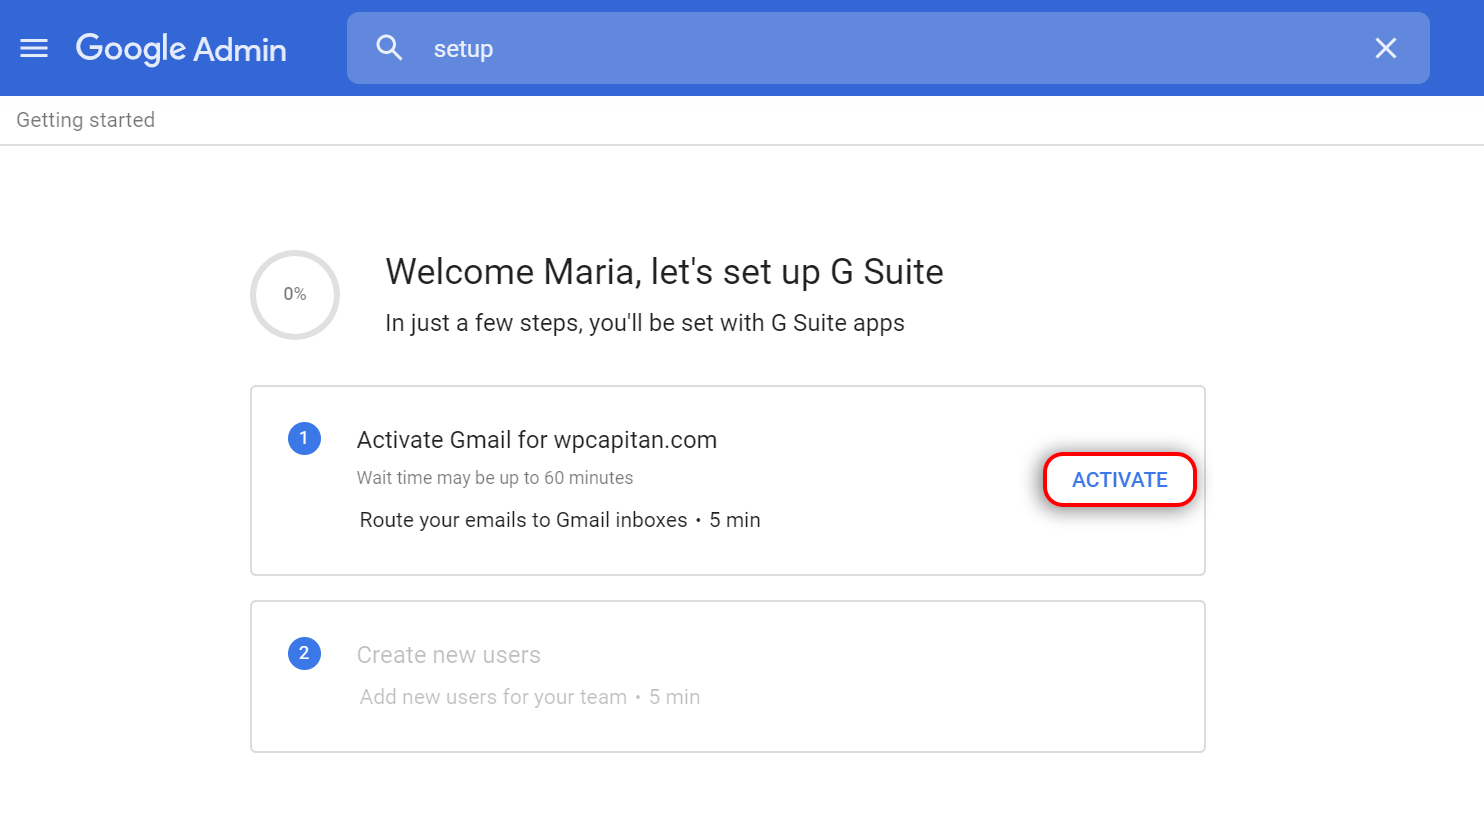
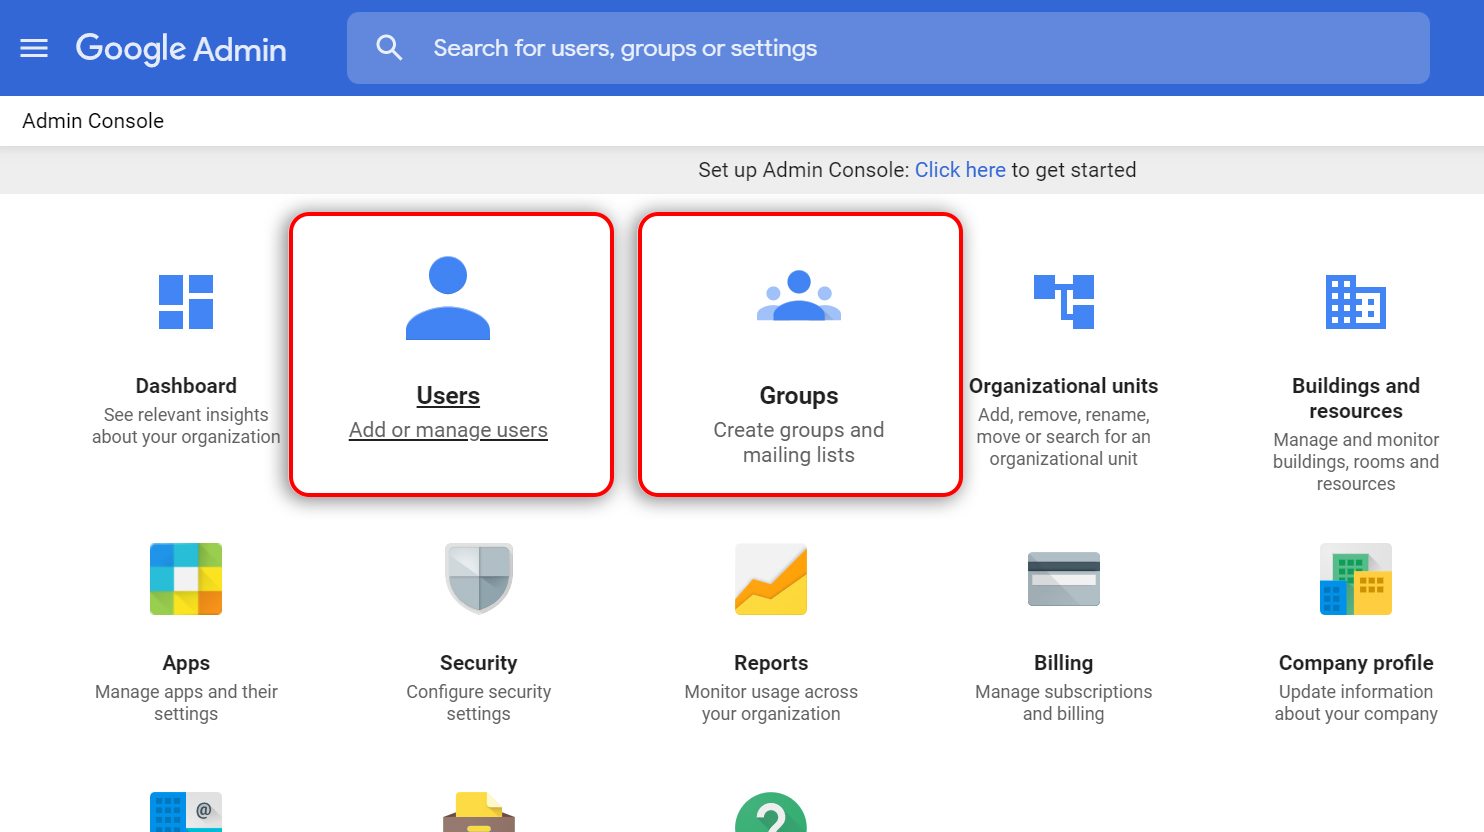
Once you have signed in or created an account for the size and type of organization that you have, you will be taken to the Admin Console. To start setup, click on Click Here. Then click Activate to set up your email using your domain. If your domain host has been detected, the wizard will guide you through the whole process specifically for your domain host. Below are the generic steps to verifying your domain and setting up. To locate the wizard, follow these instructions.
- Sign into your domain host's website
- Verify your domain
- Set up domain MX records
- Add Users/Team Members
Let’s look at these in more detail.
Verifying Your Domain
Sign into the admin console of G Suite, and click on Start Setup or Verify Domain, then click Begin Verification, and lastly click Select your domain registrar or provider. Go to the section, Create a new TXT record and copy your verification record located in the Value/Answer/Destination field. If you are being guided by the G Suite Wizard and your domain registrar has been detected, the verification code will be automatically generated by the wizard.
Sign into your hosting site 10web.io to add your verification record. This will assure that the domain belongs to you.
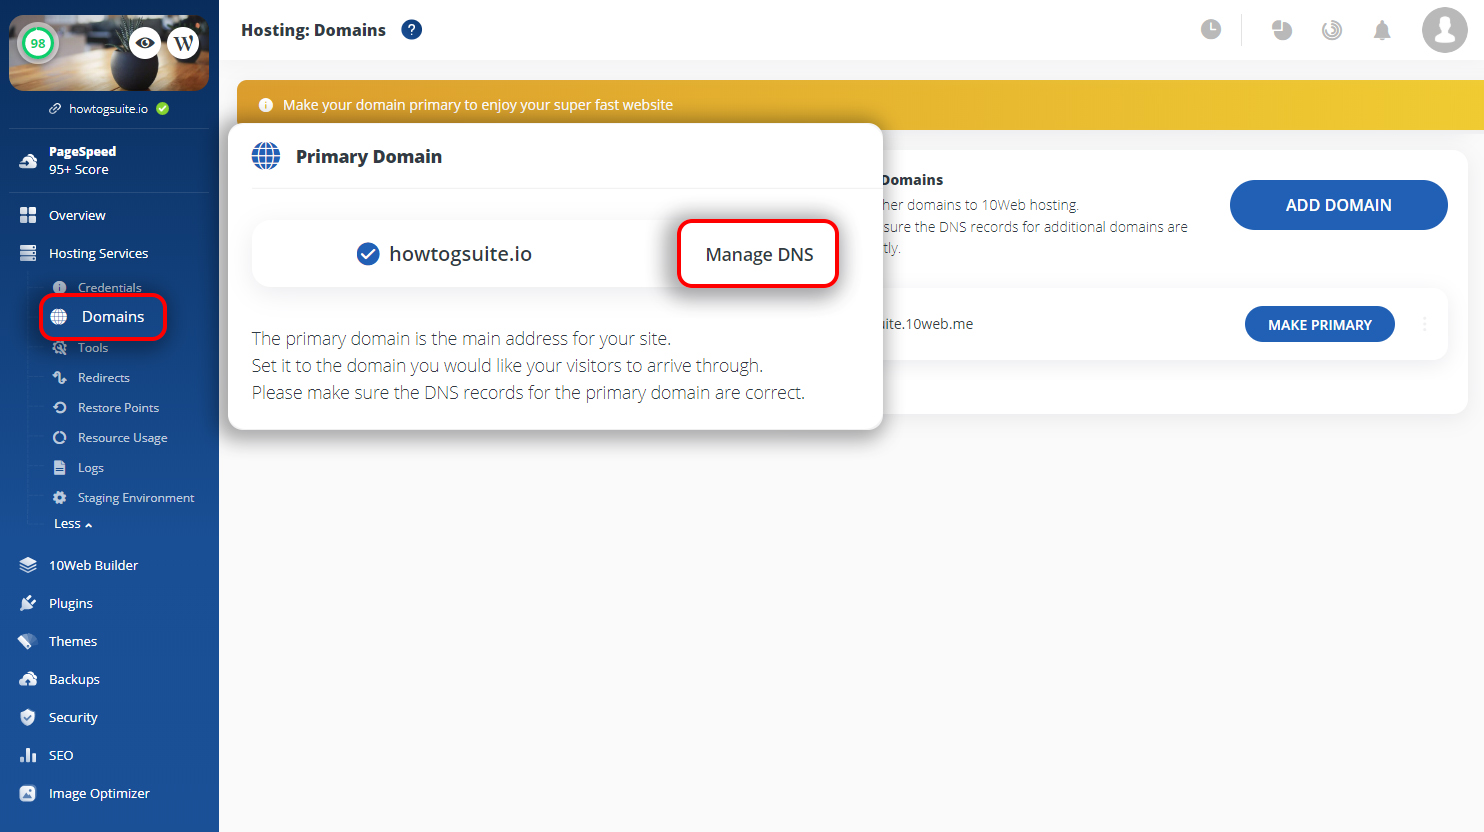
- On the left of your 10Web dashboard, click on on Domains.
- Click Manage DNS.
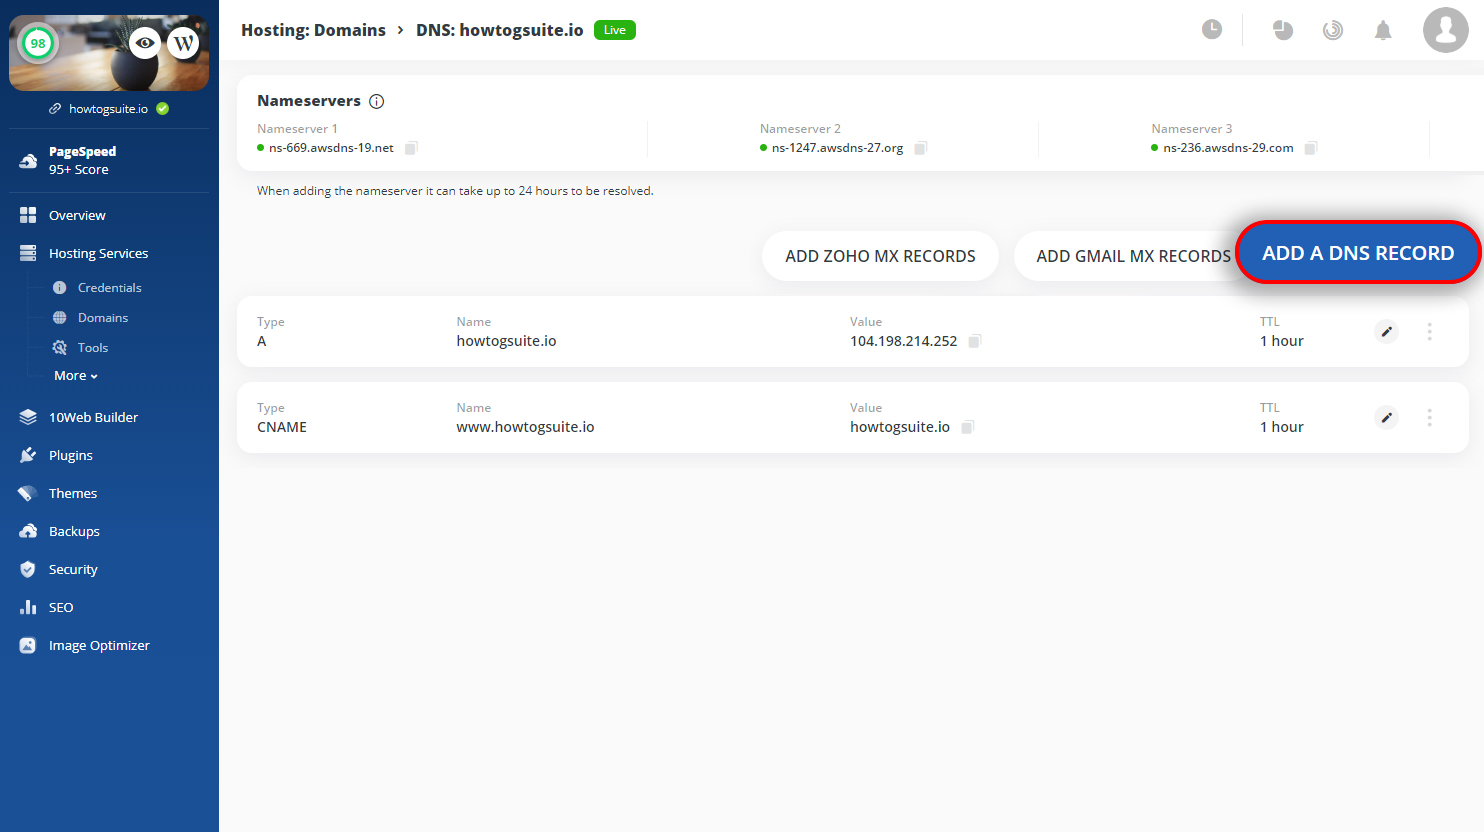
- Click on Add DNS Record.
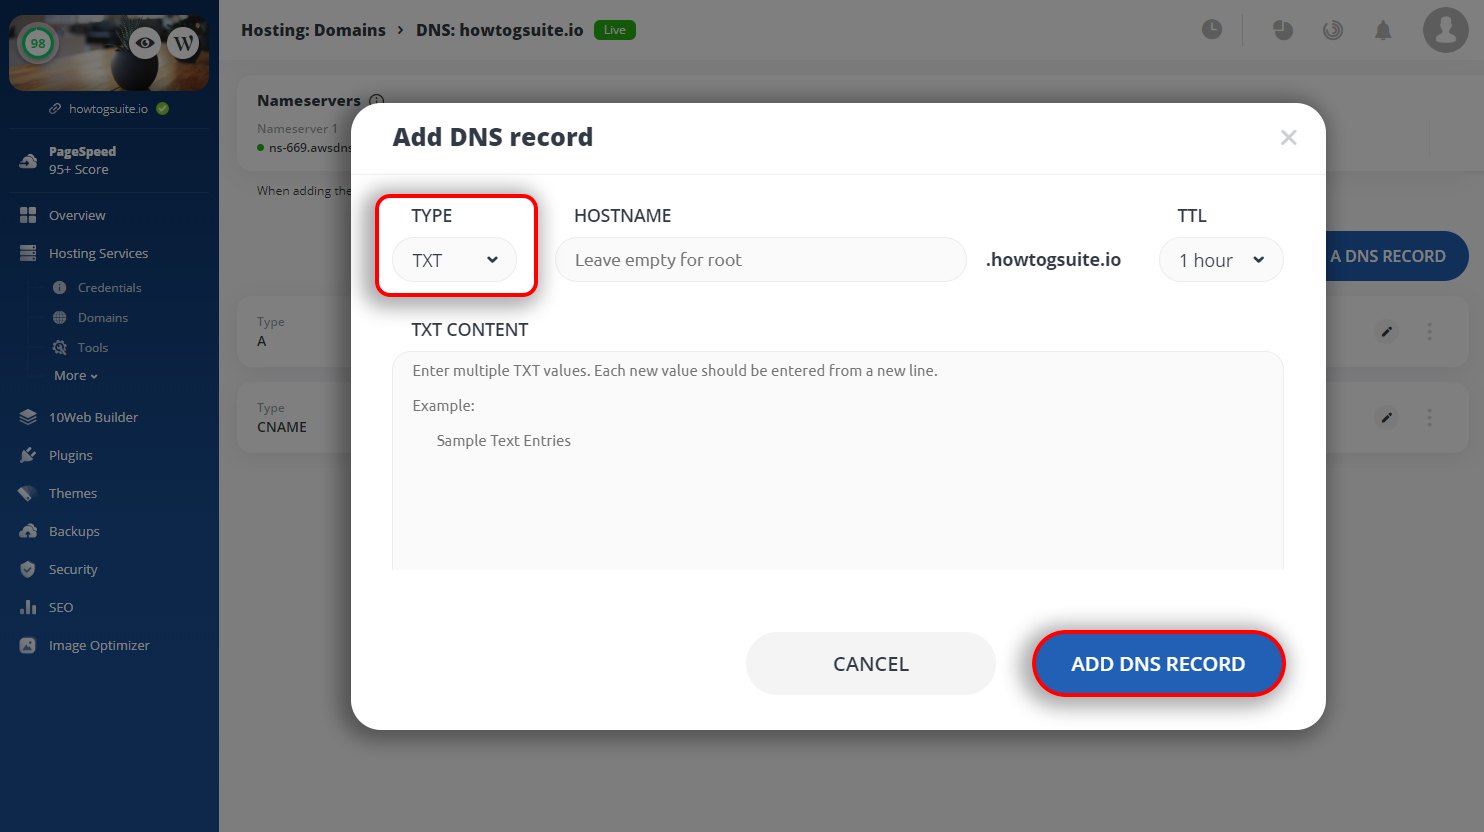
- In the drop down menu under Type, choose TXT.
- Enter the name of your subdomain and paste the G Suite verification record into the TXT Content and click Add DNS Record.
- Return to your G Suite setup and click Verify then click Continue.
Setting Up MX Records For G Suite
Once your domain is verified, it’s time to direct your email flow. This is done by configuring your MX Record to point to the google mail servers.
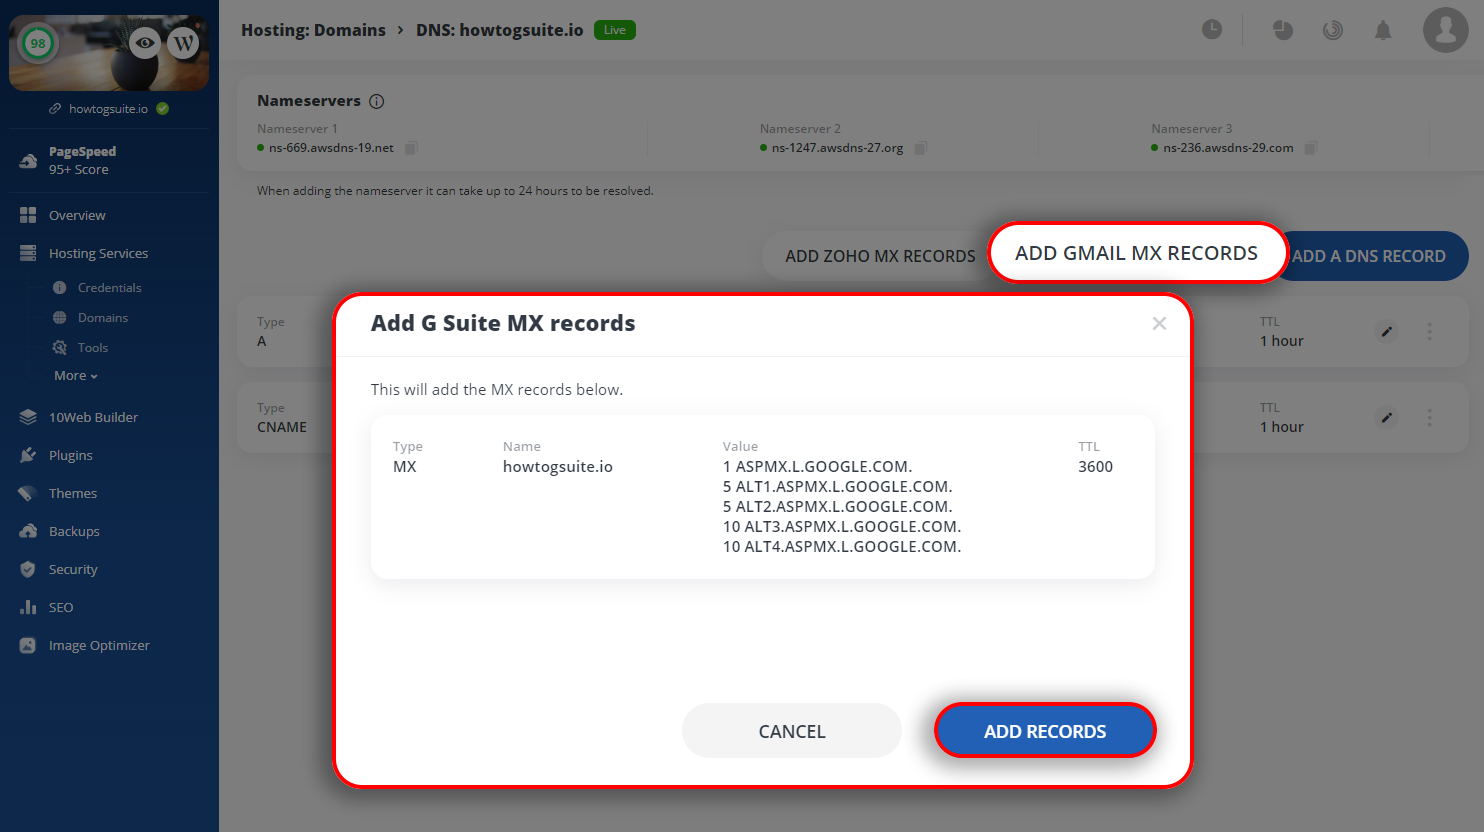
- In your 10Web dashboard, go to Domains then Manage DNS.
- Click Add Gmail MX Records then click Add Records.
It usually takes about 6 hours until you can start sending and receiving emails. It could however, take up to 72 hours to start receiving emails.
Adding Team Members
To add users, sign into the administrator panel of your G Suite account.
- Have the name and last name of your team member ready.
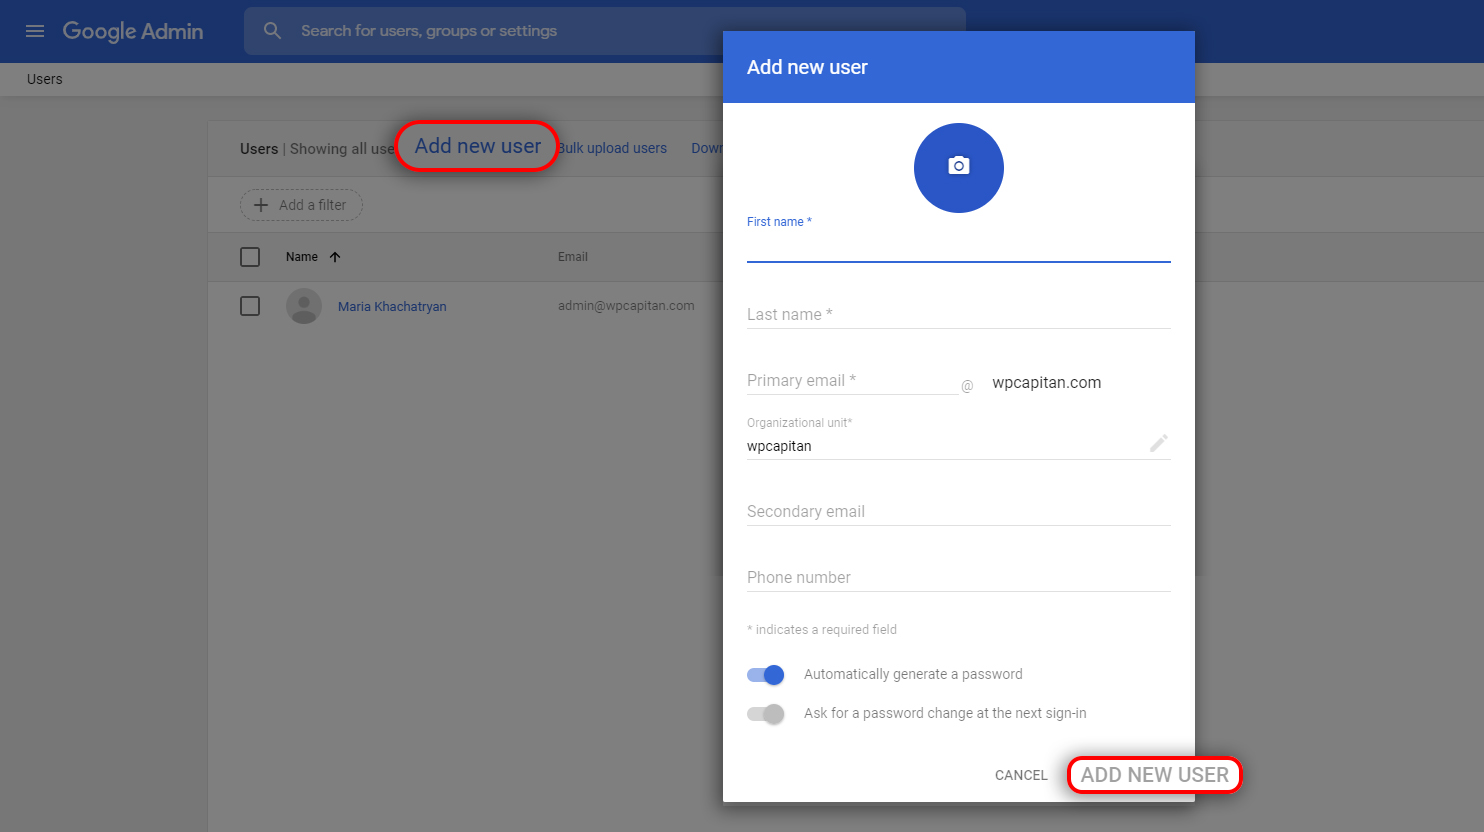
- If you have created teams, click on the Organizational Unit you would like to apply for the team member, then click on the Add New User button.
- Fill in the information, create a password, and click the Add New User button to create the email account.
- Repeat for other team members.