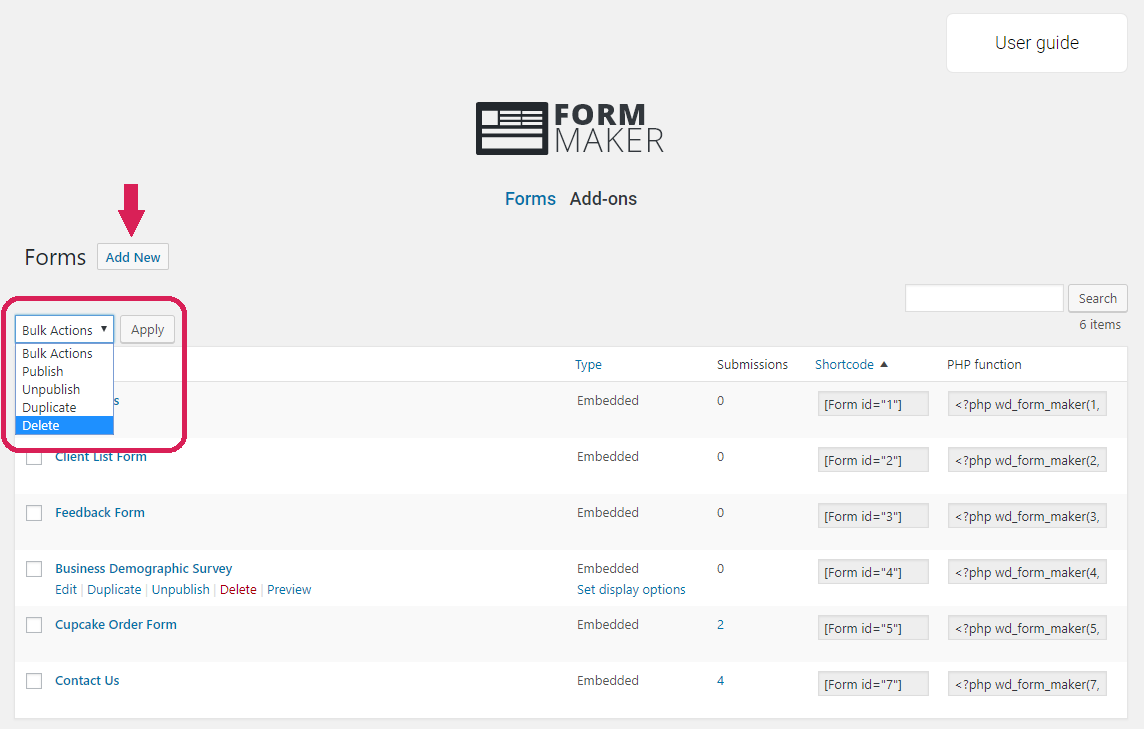
After installing WordPress Form Maker plugin by following the steps in this article, you can go ahead and start working on your forms. Navigate to Form Maker > Forms page to build your very first form. Form Maker plugin provides a few sample forms, which you can quickly edit and publish.
Using Form Maker > Forms page, you can manage existing forms, as well as perform the following Bulk Actions:
- Publish,
- Unpublish,
- Duplicate,
- Delete.
Select the necessary form, choose the bulk action, then press Apply. Also, you can search for your form by writing its title in the top Search input.
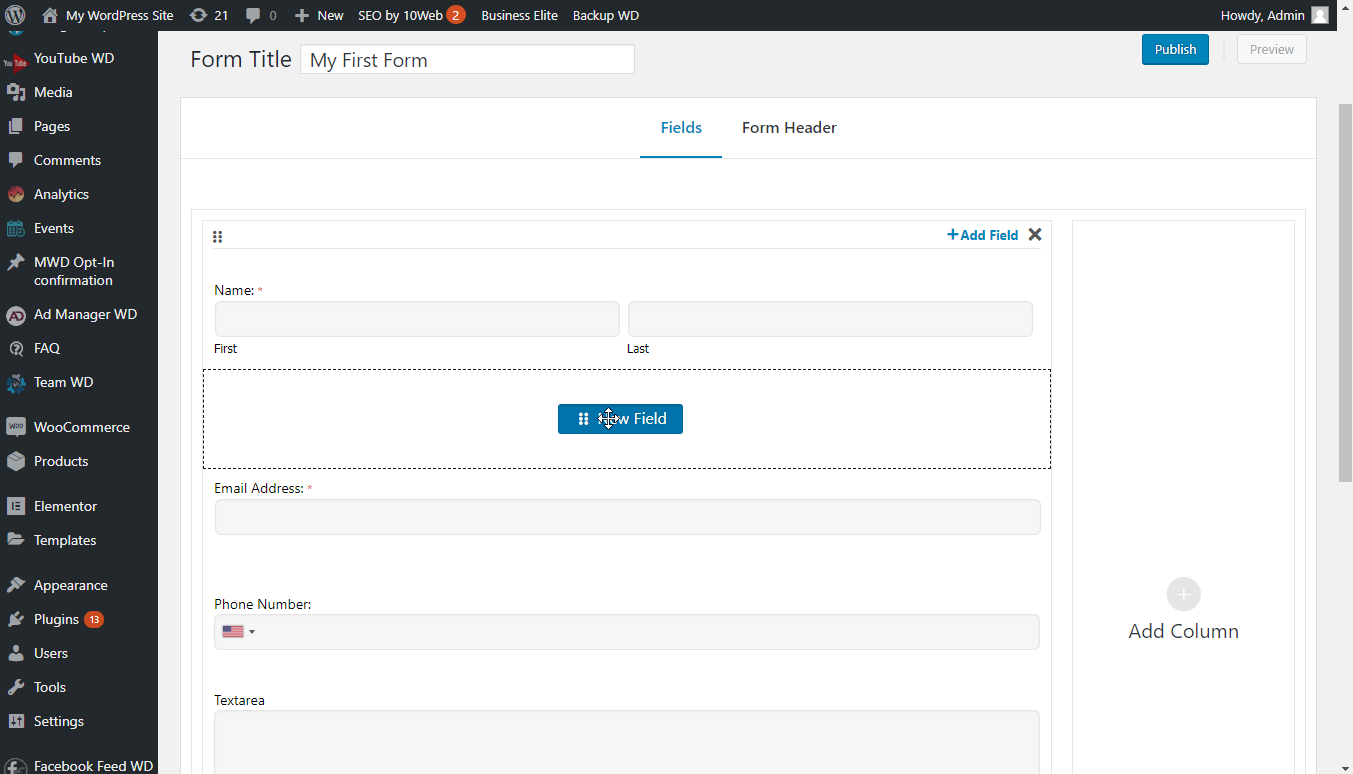
Press Add New button from this page, and you will be taken to the Form Editor section. Make sure to write a Title for this form, then choose the Theme that sets the appearance of it. If you wish to display the form with the same design as your website theme, select Default Theme option from Theme select box.
Adding Fields to the Form
To add a new field to your form, drag the New Field button to the area where you wish to place the field. The field editor toolbox will be opened automatically. Click on the field type to choose elements from, for instance, User Info Fields. Press Name button from this field type to add a Name input to your form. Then click Add and the field will be placed to the area you selected initially.
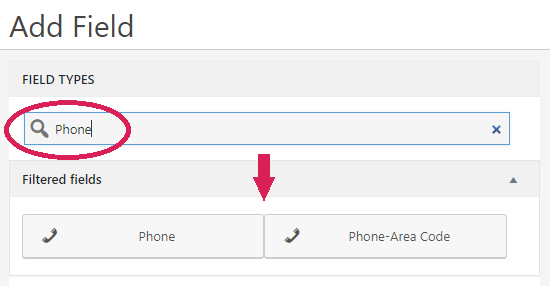
 It is also possible to search among the fields when adding a new field to your form. Use Filter input at the top left corner of fields toolbox. For example, you can search “phone” and all types of Phone fields will be filtered.
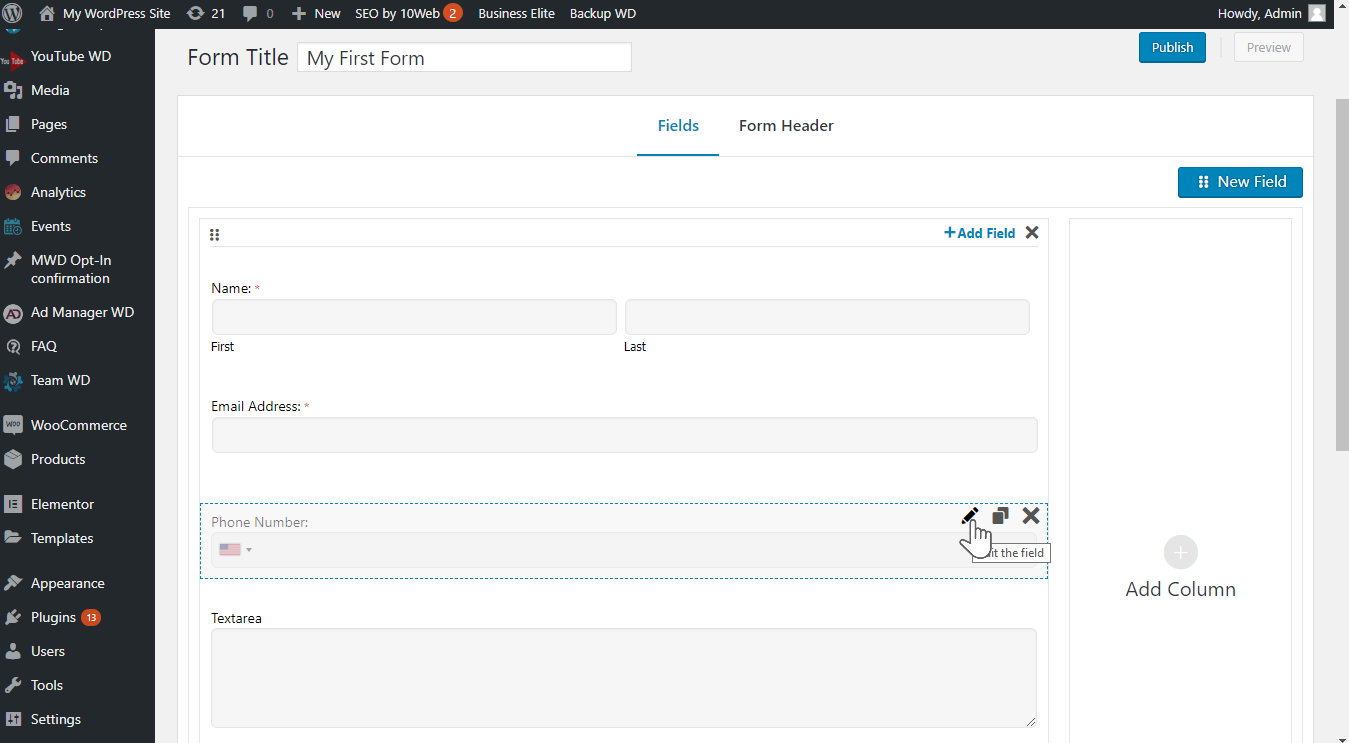
You can edit your form fields anytime by double-clicking on them. Alternatively, you can open field editor toolbox by clicking on a field once, then pressing the small pencil icon above. To change the placement of your fields, simply drag the field to the necessary area.
 The form structure additionally allows you to add columns and unlimited pages to the form. Click on Add Column and Add Page buttons to create an extensive multi-part form. Each page can contain up to 3 columns. Columns, on the other hand, can contain multiple fields on a single row.
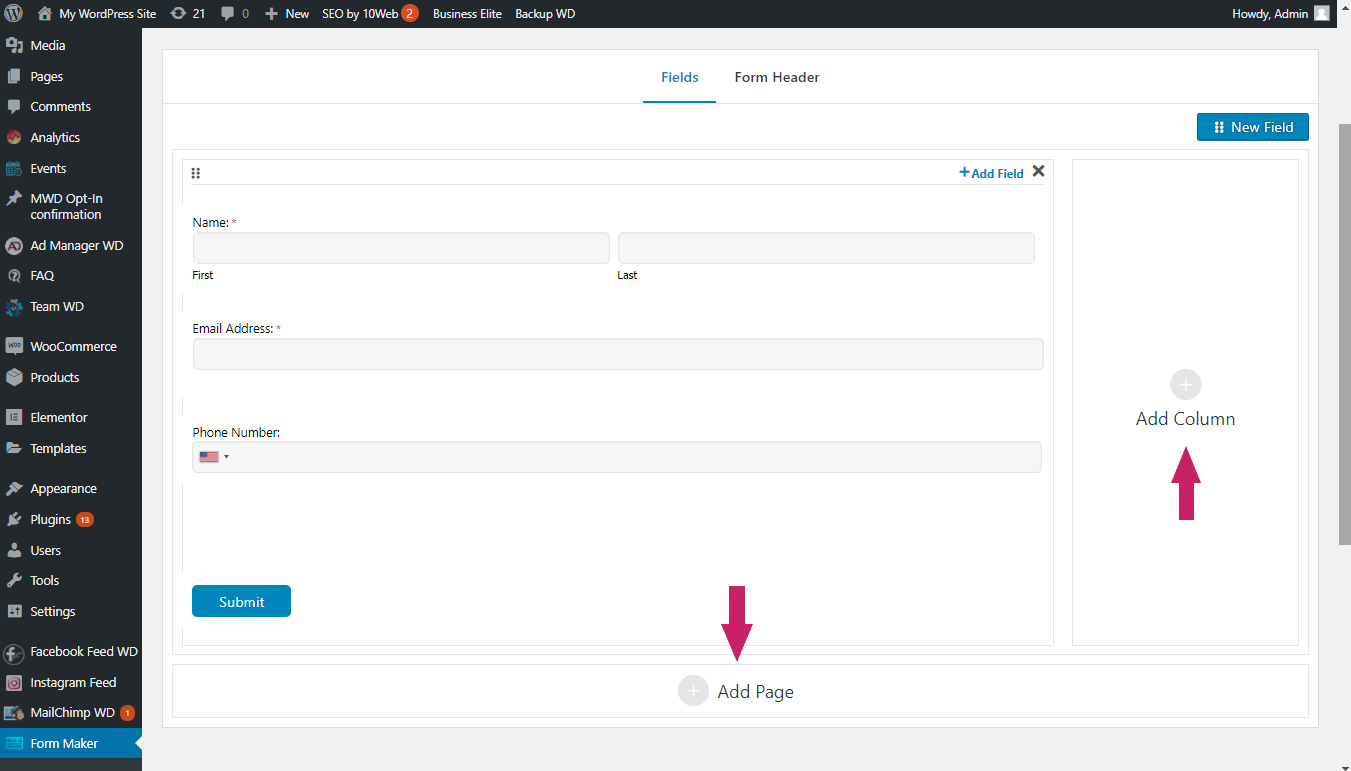 Don’t forget to Publish/Update the form to save the change you made.
After adding fields and publishing the form, you are able to review and restore Revisions on the form. Note, that the Revisions button appears at the top of your form only after you modify the form and save the changes.