WordPress Form Maker plugin allows you to build a complex questionnaire or an online application form, using Advanced Fields. Drag and drop New Field button to the area where you need to insert a field, then click on Advanced Fields tab.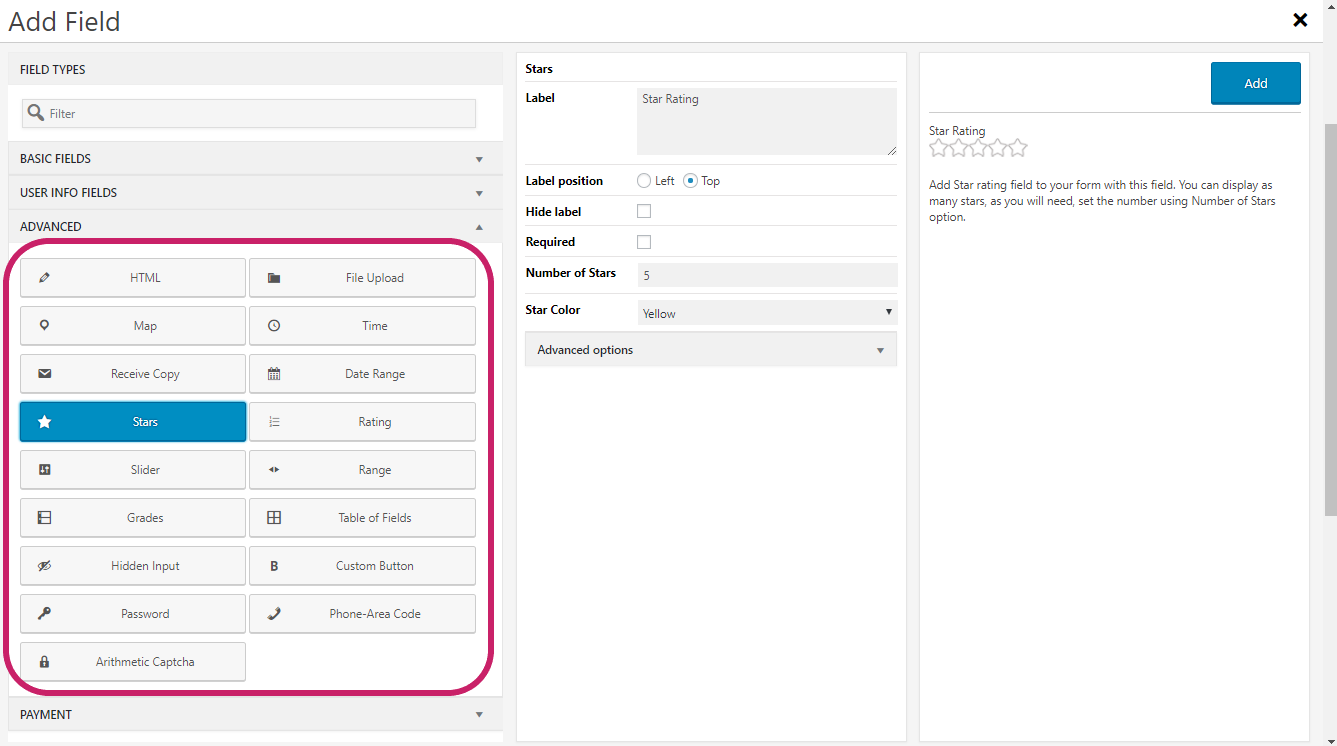
HTML
This layout field lets you add extra information in between the fields of your form. It accepts text or basic HTML with inline CSS. Note, that you need to enable Text mode of the editor to write HTML code.
File Upload
You can allow users to upload single or multiple documents, images and various files through your form. Configure File Upload field using the following settings:
- Allowed file extensions. Use this option to specify all file formats, which you want the field to accept. You can provide as many formats, as necessary. But make sure to separate them with commas.
- Maximum size(KB) (Advanced Options). Set the maximum allowed size of files uploaded through this field. Note: Besides this limitation, server configurations also control the file size of uploads.
- Destination (Advanced Options). Provide the path of the directory where you wish to keep the files uploaded through this field.
- Allow Uploading Multiple Files (Advanced Options). Allow the submitter to upload multiple files through the same File Upload field by activating this setting.
Map
This field can be used for pinning one or more locations on Google Map and displaying them on your form. Press the small Plus icon to add a location pin, then fill out the following options to place the pin:
- Address. Provide the address of the location pin. As soon as you write the address, the marker will move to the specified point. You can also drag it around and change its location this way.
- Longitude/Latitude. The values of these options are generated automatically. However, you can use them to set the location of the marker as well.
- Marker Info. Add extra information to the location marker with this option. It will be displayed after users click on the pin.
Time
Add this field to your form in case you need the submitter to specify a time value. Additional options for this field are the following:
- Time Format. Select the time format for the field, 24-hour or 12-hour. If you select 12-hour format, AM/PM drop-down will be added to time field.
- Display Seconds. Use this setting to enable an input for specifying seconds.
Receive Copy
When users fill in an email address using Email Field, this checkbox will allow them to choose if they wish to receive a copy of the submission email. Before adding Receive Copy field, make sure to configure Email Options of your form.
Date Range
You can use this field to let users specify a date range. It provides two inputs with date pickers, which will be used for selecting dates. All options of Date field are applicable to Date Range.
Stars
Add star rating field to your form with this field. You can display as many stars, as you will need, set the number using Number of Stars option.
Rating
Place this field on your form to have radio buttons, which indicate rating from worst to best. You can set many radio buttons to display using Scale Range option.
Slider
This field lets users specify the field value by dragging its handle from Min Value to Max Value. They can be set from Slider field settings.
Range
You can use this field to let users choose a numeric range by providing values for 2 spinner inputs. Its Step option allows setting the increment/decrement of spinners’ values when users click on up or down arrows.
Grades
Users will be able to grade specified items with this field. The sum of all values will appear below the field with Total parameter. Grades field has the following settings:
- Total. Change the default maximum Total value using this option.
- Items. You can add many Items to your Grades field by pressing the small Plus (+) icon.
Table of Fields
This field is quite helpful for survey forms. You can place a matrix on your form, which will let the submitter answer a few questions with one field. It has the following options:
- Input Type. Table of Fields can contain radio buttons, checkboxes, text boxes or drop-downs. Use this setting to set the type you wish to have on the matrix.
- Rows/Columns. Press the Plus (+) button to add unlimited rows and columns to your Table of Fields.
Hidden Input
This field is similar to Single Line Text field, but it is not visible to users. Hidden Fields are handy, in case you wish to execute custom Javascript on your form. It has the following unique settings:
- Name (mandatory). Provide a name for your Hidden Input field.
Note: we highly recommend you avoid using spaces or special characters in Hidden Input name.
- Value (optional). Set an initial value for Hidden Input or use the placeholder functionality. If there are no necessary default values, you can leave this blank.
Custom Button
In case you wish to run custom JavaScript on your form, you can place Custom Buttons on your form. It lets you fill in OnClick function, which needs to be written on Form Options > JavaScript page.
Password
This field can be used to allow users to provide secret text, such as passwords. All symbols written in this field are replaced with dots. You can configure your form to ask users for Password Confirmation also.
Phone-Area Code
This is another Phone field type created in Form Maker. It allows users to write Area Code and Phone Number into separate inputs.
Arithmetic Captcha
This field is quite similar to Simple Captcha. However, instead of showing random symbols, it displays arithmetic operations. Customize this field with the following settings:
- Operations. Set the operations for Arithmetic Captcha field, separating them with commas. The field can use addition (+), subtraction (-), multiplication (*) and division (/).
- Operations count (1 - 5). Specify the number of operations on Arithmetic Captcha field.
- Input size(px). Set the size of the verification input in pixels.
Signature
The field inserts a signature box allowing the admin or the user to sign it.