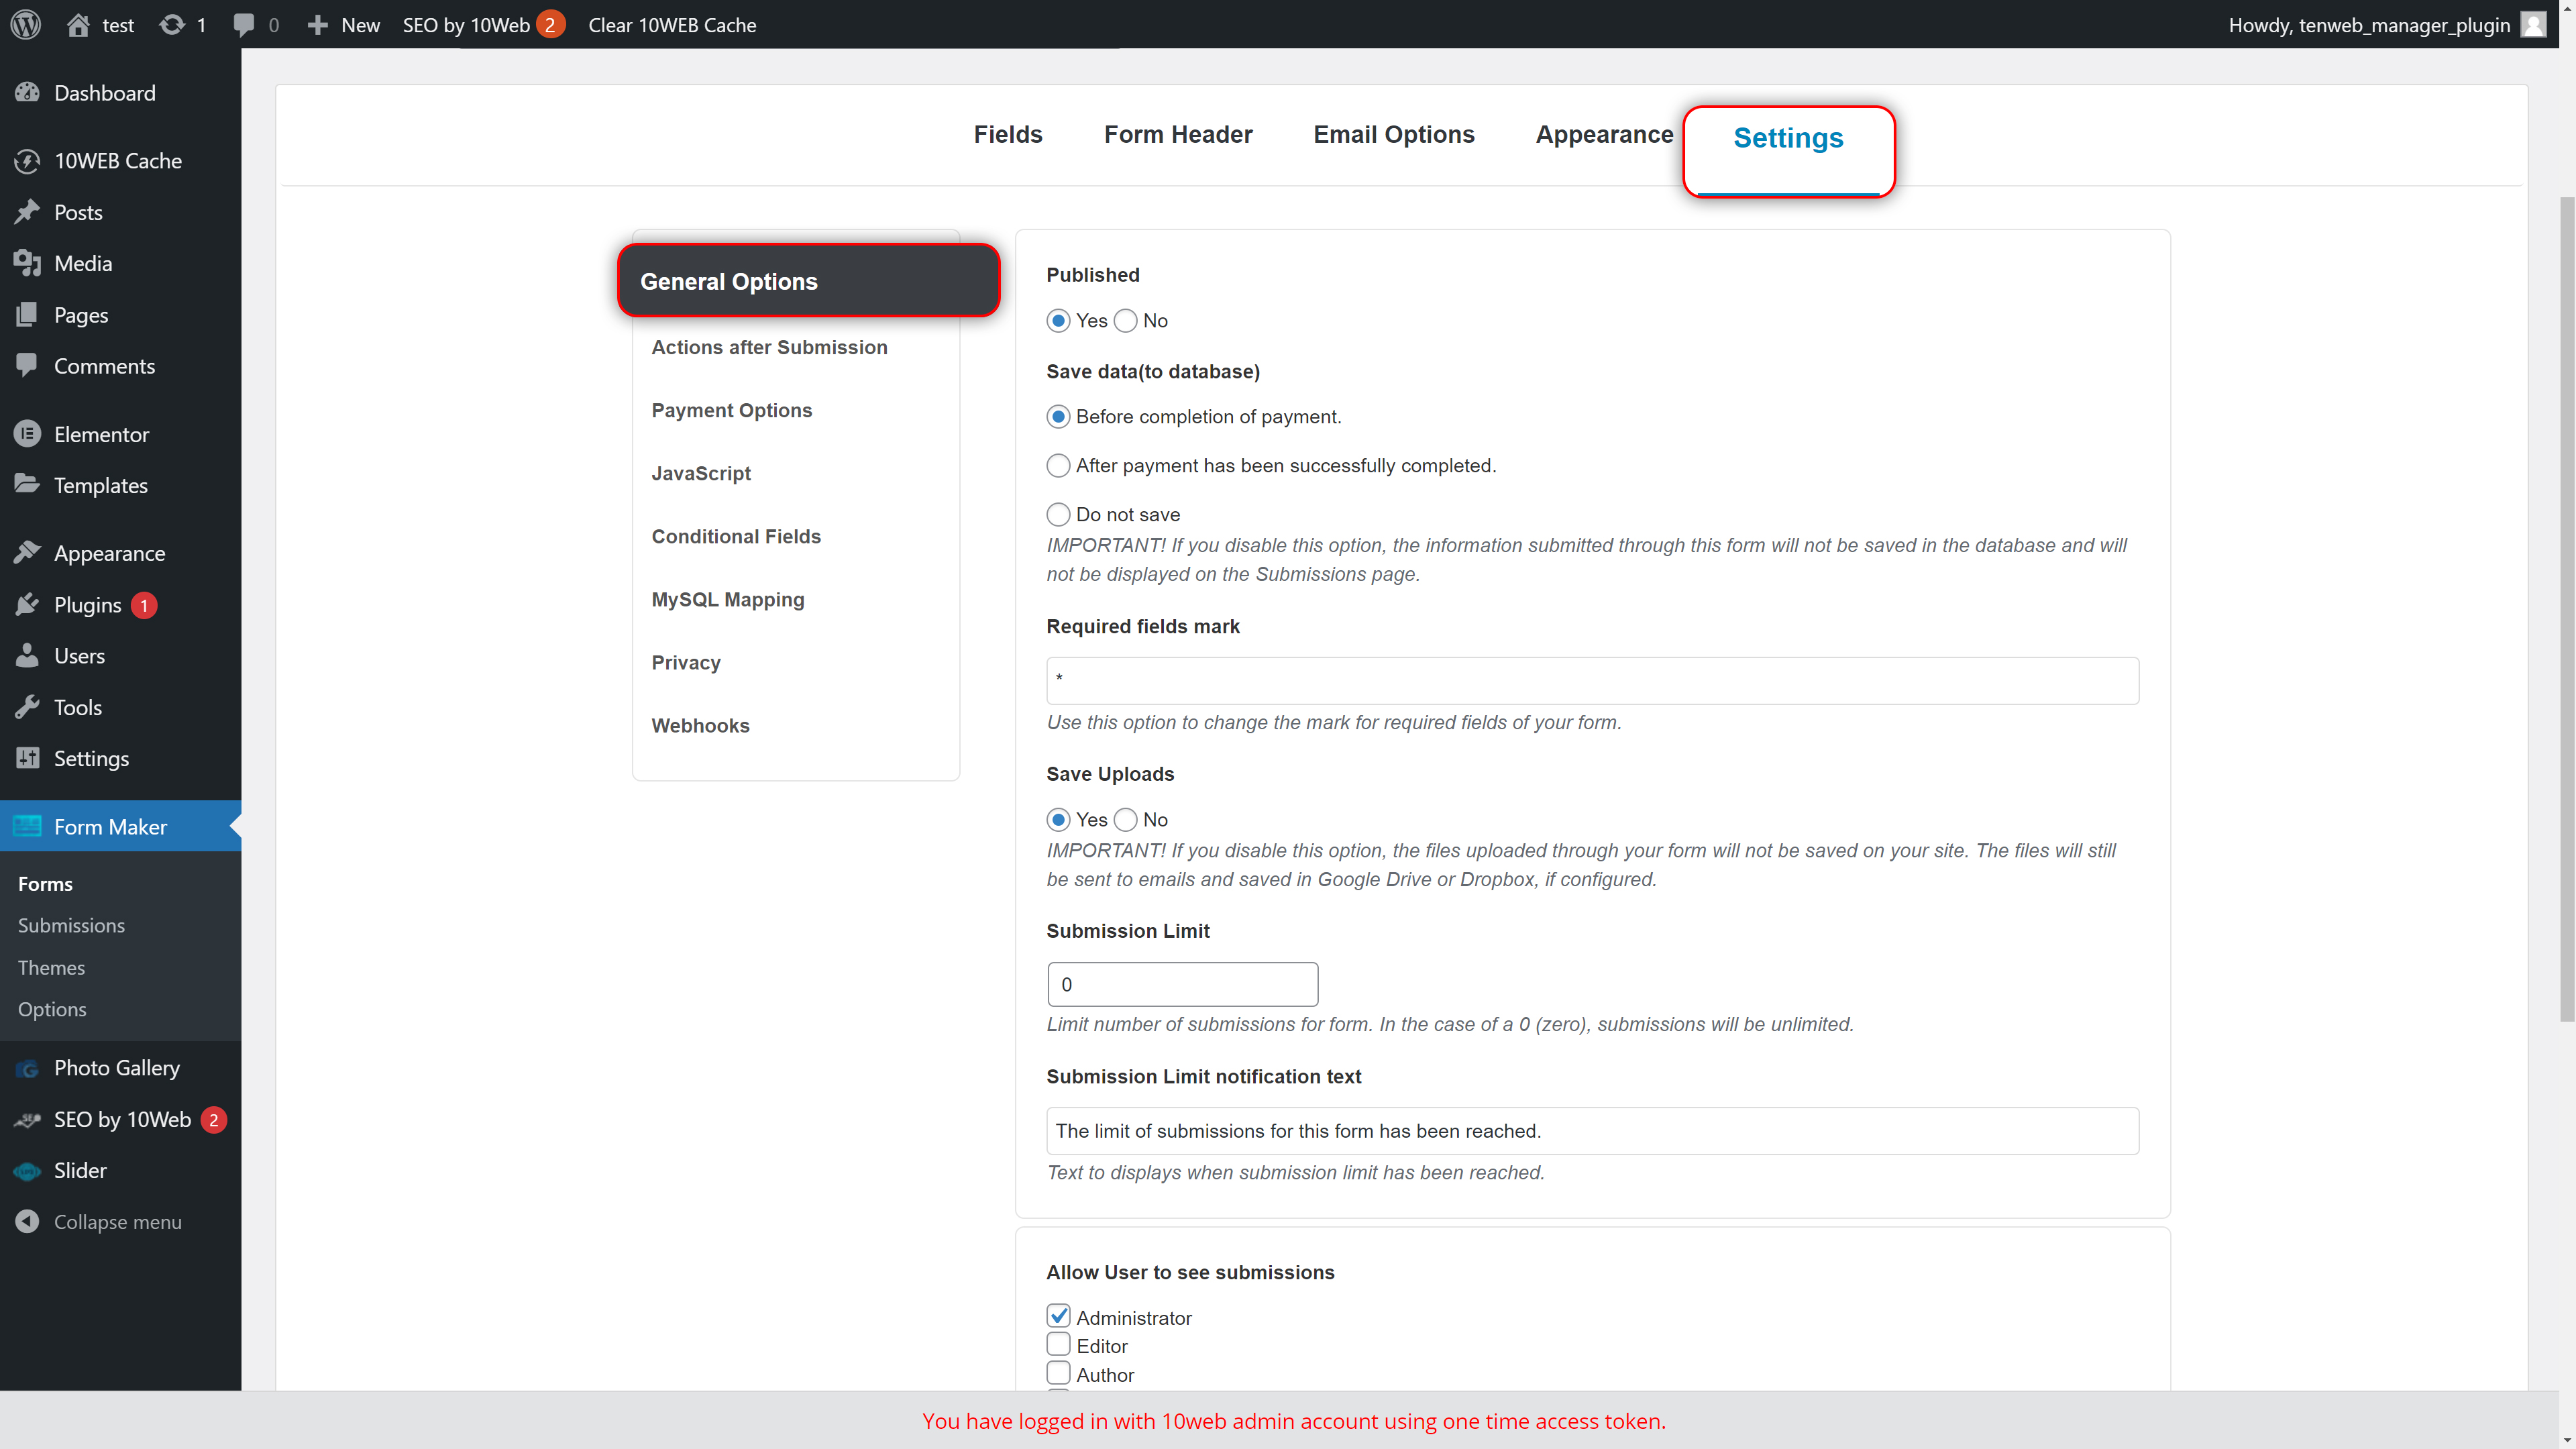
WordPress Form Maker plugin provides a list of settings, which let you customize the features of each individual form. You can set up autoresponder emails, “Thank you” messages, specify actions after form submission and more. Click on your form to edit, then click on Settings.
The Settings section is divided into separate tabs for each group of options. When you make changes and press Update, modifications on all tabs will be saved at once. We will discuss each tab and its options separately in the next few subsections of this user guide.

General Options tab allows you to modify the main settings of the selected form. You can choose to publish or unpublish the form, choose to save the submitted information to your website and more. Let’s go through all settings below.
Published
Enable this option, so the form will be visible on the site's front-end when you publish it with one of Form Maker’s Display Options.
Save data (to database)
The information submitted through a Form Maker form is saved to [db_prefix]_formmaker_submits database table of your website. This setting allows you to enable or disable database saving before or after the completion of a payment. You can also choose not to save the data.
Required fields mark
Use this option to change the mark for required fields of your form. An asterisk (*) is set as this symbol by default.
Save Uploads
If this setting is enabled, files which are uploaded through your form will be saved on your the file system of your site.
Submission Limit
Set a limit for the number of submissions for this specific form.
Submission Limit Notification Text
Write a customized text that will be displayed when the submission limit has been reached.
Allow User to see submissions
Mark all user roles which will be able to view front-end submissions, when you publish them on a post or page.
Fields to hide in frontend submissions
Select fields of the form and Stats Fields which will not be displayed within front-end submissions, when you publish them.