Stripe extension of WordPress Form Maker plugin allows you to integrate Stripe payment method with your forms and let the submitter pay using credit card. Stripe is a popular payment method in United States, Canada, Australia, United Kingdom, and many other countries. In these countries, Stripe allows you to accept payments to your Stripe account, however, the payment can be submitted worldwide.
Stripe uses SCA. Strong Customer Authentication, is a multi-factor authentication enforced within the European economic area. SCA is used in order to provide safe internet transactions. It has three factors of which at least two must be used:
- Knowledge - something only the user knows (password)
- Possession - something only the user has (phone or hardware token)
- Inherence - something only the user is (fingerprint or face recognition)
Enforcement of SCA requierments was launched on the 14th of September, 2019 and will take full effect by December 31 2020. The responsibility to authenticate a payment belongs to the bank and does not affect the form building process for you. Customers will need to authenticate their identity with their bank in order to finish the checkout process.
As Stripe extension allows to accept direct credit card payments, users will remain on your website during the entire payment process. Although no sensitive data is stored on your website, it is still recommended to have SSL certificate to further ensure the security of the payments.
Allow your users to make credit card payments via Stripe quickly and easily. Receive the payments directly to your bank account. Get the powerful Stripe extension for Form Maker plugin today.
Attention: Stripe Payment Gateway extension requires Form Maker Pro version 2.8.11 or higher. If you are using an older version, please update your plugin.
Integrating Stripe with Form Maker
After installing Stripe extension to your website, access its WordPress administrative dashboard and go to Form Maker > Forms page. Edit the form you would like to integrate with Stripe, then press Form Options button. From this page, navigate to Payment Options tab to begin configuring Stripe settings.

As the first step, select Stripe as the payment method of your form. The required options for integrating Stripe with your form will appear below. With Checkout Mode, you can choose to test Stripe integration or go live as soon as you are ready to receive payments.
Both Test and Live modes require API keys to incorporate Stripe payment gateway with your form. Get the keys from Stripe.com and copy them to the corresponding pair of input boxes:
- Live publishable key and Live secret key,
- Test publishable key and Test secret key.
Managing Stripe Fields
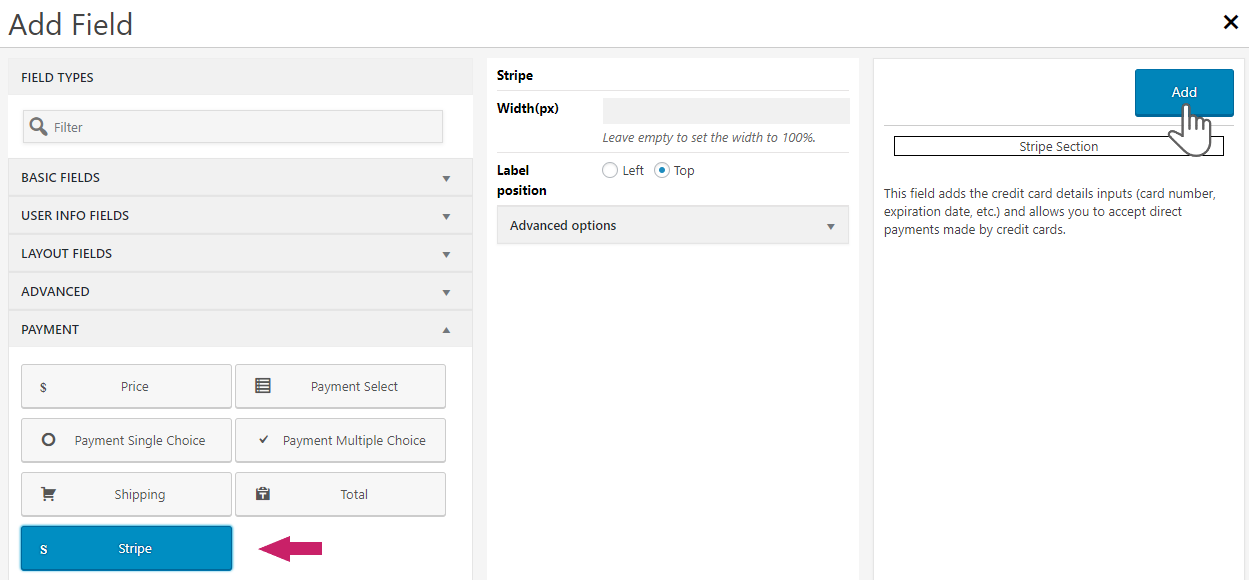
As you configure the settings above, make sure to press Update to save the changes. The extension afterwards lets you add Stripe Fieldsto your form. To add them, go back to the form editing page and click New Field button. Expand Payment Fields section, choose Stripeoption and press Add button.

To select the Stripe fields to include in your form, go back to Form Options > Payment Options tab. The following options cannot be disabled, since they are mandatory:
- Card number,
- CVC,
- Expiration month,
- Expiration year.
However, you can choose to enable or disable the fields below based on your requirements. In addition, you can set them to be required.
- Name,
- Address line 1,
- Address line 2,
- City,
- State,
- Country,
- Zip code.

Configuring Payment Settings
In addition to payment fields and Stripe settings, you can modify a the following additional options:
- Payment Currency,
- Tax.
However, these settings can be changed by selecting PayPal payment method. Temporarily switch the payment method to PayPal and select the necessary currency from the corresponding list. You can also specify the percentage of the tax, which will be calculated from the total payment amount of your form.

After configuring these options, switch back to Stripe payment method and Update Form Options.