WordPress slider plugin provides 3 ways to publish slideshow on your WordPress website:
- on a WordPress page or post,
- as a widget,
- on a custom PHP template.
How to Use tab above the created slideshow will help you display your slider on the front-end of your site with one of the above-mentioned ways. Let’s discuss each option separately and publish the slider you just built.
Publishing Sliders on Pages or Posts
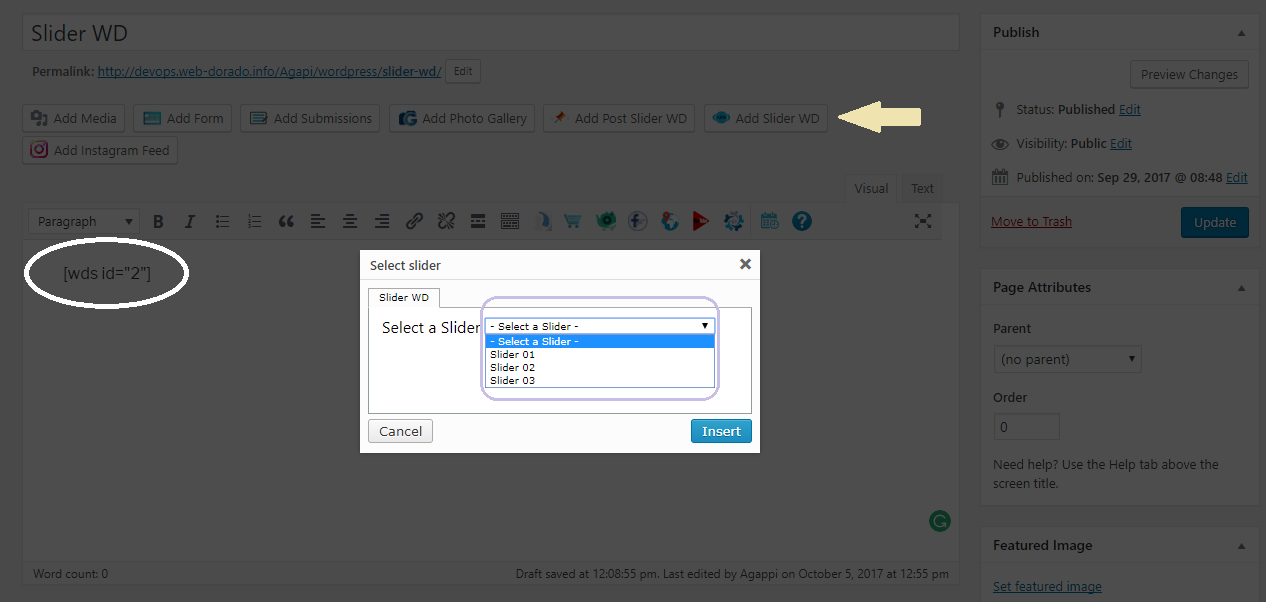
To insert your slider into a page or post, add or edit the post/page where you wish to showcase the slideshow. Above the content editor, there is a button titled Add Slider. All you need to do is to press this button, choose a slideshow using Select a Slider drop-down menu, then click Insert.

The shortcode of your slideshow, e.g. [wds id="2"], will be added to the content of the page/post you are editing.
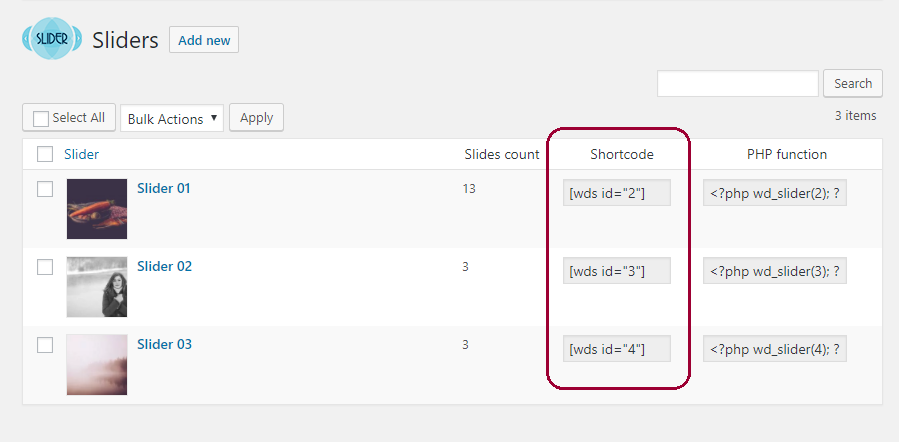
In addition, you can add the shortcode manually by copying it from Slider > Sliders page. Each slider shortcode is displayed next to the corresponding item, under Shortcode column.

Adding Sliders to a PHP Template
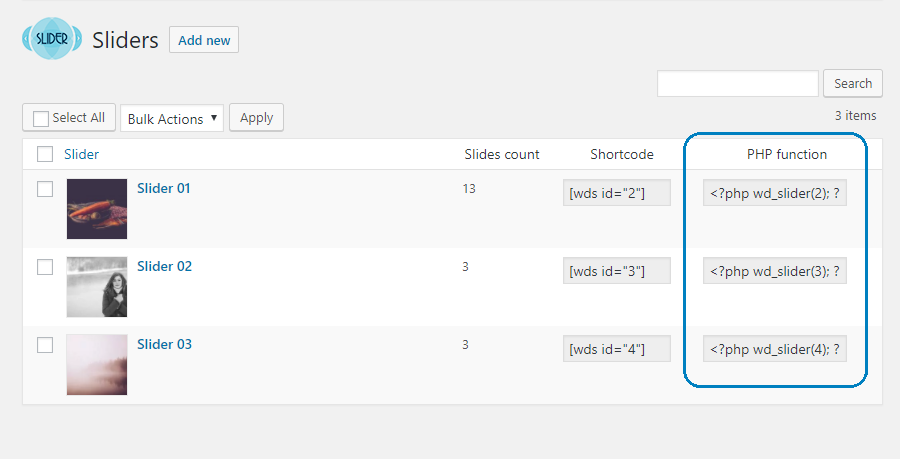
In case you use custom PHP templates and would like to display your slideshow on these pages, you can use PHP function Slider plugin provides. You just need to add the function, e.g.:
<?php wd_slider(2); ?>
into the necessary .php file. For instance, if you wish to display the slideshow along with the header, simply add the code to header.php file of your website theme. You can find the function and copy it from Slider > Sliders page, under PHP function column.

Publishing Sliders as Widgets
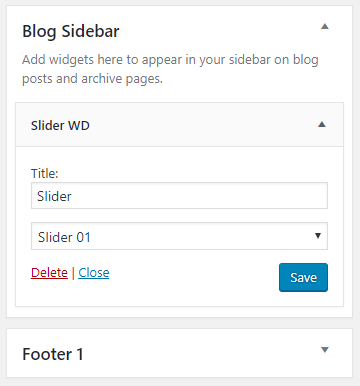
To publish your slideshow on a widget area, navigate to Appearance > Widgets page. All widgets on your website and widget areas provided by your theme are available on this dashboard.
Look for Slider widget, then drag it to the widget area where you wish to display the slideshow. Write a Title for the widget and choose any slideshow using Select Slider drop-down menu. Press Save and the slider will appear on this widget area immediately.
