Photo Gallery plugin allows you to edit and apply numerous functions to gallery images. You can implement various modifications, such as:
- crop or resize the images,
- rotate them,
- set or remove watermark,
- add tags,
- edit image titles or descriptions,
- reorder images in the gallery,
and more. The plugin lets you make these changes both on single and multiple images using its Bulk Actions. Add or edit your gallery and let’s go through each option, discovering all image editing tools of Photo Gallery plugin.
Editing Individual Images
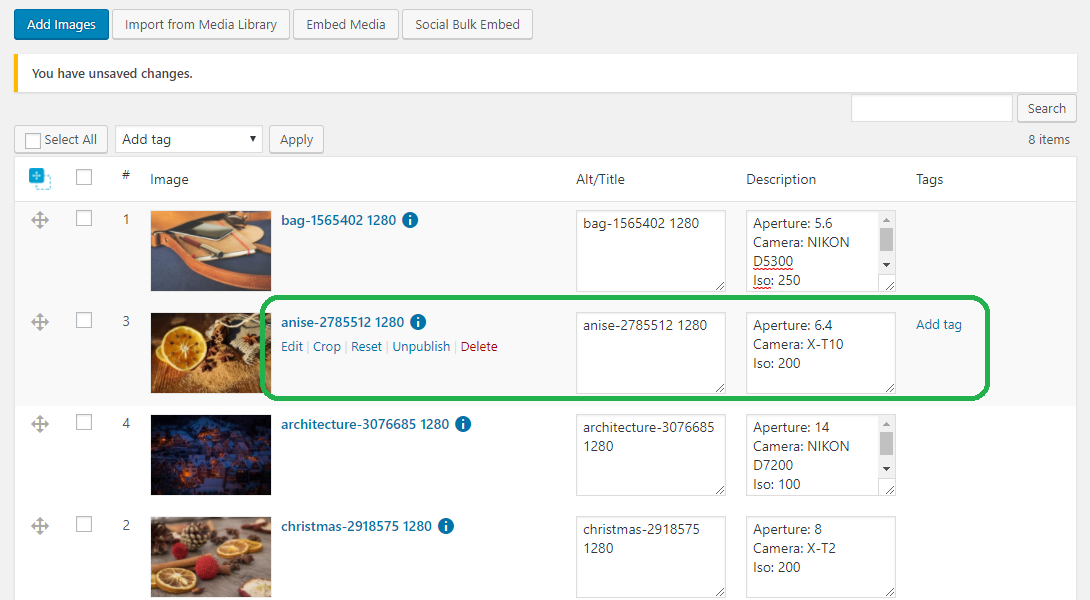
First and foremost, the plugin lets you implement changes on individual images. You can:
- add information and tags on images,
- edit and crop them, apply visual effects,
- reset them to their original state,
- publish/unpublish or delete them,
and more. Begin modifying the images by filling out the following options:
- Alt/Title. Set a title for an image by filling out this input box.
- Description. Include a description for your photo by writing it in this option.
- Tags. To add tags to a specific image, hover over this column and click on Add tag link that appears. You will then be able to select the necessary tags and add them to this particular image.
Note: Photo Gallery automatically imports meta information (EXIF data) of images as their titles and descriptions, while they are being uploaded.
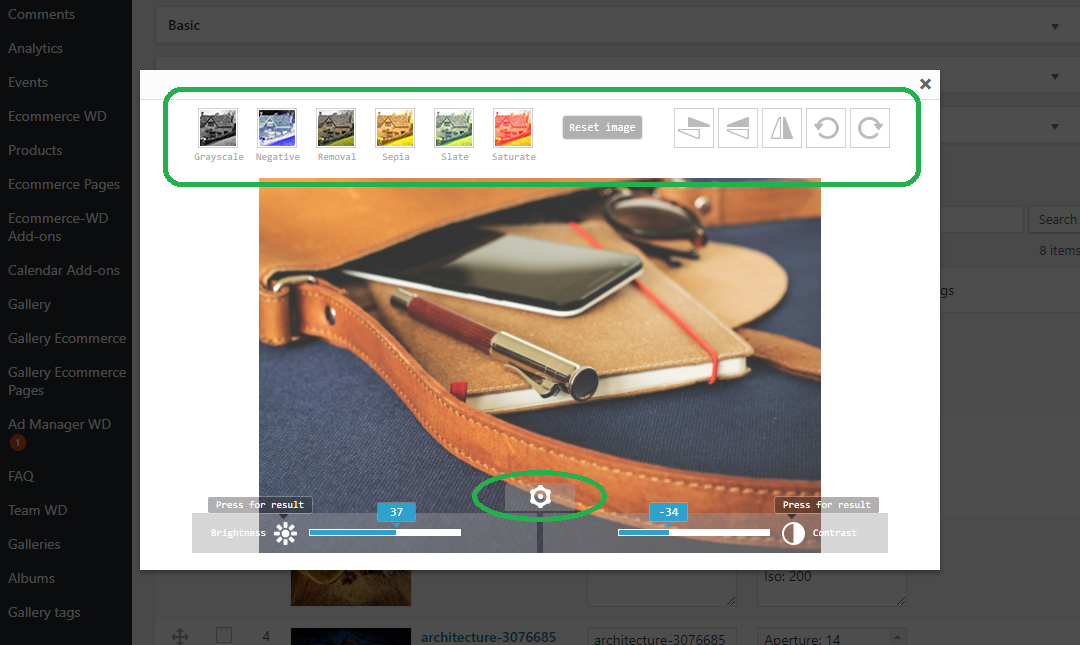
To apply visual effects on images, rotate them, change brightness or contrast, you need to click on Edit button next to the item. A popup box will appear containing all the necessary tools. You will notice the following effects at the top of this toolbox:
- Grayscale,
- Negative,
- Removal,
- Sepia,
- Slate,
- Saturate.
Clicking on one of these options will assign the corresponding effect to your gallery image. Furthermore, you can implement the following changes using this image editor box:
- Flip the image (vertically, horizontally, and by both directions),
- Rotate it left and right.
The small gear button at the bottom of the image will allow you to expand Brightness and Contrast options. Click and drag the bars of these options to set the desired appearance on your picture.
In case you wish to revert the changes you have made, click on Reset Image button from the top of this popup box.
Crop feature of Photo Gallery plugin lets you set desired areas of images as their thumbnails. Click on Crop button next to the photo you wish to modify. Afterward, select the area to crop for the thumbnail.
Keep aspect ratio option applies the same width and height for the cropped area if selected. Alternatively, you can uncheck this setting and use different dimensions while selecting the area to crop. However, you should note, that this can result stretching of the thumbnails on published galleries.
Note: Cropping does not modify large images on photo galleries, i.e. only the thumbnail of a picture is being cropped.
Clicking Reset button next to an image will remove all changes you have made on it, and bring the original version of this particular item to your photo gallery. You can also Unpublish or Delete individual images on your galleries by pressing corresponding buttons.
Editing Image Ordering
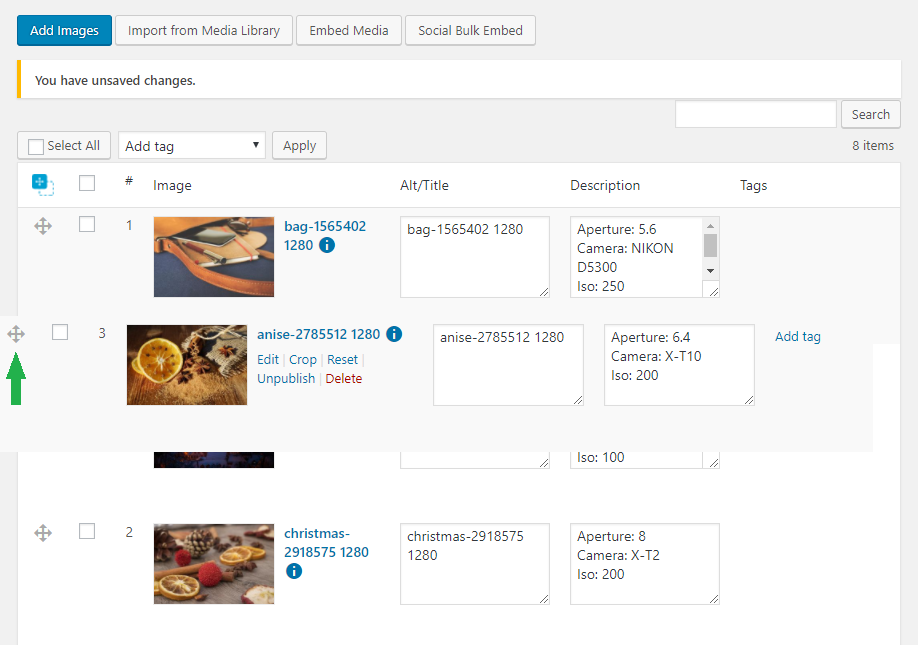
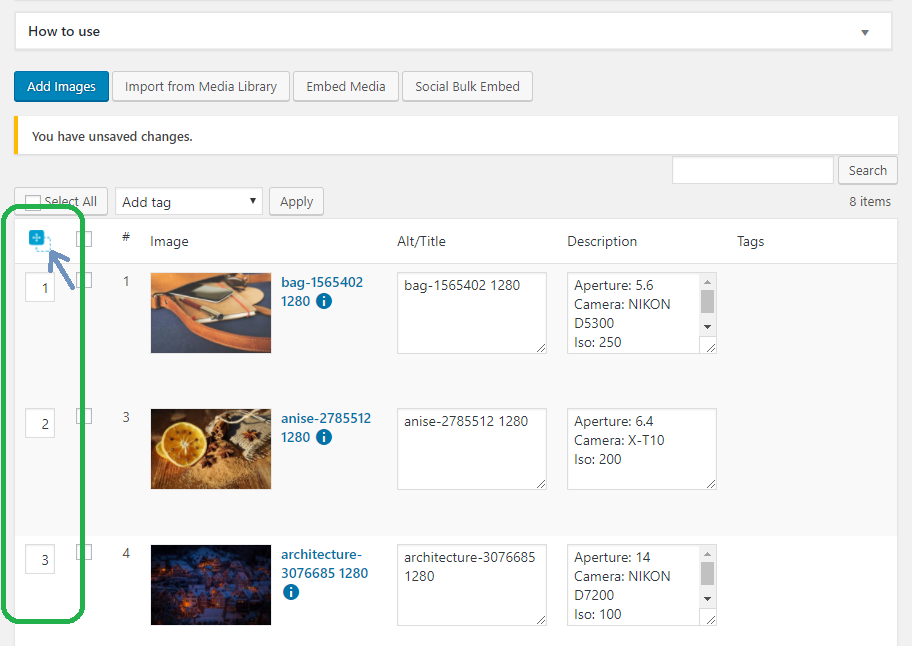
Photo Gallery plugin allows you to reorder the images, to get the exact sequence of the pictures you wish to have in your galleries. You can do that using the following 2 methods:
- dragging and dropping the images to the desired position,
- providing the order number for each image.
You can Drag and Drop images using the small cross next to the items. Simply reposition the photos as you wish to have them.
To change the order numbering manually, you first need to open Order Column of your gallery. Click on Show Order Column button, and you will be able to specify the image ordering with the inputs that appear below.
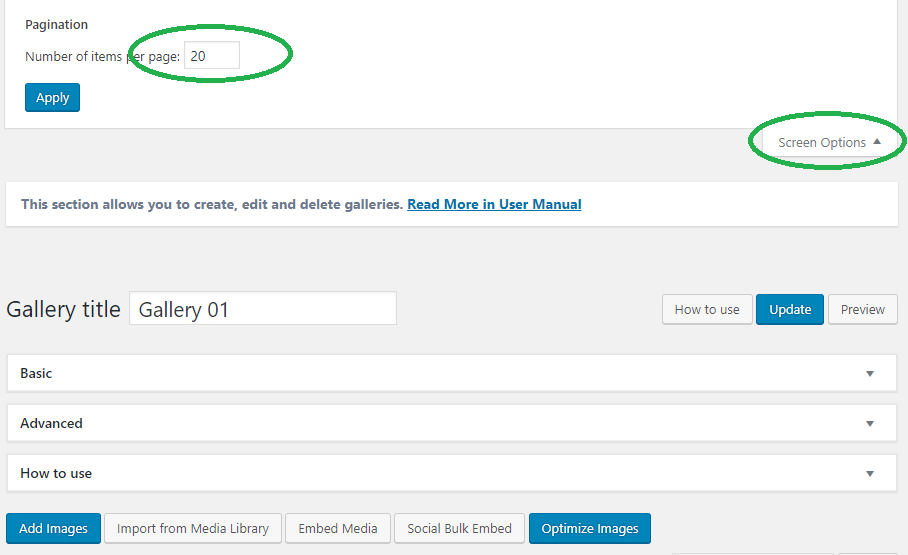
Screen Options
By default, Photo Gallery shows 20 images per page in the gallery editor. However, in case of having many images, you might need to display more items per page to be able to drag and drop photos to the desired position.
To change the number of displayed images on the gallery editor, click on Screen Options and open this toolbox. You will find Pagination section with Number of items per page option. Set it to a value larger than 20.
Make sure to press Publish or Update, to save the changes you made to the images.