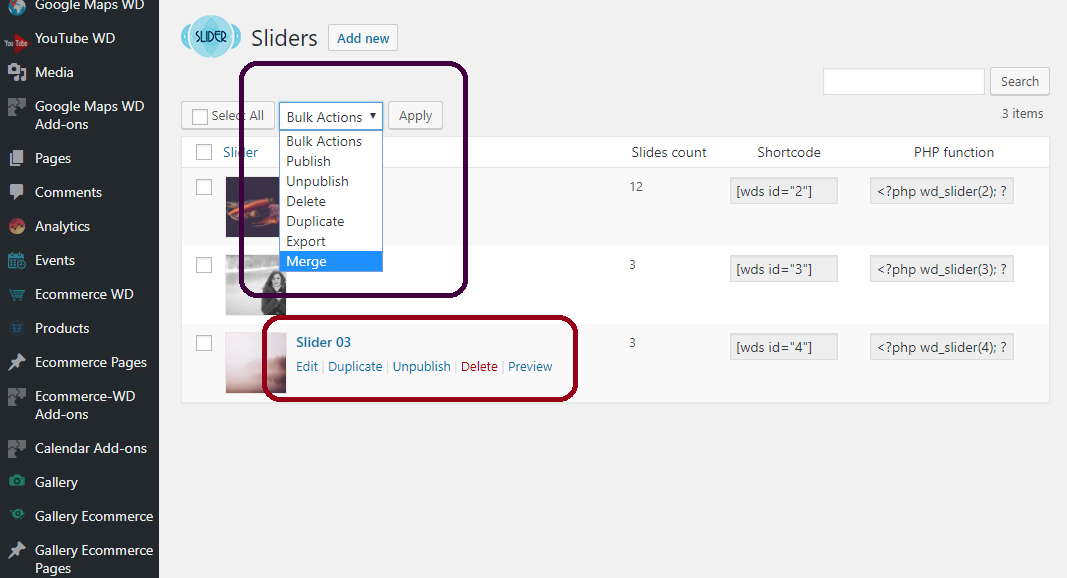
To configure your first slideshow with WordPress Slider plugin, let’s start with adding images to sliders. Navigate to Slider > Sliders page to begin. This dashboard includes the list of all sliders created with the plugin. You can run the following basic functions for each individual slider:
- Edit,
- Duplicate,
- Unpublish,
- Delete,
- Preview,
as well as use Bulk Actions to modify multiple sliders at once. Select the items you wish to change, then select one of the actions below from Bulk Actions drop-down menu:
- Publish,
- Unpublish,
- Delete,
- Duplicate,
- Export,
- Merge.
After choosing the action, press the Apply button.

Now let’s begin creating a new slideshow from scratch. Press Add New button from the top of Slider > Sliders page. As a first step, specify a Title for your slider and make sure you are on Slides tab, where you can configure the content of your slider.
Adding Images and Videos to Sliders
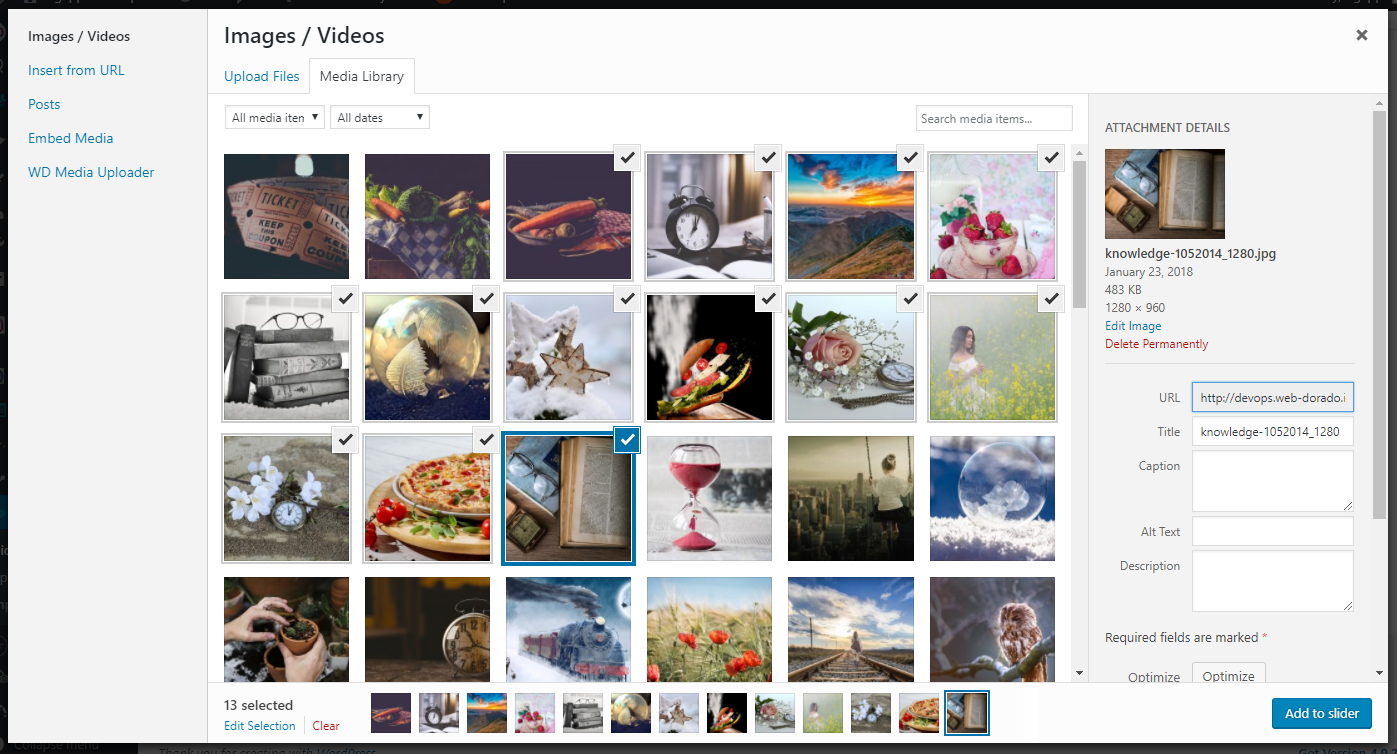
Press Add Slides button below Slider Title to add an item to your slideshow. You will access WordPress Media Library, which lets you use existing images or upload new media.
Upload the images and videos you wish to add or browse items from WordPress Media Library. You can select a single item by clicking on it, or choose multiple by pressing and holding Shift or Control keys on your keyboard.
After choosing the images and videos, press Add to Slider button.

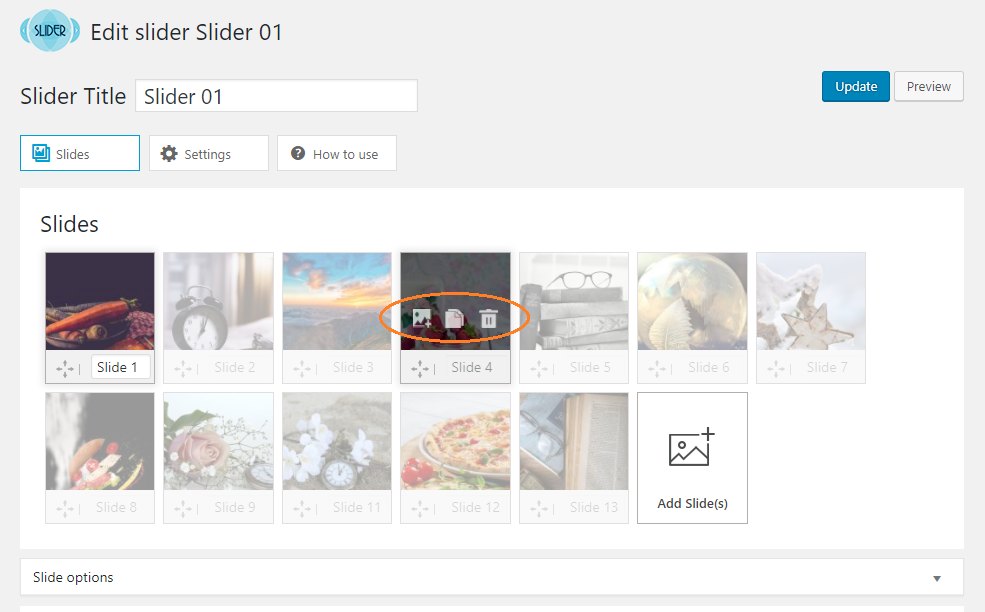
When the slides are added, you will be able to see the list of their thumbnails which help you to easily navigate through slides. Each thumbnail has its own set of buttons, which will become visible after hovering on an item:
- Edit. You can change the slide image, keeping its attributes (e.g. layers on slides, transitions).
- Copy. Pressing this button will create a duplicate of the current slide. The duplicate will be added as the last slide of your slideshow.
- Delete. You can delete the slide using this button.
Furthermore, you are able to change the ordering of the slides by dragging the thumbnails and repositioning them.

Make sure to Publish/Update your slideshow to keep the changes you made. You can also Preview the slider to check its appearance.
Editing Slide Options
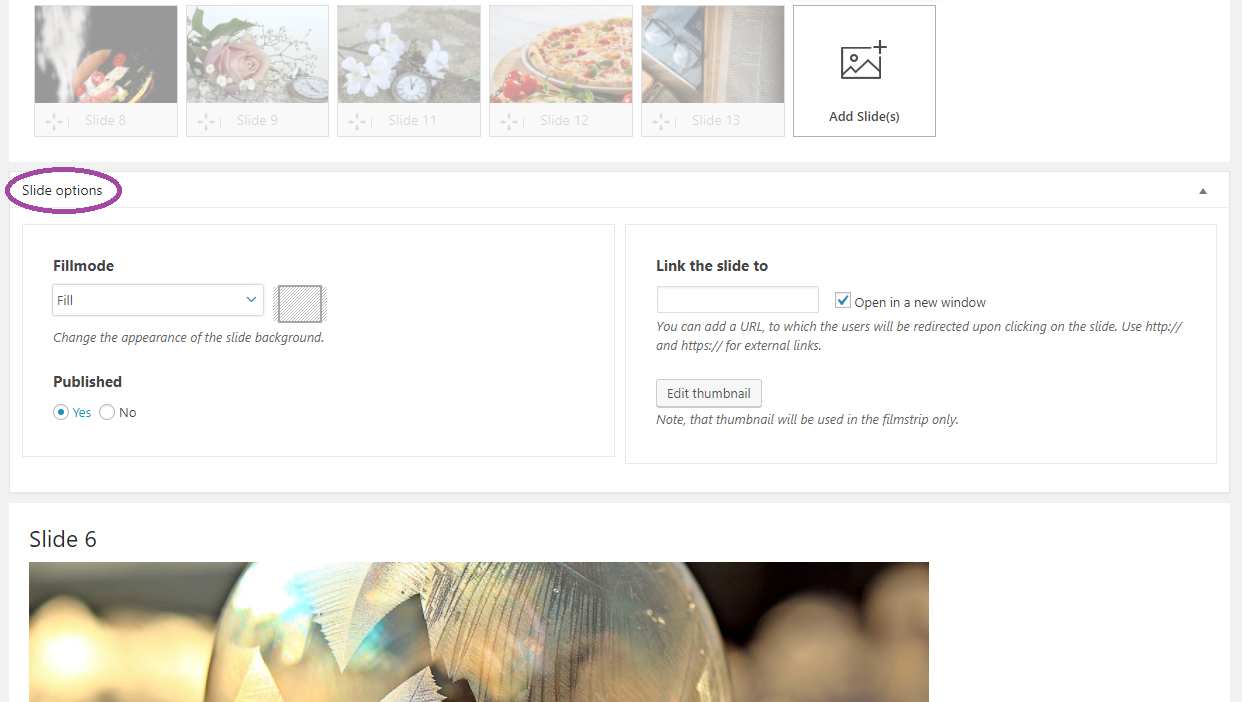
Each slide has its unique settings and you can edit them by clicking on Slide options bar. This section allows you to customize slides and display them on your website just as you need. Press Slide options bar to edit the settings.
- Fillmode. Use this option to change the appearance of the slide background. The following options are available for background style:
- Fill,
- Fit,
- Stretch,
- Center,
- Tile.
- Published. Select Yes to have the slideshow published. Unless you place it on a page/post or a widget, the slider will not be visible on the front-end of your website, regardless of the value selected for this setting.
- Link the slide to. You can add a URL, to which the users will be redirected upon clicking on the slide. Use http:// and https:// for external links.
- Edit thumbnail. Press this button to modify or change the thumbnail image of the selected slide. Note, that the thumbnails are in slideshow filmstrip only.
