Besides using WordPress default Media Library, WordPress Slider plugin has an advanced WD Uploader for adding or editing slides. This is a powerful and user-friendly tool which allows you to upload and manage images, separate them into folders, and more.
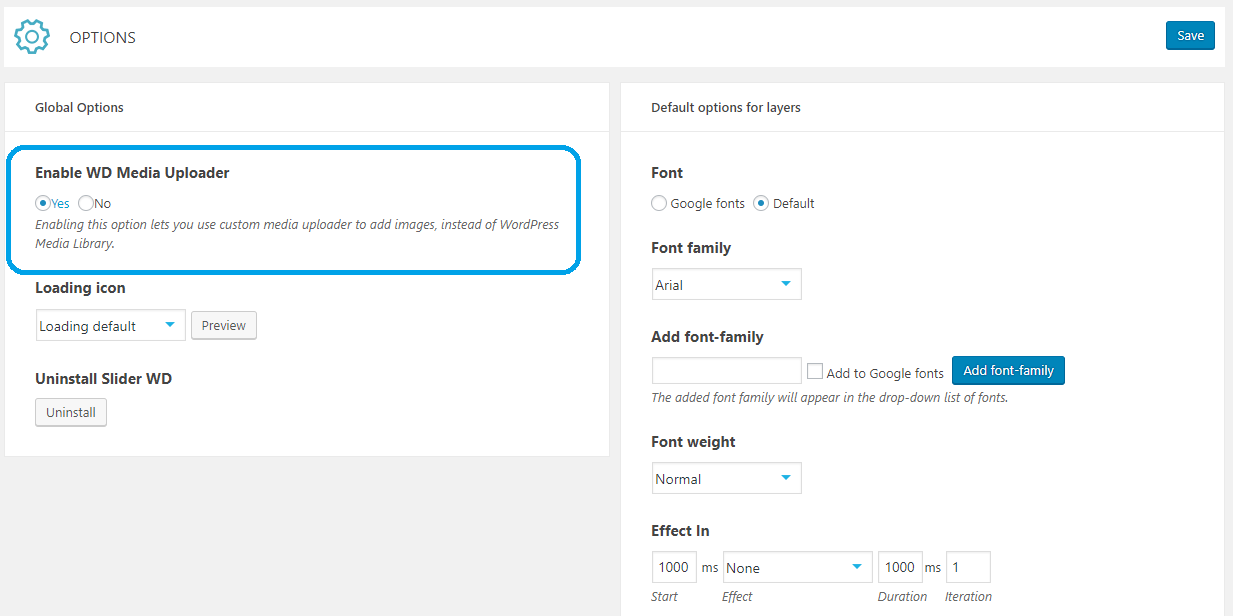
To access WD Uploader, firstly, you need to enable it from Global Options of Slider plugin. Go to Slider > Options page and set Enable WD Media Uploader setting to Yes.

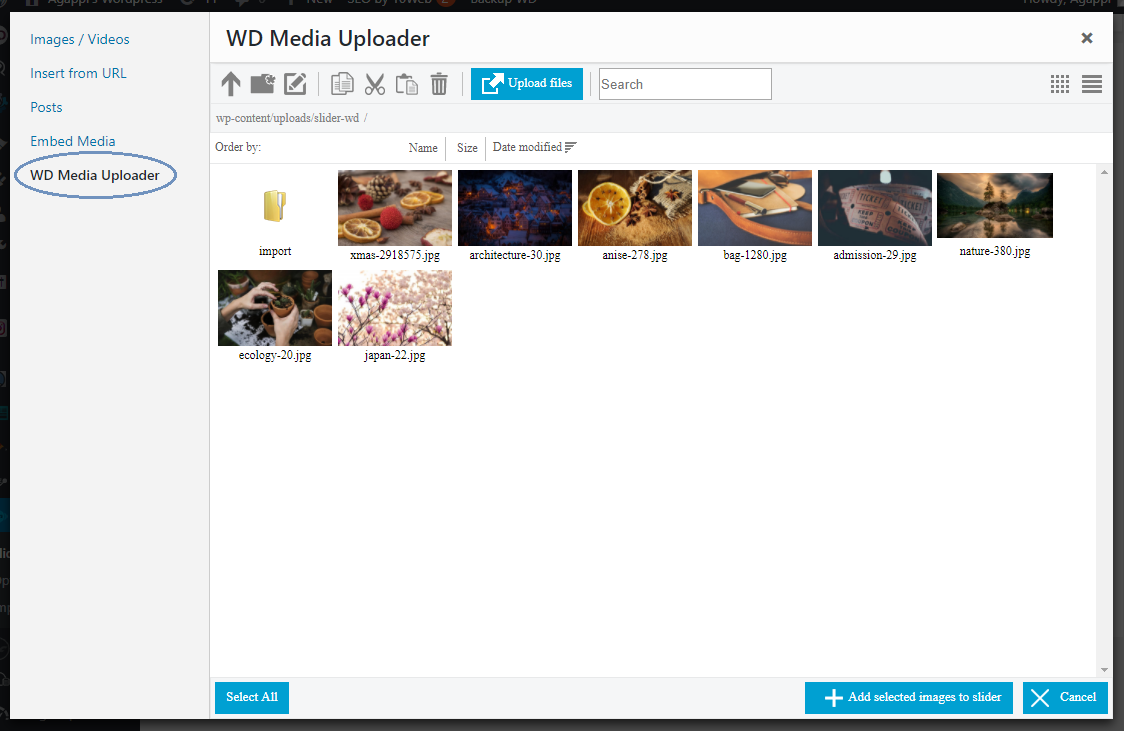
Afterward, edit your slideshow and click on Add Slides button. Navigate to WD Media Uploader tab to start adding new images. This dashboard includes a set of options which we will describe one by one.

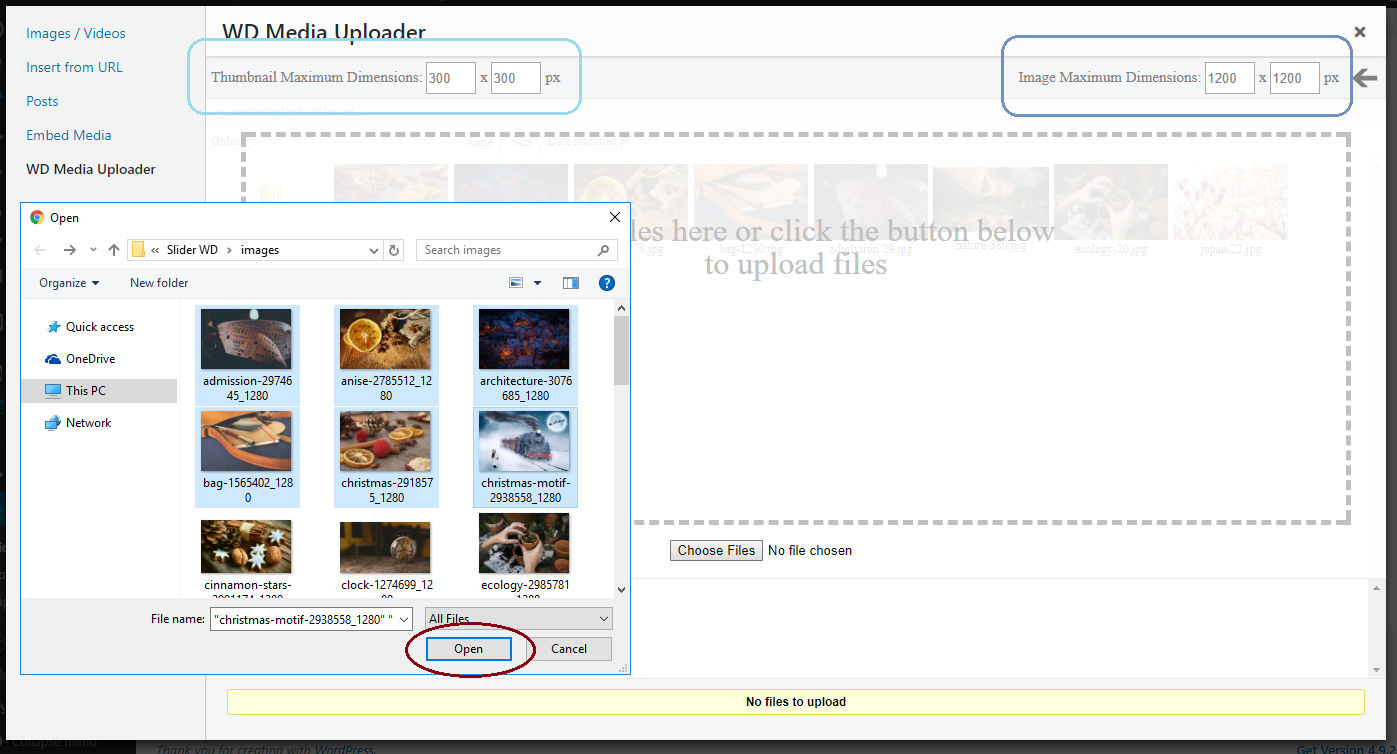
Let’s begin with uploading new items. Press Upload files button. Before selecting the images to upload, make sure to configure the following two options:
- Thumbnail Maximum Dimensions. Sets the maximum size for width and height of slide thumbnails. Recommended dimensions are 300x300 pixels.
- Image Maximum Dimensions. Use this option to specify the maximum width and height for slide images. For the best display, we recommend using dimensions that are not smaller than 1200x1200 pixels, and not larger than 2000x2000.

As you set up the two options mentioned above, press Choose Files button to select images from your computer. You can select multiple files at once by holding Shift or Control keys on your keyboard. Make sure to click Open after choosing the items.
Alternatively, you can upload the files by dragging them from your computer and dropping into WD Media Uploader.
Once the upload is finished, your images will be available in WD Media Uploader screen. Select the items you wish to have as slides, then press Add Selected Images to Slider button. You can mark all items by simply clicking on Select All button, or hold Shift or Control keys to choose multiple.
WD Media Uploader Options
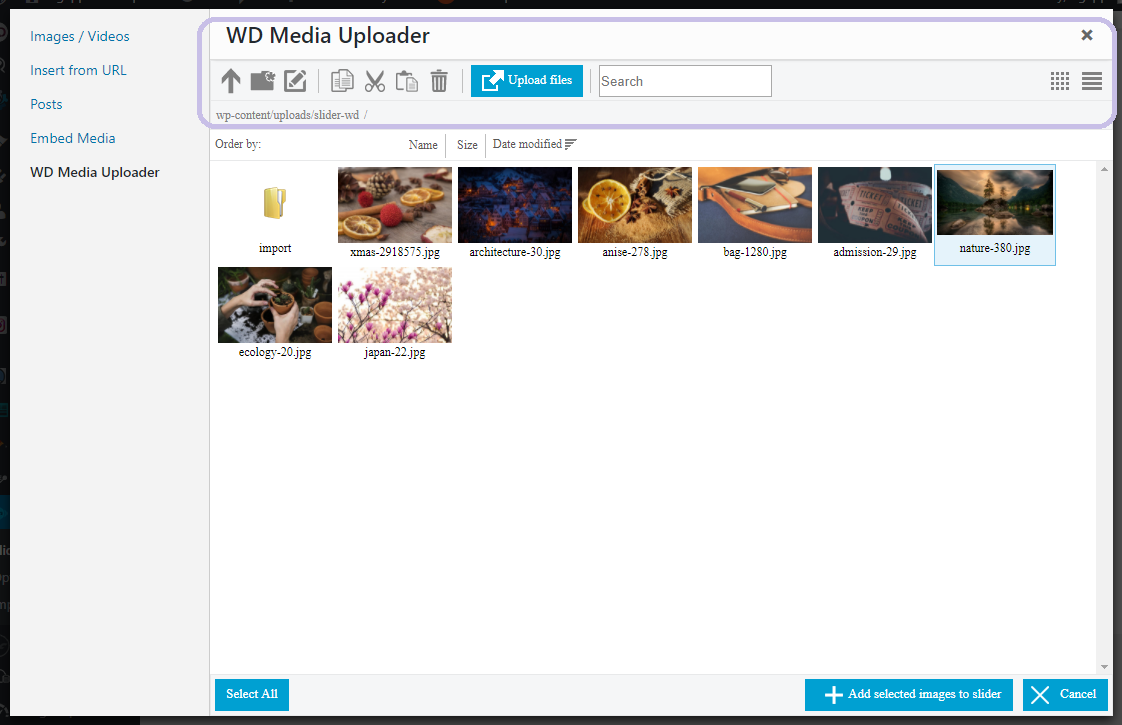
WD Media Uploader provides several useful settings, which help you have complete control over your slider images. Manage all items using the buttons at the top of WD Media Uploader toolbox:
- Up. Click this button to navigate to a parent folder in WD Media Uploader.
- Make a directory. Press this button to create a new folder in WD Media Uploader. This helps you achieve a highly-organized display for slider images.
- Rename item. Click this option to provide a new title for an image or a directory in WD Media Uploader.
- Copy. Select and copy single or multiple images and directories in WD Media Uploader.
- Cut. Use this button to move single or multiple items from one directory to another in WD Media Uploader.
- Paste. Paste the copied or cut items using this button of WD Media Uploader.
- Remove. Delete unnecessary images or directories from WD Media Uploader by clicking on this button.
- Search. Use this search bar to quickly browse images and directories added to WD Media Uploader.
- Thumbnails view. Use this button to switch WD Media Uploader view to Thumbnails display.
- List view. Display the items in WD Media Uploader with list view by pressing this button.
