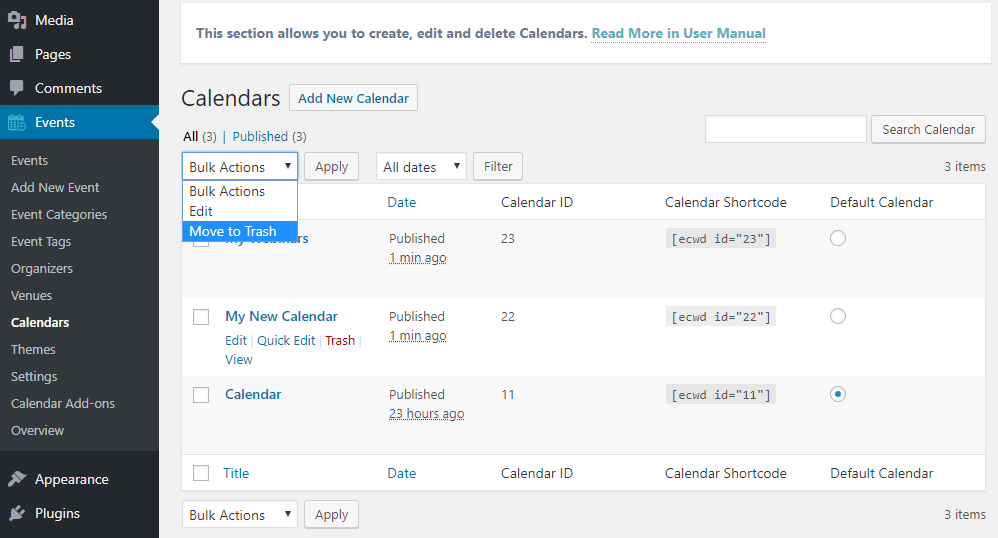
As the installation of WordPress Event Calendar plugin is finished, one default calendar will be created automatically. Navigate to Events > Calendars page to modify it, or to create your own.
This page contains the list of all created calendars, along with additional information. You can check the creation date and IDs of calendars, as well as access their shortcodes. Using Default Calendar column of this page, you can select the default calendar of your website.
You can use the search bar to quickly access an entry, as well as filter calendars by their creation date. To edit or delete multiple entries, choose one of the following options from Bulk Actions drop-down box:
- Edit,
- Move to Trash,
then click Apply. Also, you are able to modify individual calendars by hovering over each and choosing from these actions:
- Edit,
- Quick Edit,
- Trash,
- View.
Adding a New Calendar
To begin creating a new calendar from scratch, click on Add New Calendar button. Write a title for the calendar as the first step. You can also enter additional information as the description of the calendar using the post editor box.
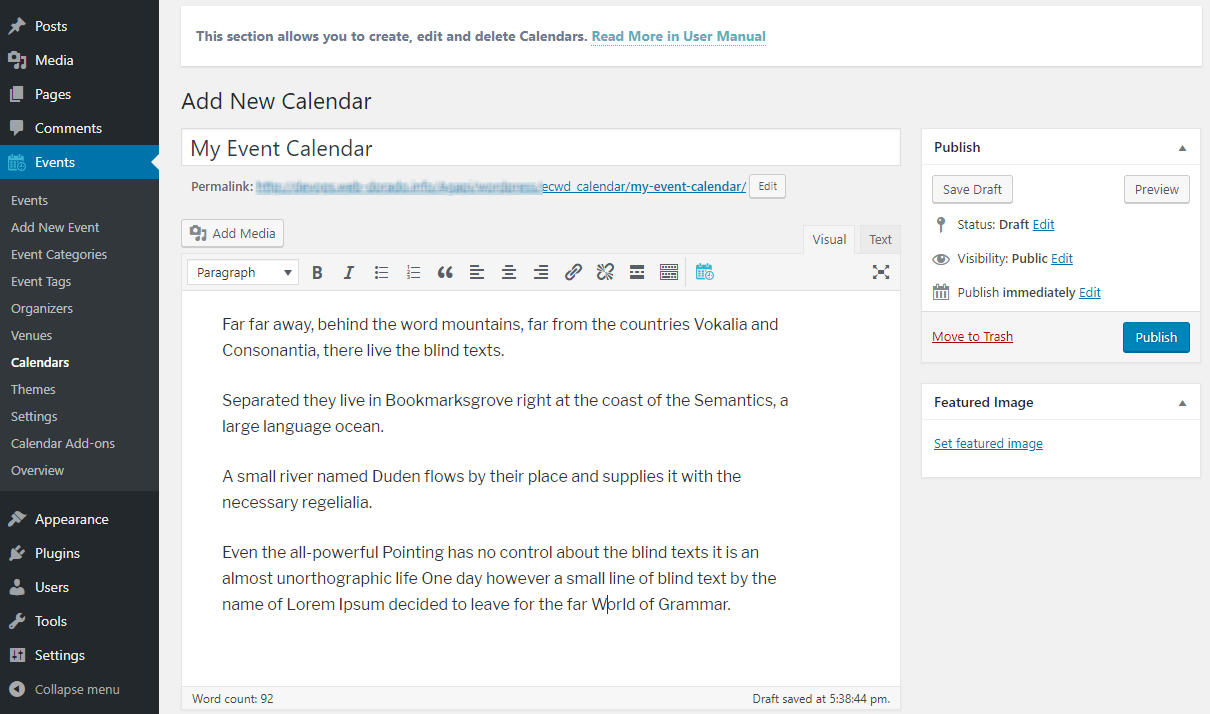
Below the calendar editor box, there is a group of useful Calendar Settings, which allow you to configure the features of your calendar. Let’s discuss these tools one by one.
Previewing the Calendar / Adding Events
Press Preview/Add Event link to preview the calendar in a popup box and quickly add events to it. You just need to click on a calendar date to begin inputting an event. A toolbox will appear with all necessary settings.
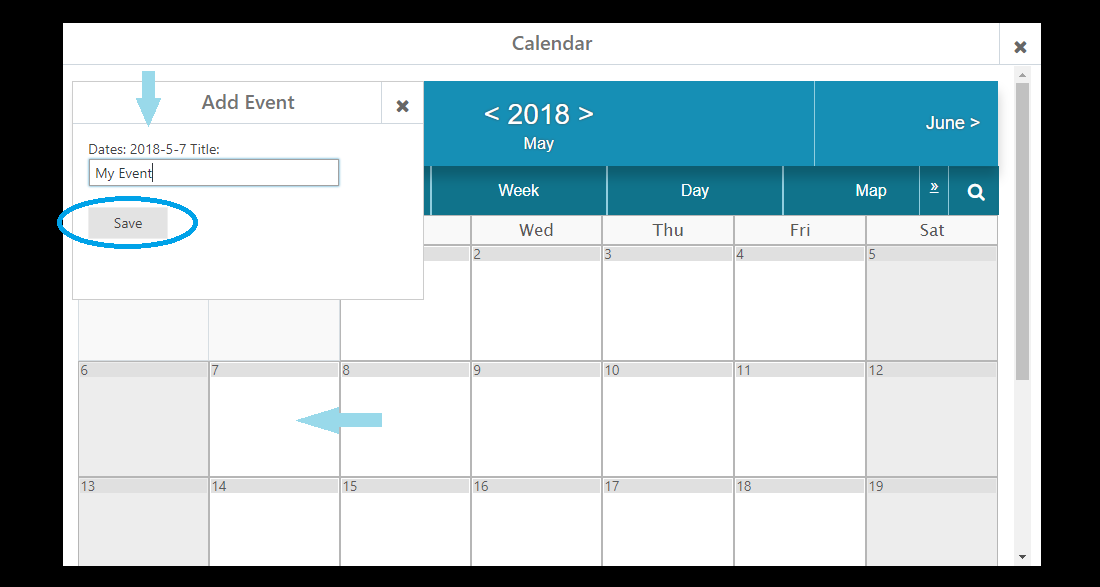
In case you need to add an event, which is going to last multiple days, simply drag the mouse from the start date to end date. You will notice the selected dates appearing in Add Event popup box.
Set a title for your event, then press Save. Note, that this entry will be saved as draft.
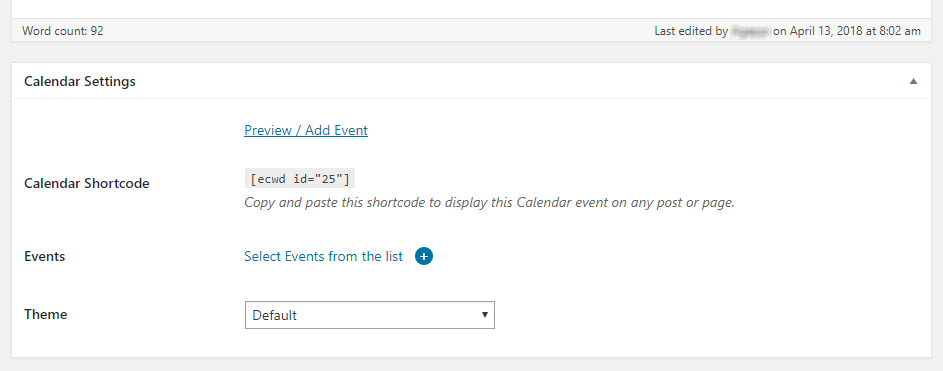
Calendar Shortcode
Event Calendar plugin creates a shortcode for each calendar you create. It has the following format:
[ecwd id="5"]
You can copy this shortcode and paste it into a WordPress post or page to display this calendar.
Adding Events
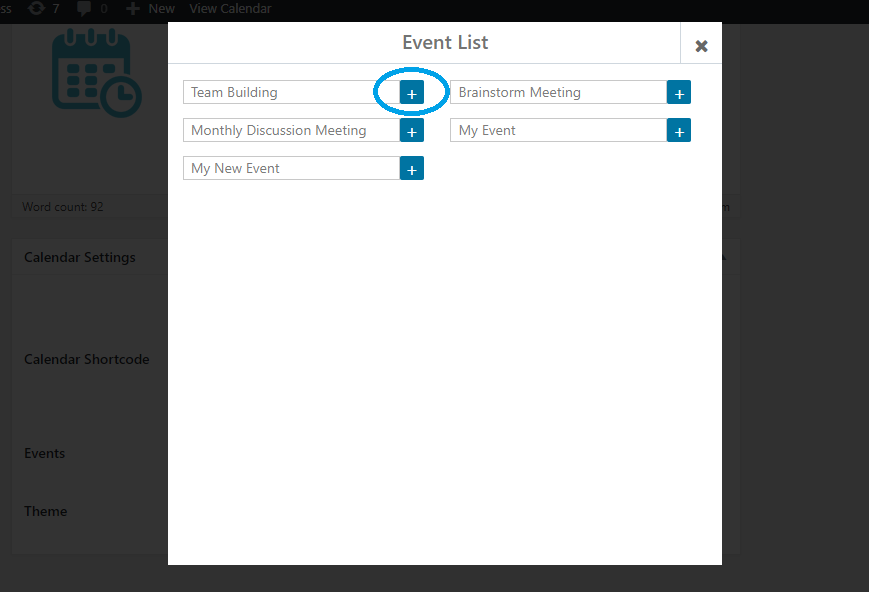
Click on Select Events from the list link to choose events and add them to your event calendar. A popup box will appear, containing all published events. Press the plus (+) button to insert them into your calendar.
Selecting a Theme
Use this drop-down box to select the theme to use on your calendar. You can modify the themes by navigating to Events > Themes page of the plugin.
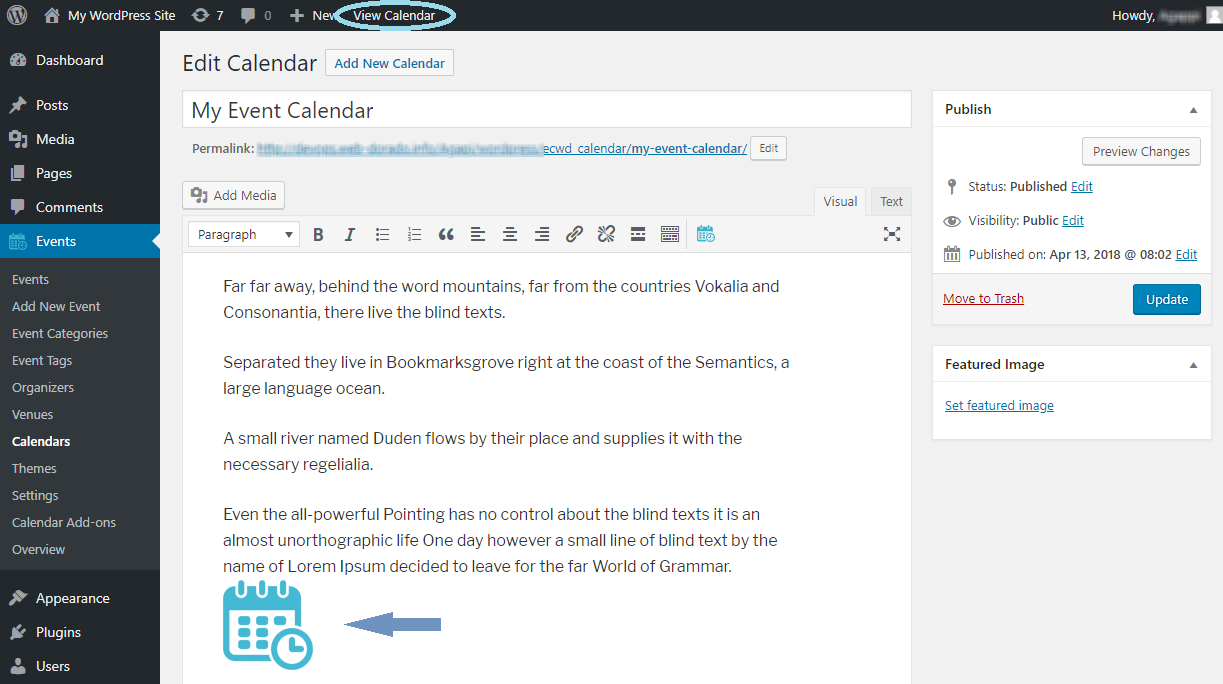
After you finish filling out necessary details for your calendar, press Publish. As the page reloads, you will notice a calendar icon appearing along with the description you have entered. This is the calendar shortcode and it is required for the calendar to appear correctly.
You can check the front-end of the created calendar by clicking on View Calendar button from the top bar of WordPress administrative panel.
