Using Event Calendar WD for managing your community events? Have contributing authors? The Event Calendar WD Frontend Event Management add-on is the perfect solution for you. The add-on allows your users to create events from website front end.
Attention: Frontend Management Add-On requires Event Calendar Premium version 5.0.23 and higher: if you are using an older version, please update your plugin.
When activated add-on brings two separate sections displayed above the main calendar. With these tabs, the user will be able to add events to the calendar (Add Events) and view (optionally edit/delete) the added event list using filters (My events).
Settings
Frontend Event Management is easy to set up.
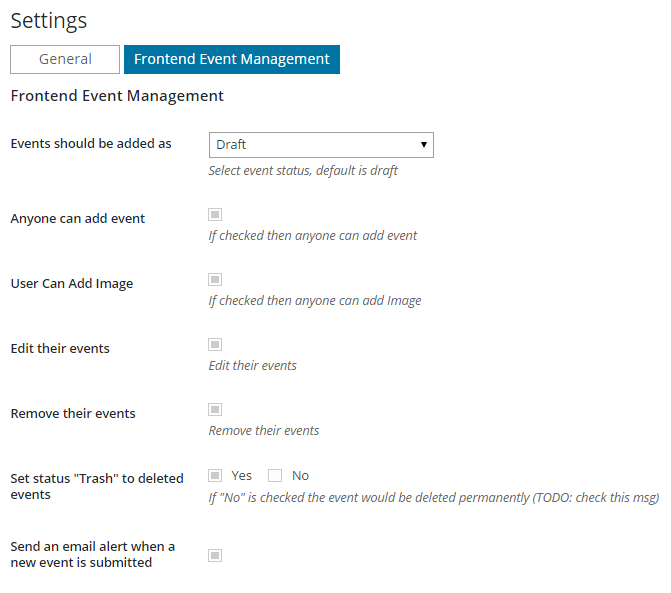
This section allows configuring options for the event management system. To access the option go to Event Calendar WD > Settings > Frontend event management.
Events should be added as. Choose the default post status for the submitted events. Anyone can add event. If you want all site visitors to be capable of adding events choose the option. By default only registered users can add events.
User Can Add Image. Choose whether to allow the user to add images to the event or not.
Edit their events. Check the box to allow the contributors to edit their own events.
Remove their events. Check the box to allow the contributors to remove their own events.
Set status “Trash” to delete events. If you want to have an event recovery from trash select the option otherwise the events will be permanently removed.
Send an email alert when a new event is submitted. Check the box to receive email notifications whenever a new event is added.
Email address to be notified. Provide an email address, which will be used for sending out notifications whenever a new event is added to the calendar.
Events Per Page. Set the number of posts which will be displayed in My Events page.
Google ReCaptcha site key. Fill this field and below field to activate recaptcha. It’s used only for the guest visitors.
Google ReCaptcha secret key. Fill in the Google ReCaptcha secret key. It’s used only for the guest visitors.
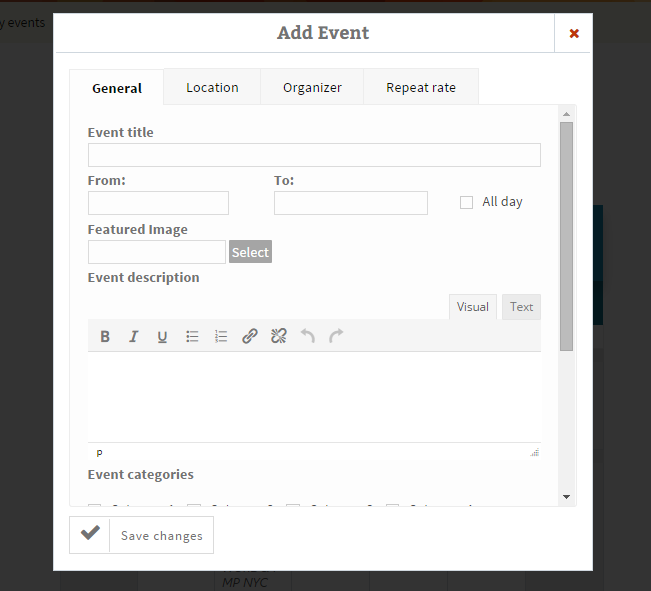
Add Event
This section allows registered users to create events . The whole process is divided into 4 sections. You should press “Save Changes” button as a final stage. Let’s discuss each of them in more details:
General. You can set the event title, description, categories, tags. Set event starting and ending dates, add event and video URLs.
Location. You can set the venue of the event or add the location filling out the address of the venue. The event will be marked on Google Maps.
Organizer. You can select the organizer of the event from the available list or create new organizer providing the name of the organizer and description.
Options. You can set the repeat rate of the event making it recurring on a daily, weekly, monthly or yearly-basis.
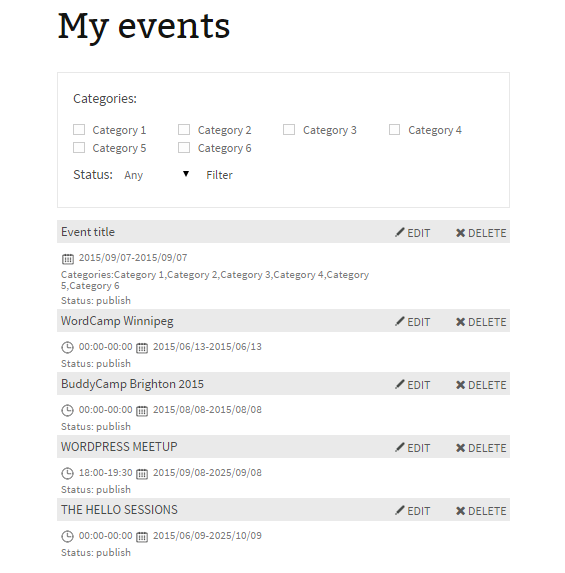
My Events
This section allows view the events created by the user and optionally edit/delete them. This option is not accessible for the guests.
Category. Select the category from which you want to display the events.
Status. Select the post status.