Here you can select a theme from already created themes for your WordPress Google Map. In case you want to create a new theme, you need to Google Maps>Themes section and press Add New button.
Select. Here you will see the list of already created themes. Preview. Here you will see the live preview of the theme.
Adding/Modifying Maps Themes
In this section you can create a new theme/skin for your map. As a first step, you need to add a title to the theme.

All changes made in styles and colors for Directions, Store Locator, Marker Listings (with its 4 styles) can be previewed on the right side of the screen to get an overall idea on what you have as a result of changes.
For the map styles, you need first to provide the radius from the center you want to display with the map.
Choosing from default options
Here you will see the list of available map skins to choose from. Whenever you add a new custom skin, the new skin will be added to the list.
Style existing/Create new skin based on default skin.
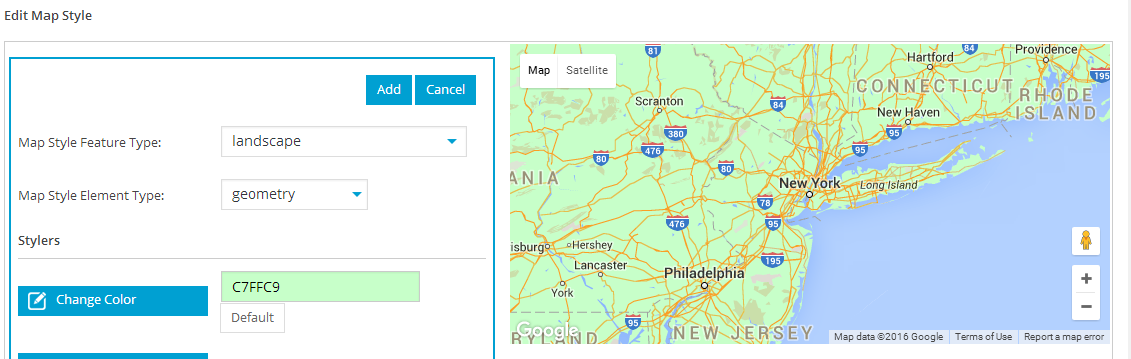
To create a custom skin first press Add new Style button. Then navigate to Edit Map Style and press Add feature style button. Two dropdowns will appear. Map Style Feature Type will allow choosing a specific map-related feature, e.g. landscape, road and etc. Map Style Element Type will allow choosing a specific element of the feature, e.g. geometry or labels. For each element, you can make style changes using Styler. It will allow changing color, gamma, hue, invert lightness, lightness, saturation, visibility, and widths of the selected element.
Creating a Custom Skin
If you want to have a custom map skin based on Google Map styling standard, you can uncheck Auto Generate Map Style Code and paste the custom script in content area below.