Description of Schedules in WordPress Ad Manager plugin.
With Ad Manager WD Schedules you can apply certain schedules to your adverts, and have them published during a specific time frame. Related ads will automatically appear on the start date, and will expire on the end date of their schedules.
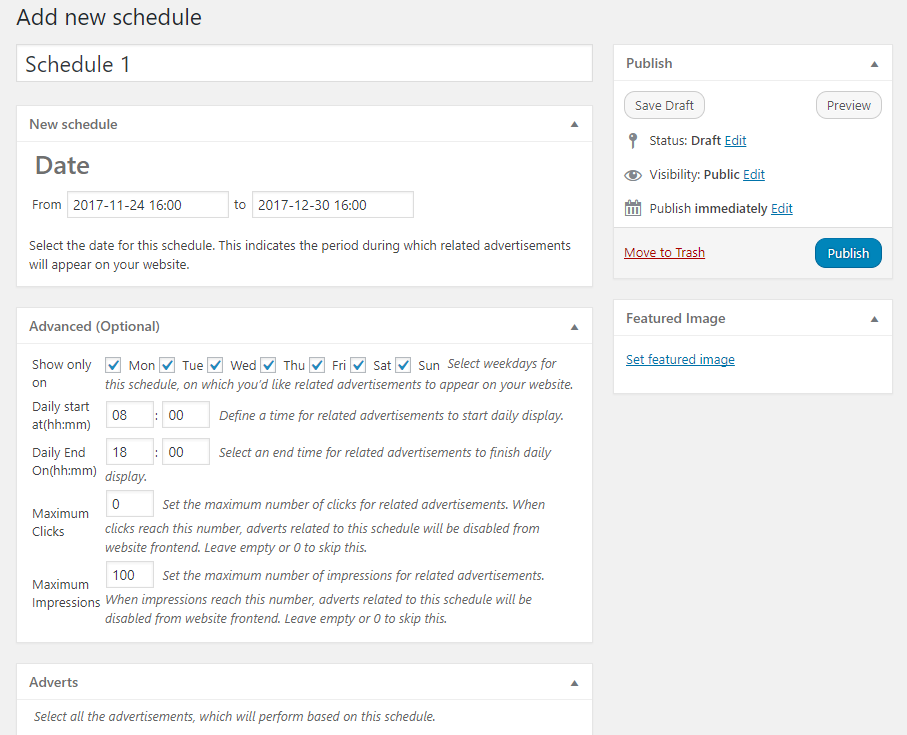
Click Add New Schedule button to start configuring your first advertisement schedule. Start with providing a Title for this entry, and afterwards select the start and end dates. Click on From and To inputs to open date pickers. This indicates the period during which related advertisements will appear on your website.
With Show only on option the plugin lets you specify weekdays, on which ads connected to this schedule will display. You can also set Daily start at(hh:mm) and Daily End On(hh:mm). These are the timestamps when the ads will start and finish appearing on each weekday.
You might need to control the schedule not based on start/end dates, but clicks and impressions. This can be done with Ad Manager WD plugin, by specify the number of Maximum Clicks and Maximum Impressions.Adverts related to this schedule will be disabled from website frontend as soon as clicks and impressions reach these numbers. Alternatively you can leave the values empty or set to 0 to skip this.
Apply the schedules to advertisement entries using corresponding checkboxes under Adverts section.
v.1.0.10