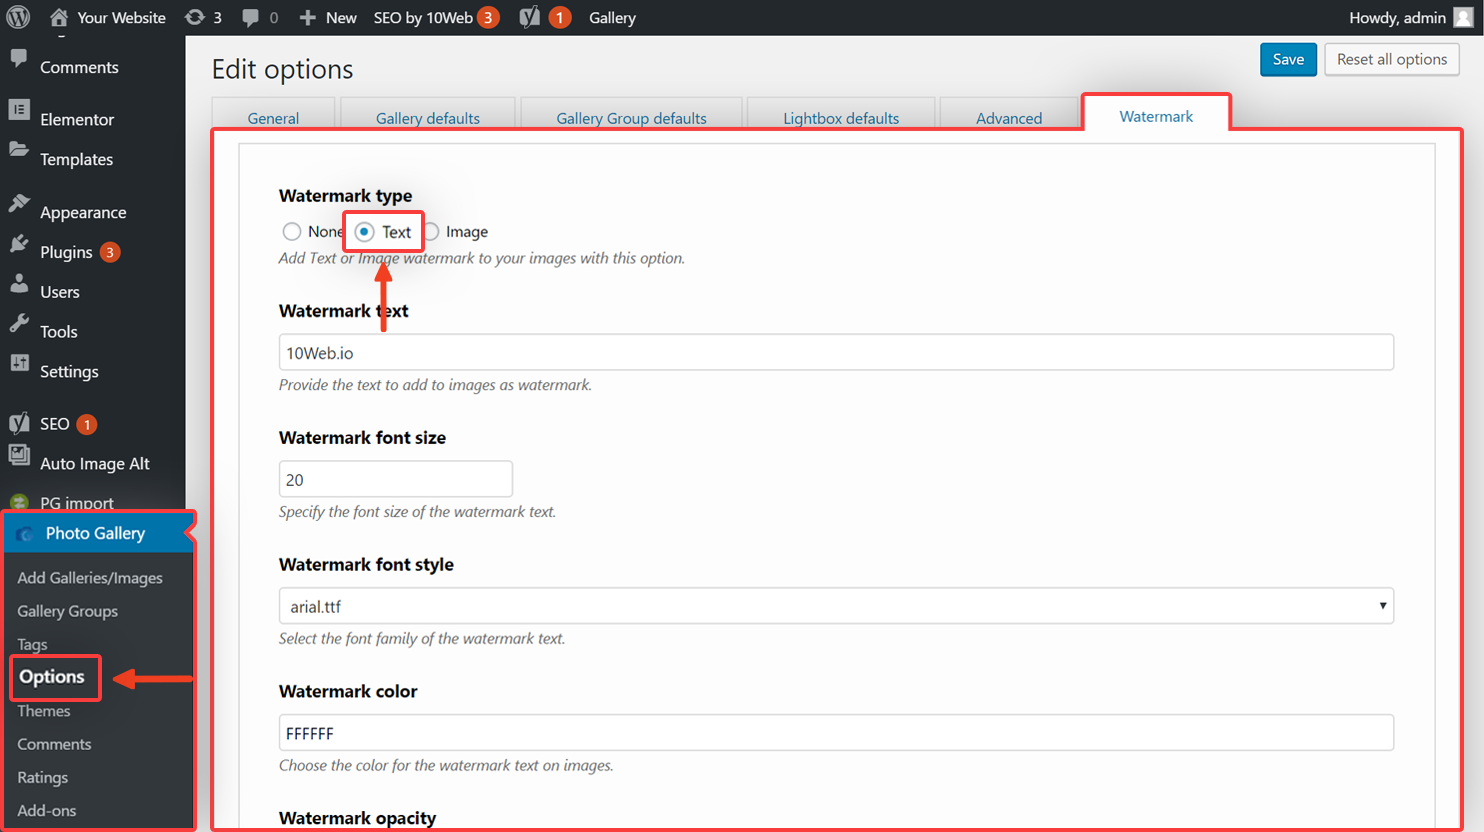
- Click Photo Gallery from the menu on the left of your WordPress dashboard.
- From the list under Photo Gallery, click Options.
- Click the Watermark tab to access its settings.

- Select the type of watermark you want under Watermark type.
By selecting text as the watermark type, from the new settings that pop up, you can set the text of the watermark, its size, font, color, opacity, and position.
By selecting image as the watermark type, from the new settings that pop up, you can set the image you want to use as your watermark (either upload or provide the absolute URL of the image), its size, and position.
Click Set Watermark to see your changes, then click Save at the top right to save your settings.
Note: If you click on Set Watermark it will apply to all your existing gallery images.
Alternatively, if you’ve already created a watermark by following the steps above, you can set it on specific images:
- Click Photo Gallery from the menu on the left of your WordPress dashboard.
- Click the gallery which images you want to watermark.

- Select the images you want to watermark by checking the box next to each image.
- Click the Bulk Actions drop-down menu, and select Set watermark.
- Click apply, then click Update at the top right.
