Whether you run a one person business or have many members in your team, setting up an email address with your business domain, e.g. name@yourdomain.com, isn’t only good practice for your business and its image, but depending on which provider you use, you have an array of tools that you can utilize to ensure your business operates smoothly. Although 10Web does not provide email services, we are here to help you connect to third party providers such as ZOHO and G Suite.
Here is how to set up your business email with ZOHO. Start by going to zoho.com and clicking on mail then pricing. You can choose a plan or scroll down and choose the 15 day free trial of the Mail Premium Plan or the Forever Free Plan. At the moment, Zoho’s Forever Free Plan provides you with 5 free email addresses. Click on either to start set up.
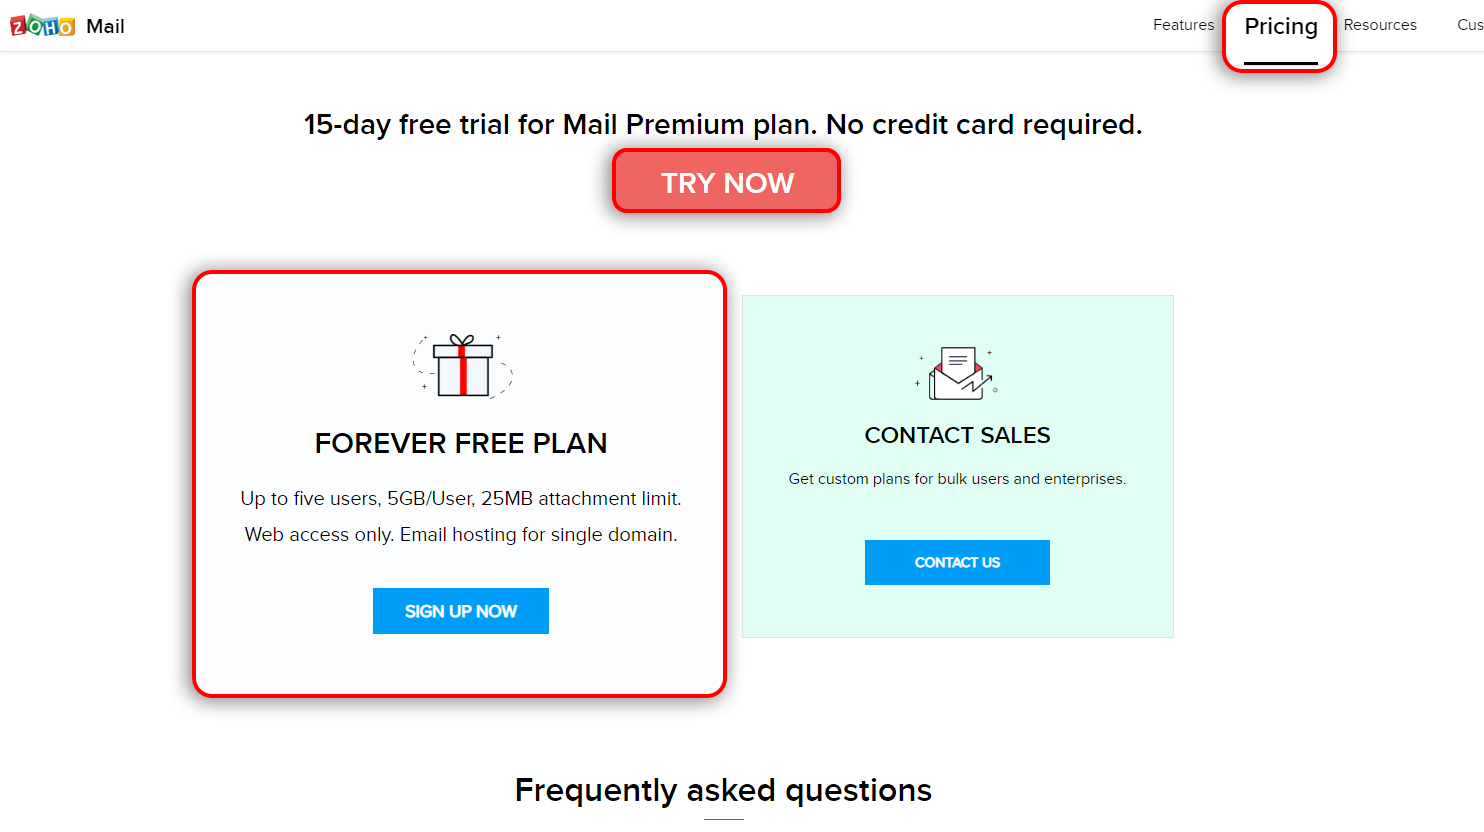
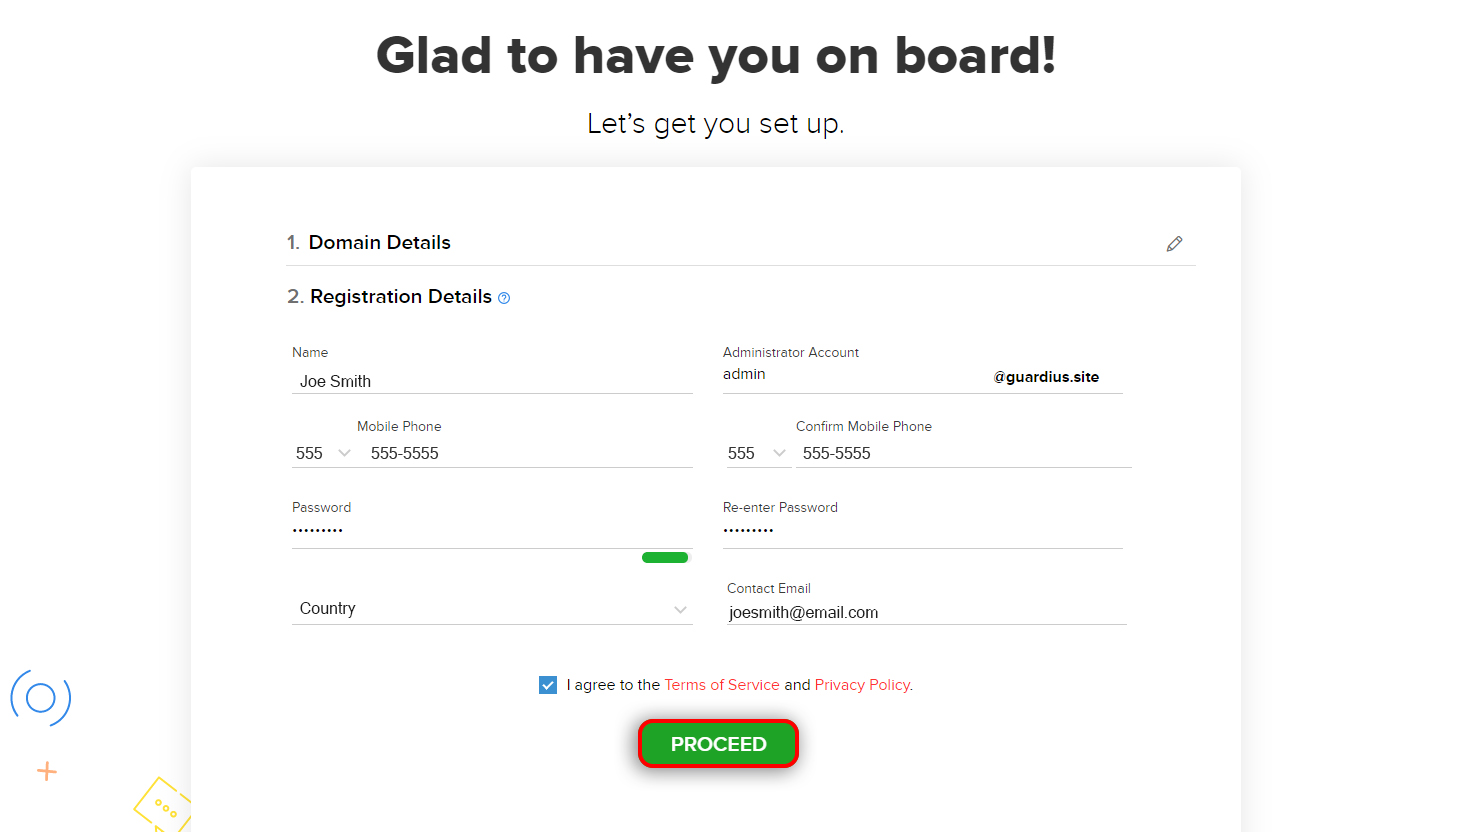
For this How To, we’re going to use the Forever Free Plan. You can sign up with a domain you already have or buy a new domain through Zoho. Fill in your domain name then fill out all the information and click Proceed.
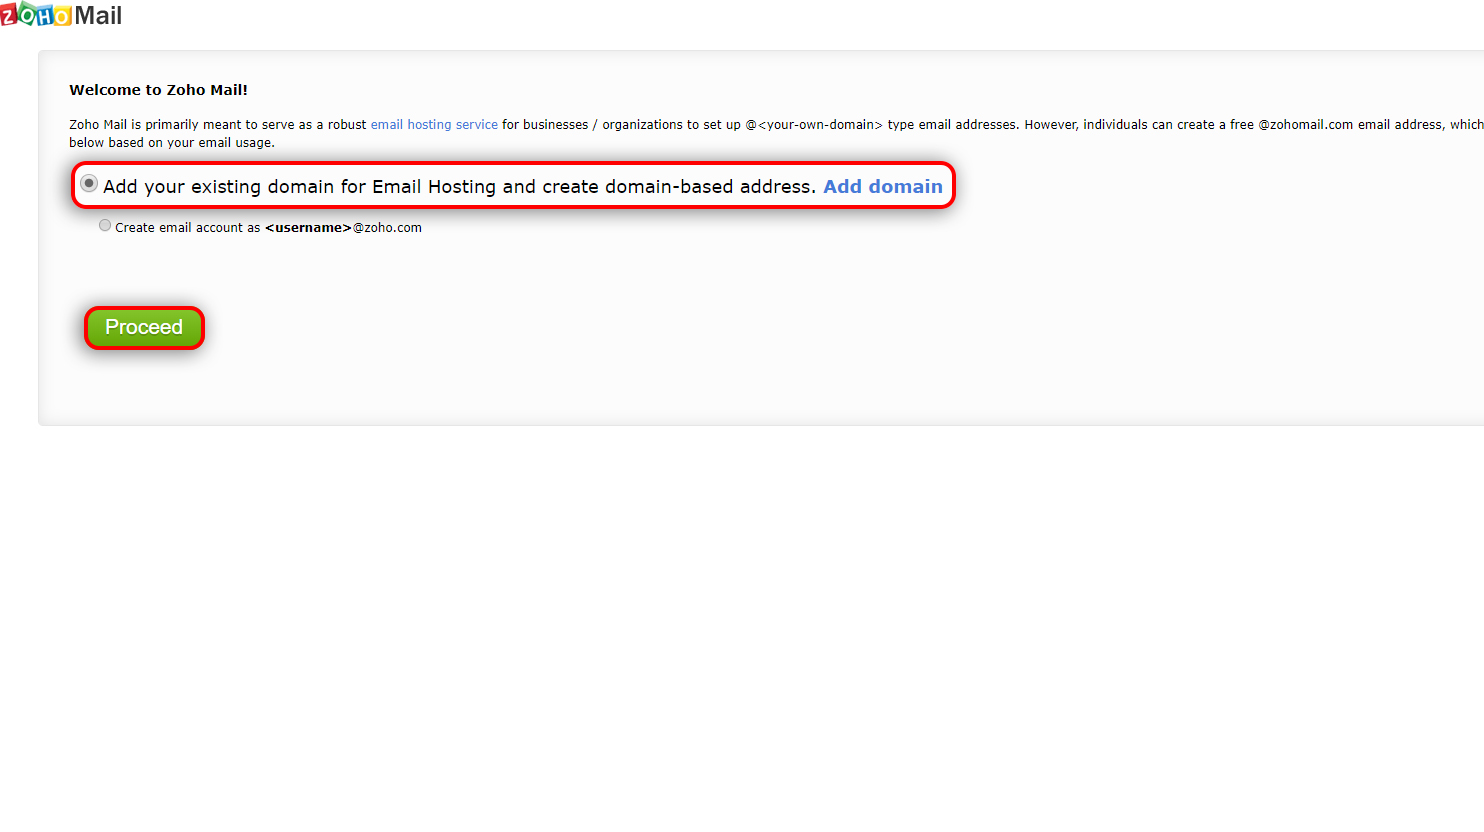
A verification code will be sent to your mobile. Fill in the code and click on Verify My Mobile to proceed with two factor authentication. Once you authenticate, click Continue to go to your account. Now that your account is set up, let's move ahead and set up your business email. Go to the Control panel. Select to add existing domain, and click Proceed.
Type in your domain and move forward to the verification process.
Verifying Your Domain
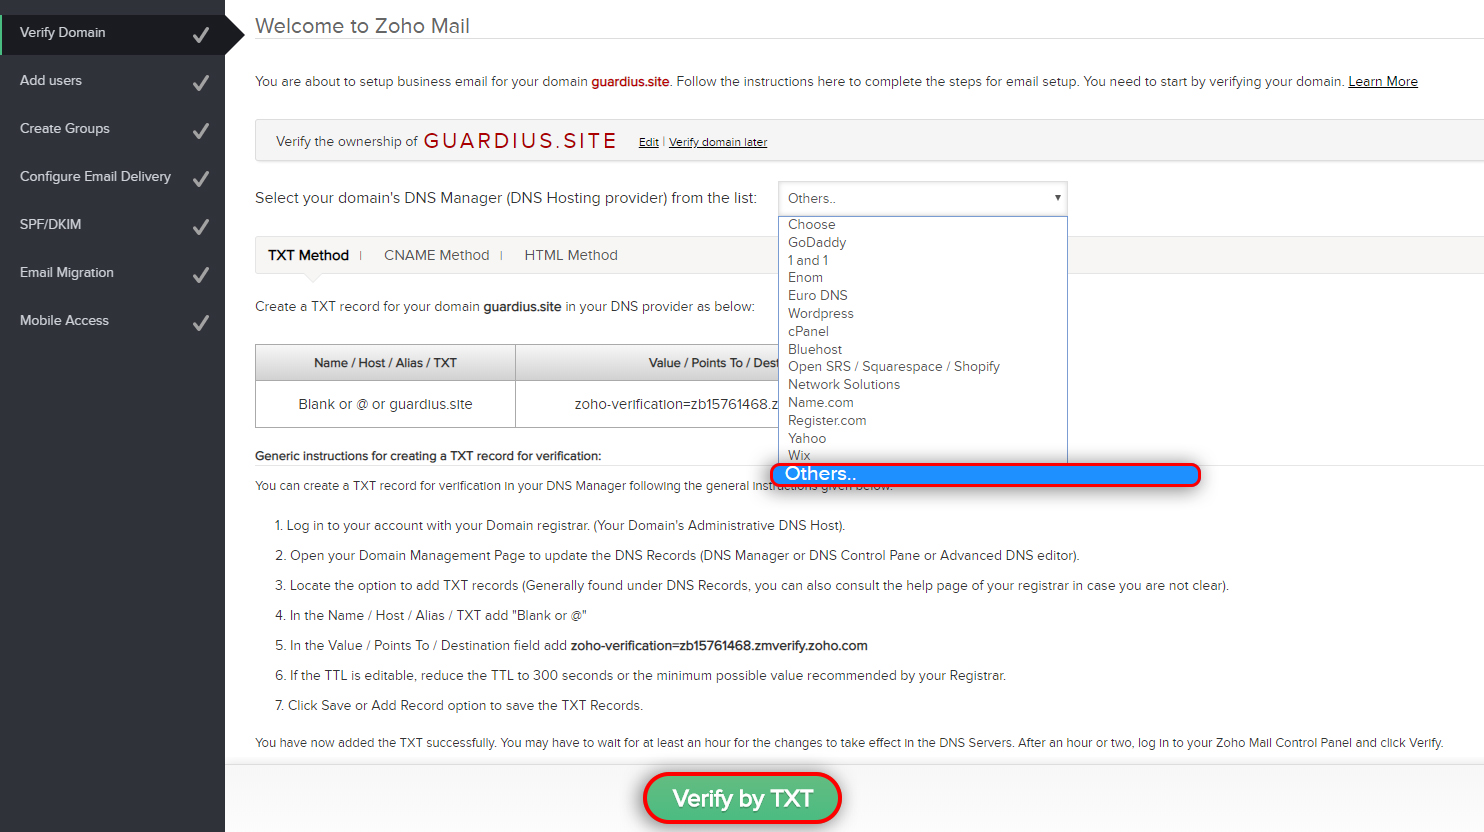
In Zoho mail domain verification, select Others from the DNS drop down menu to start verification of your domain.
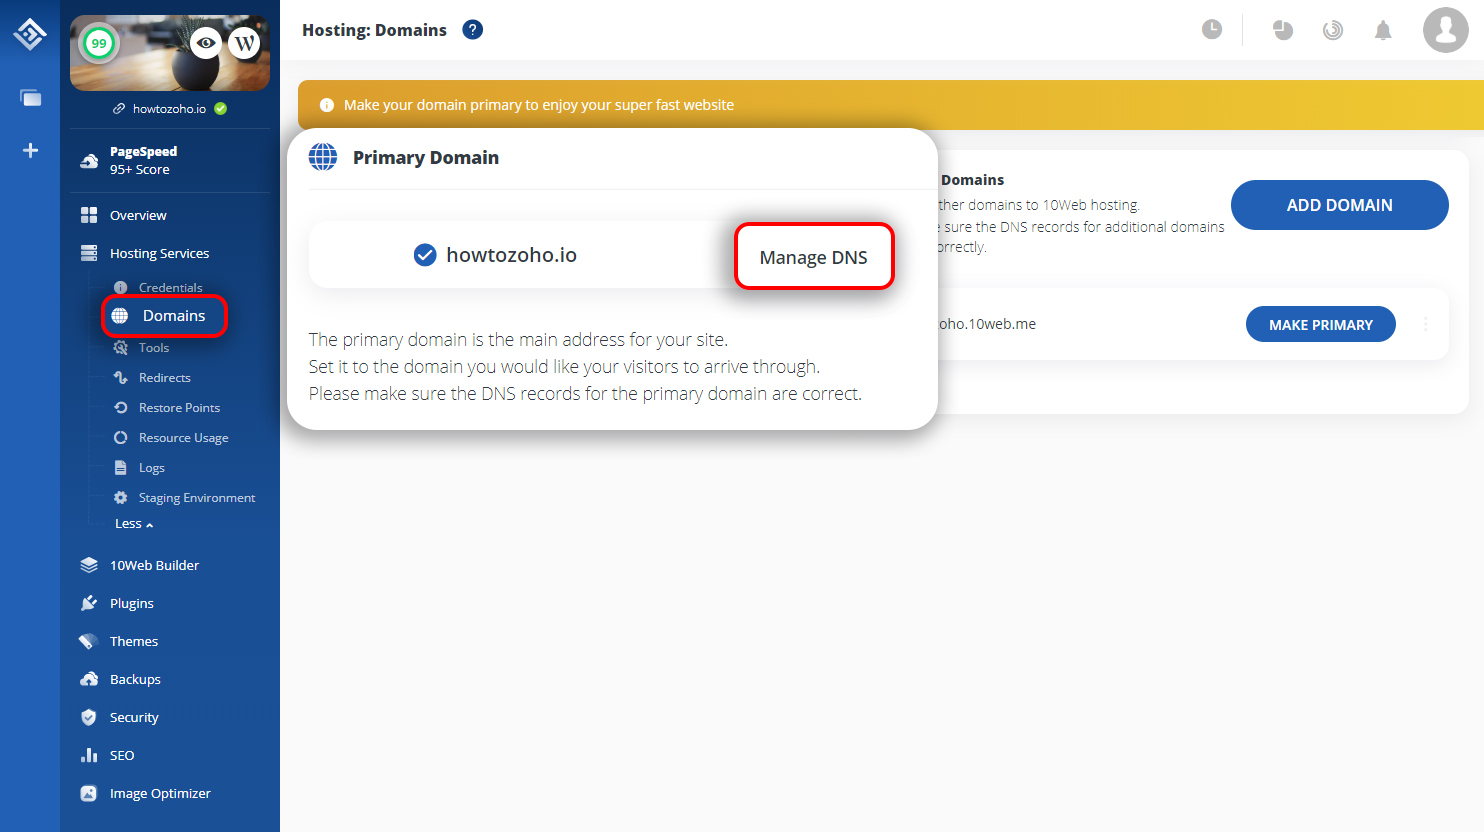
Log into your 10Web dashboard. Click on the website for which you want to set up the email. Click on Domains then on Manage DNS.
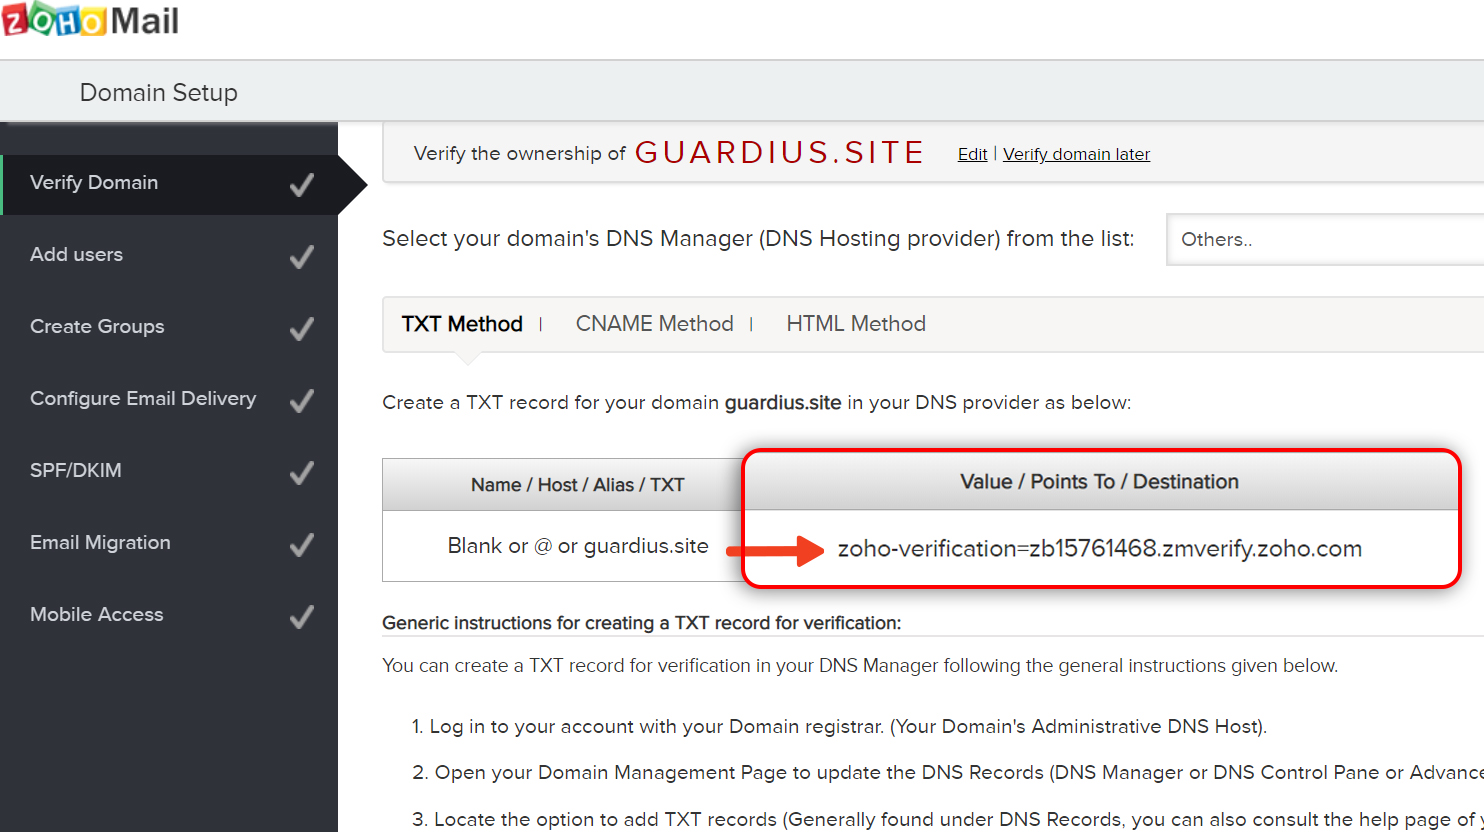
Go back to your Zoho Domain Setup page. Copy the values in the Value /Points to/ Destination box.
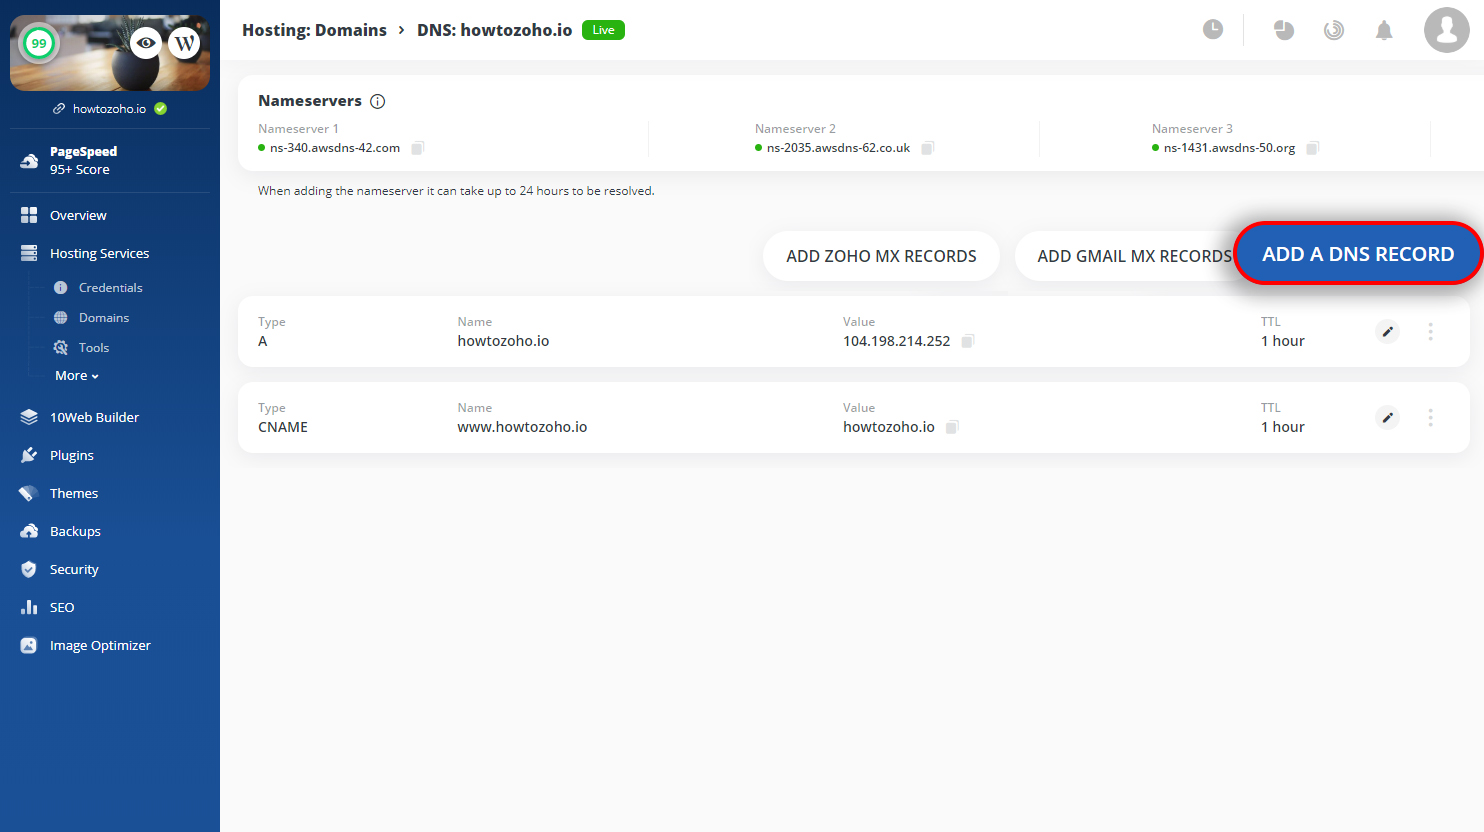
Now go back to your 10Web dashboard and click Add DNS Record.
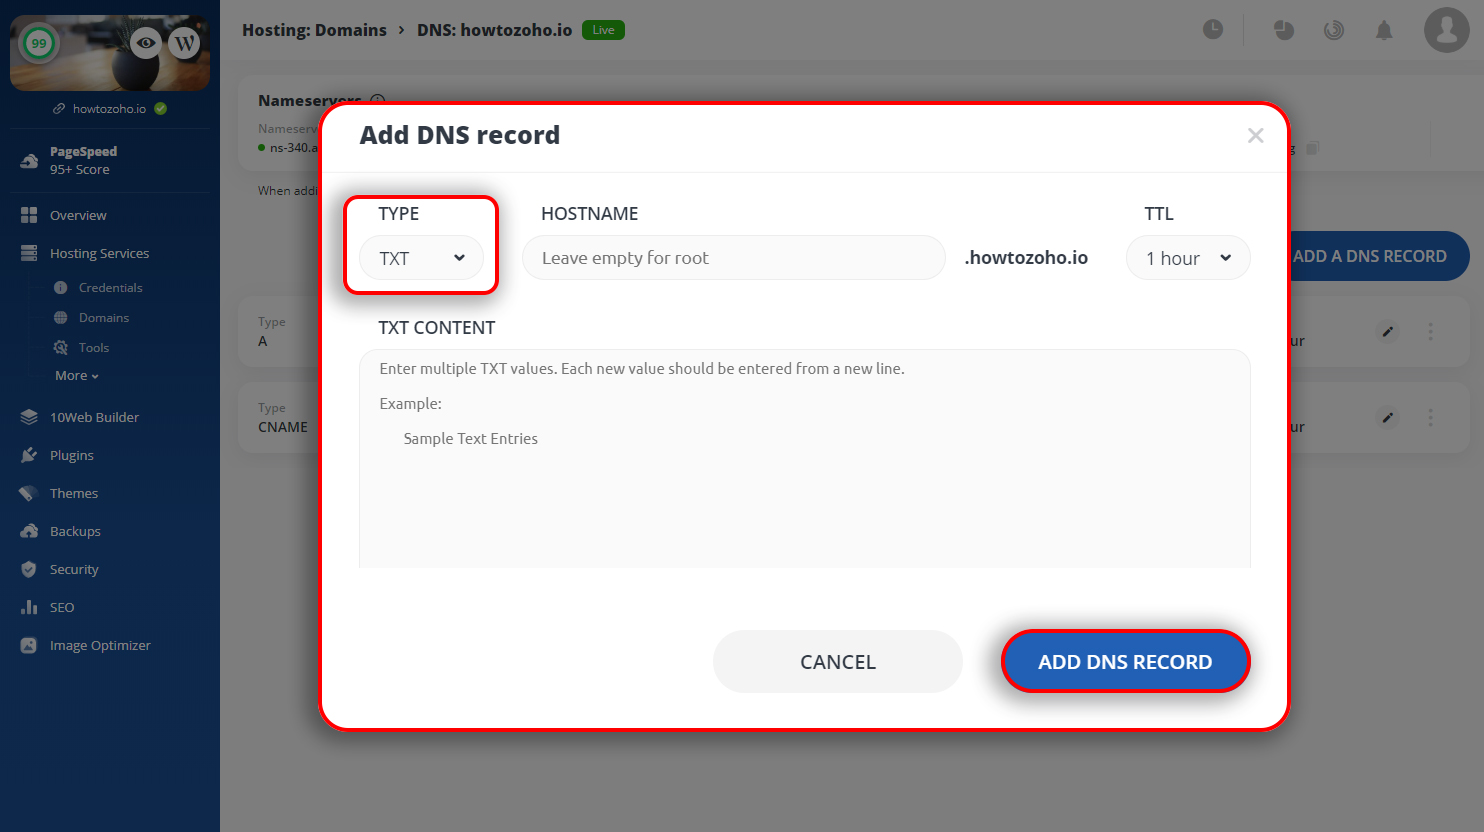
A pop up box will appear. In the drop down menu under Type, choose TXT and paste the copied values in the field box, then click Add DNS Record.
The TXT record you’ve just added will appear in the list of your records.
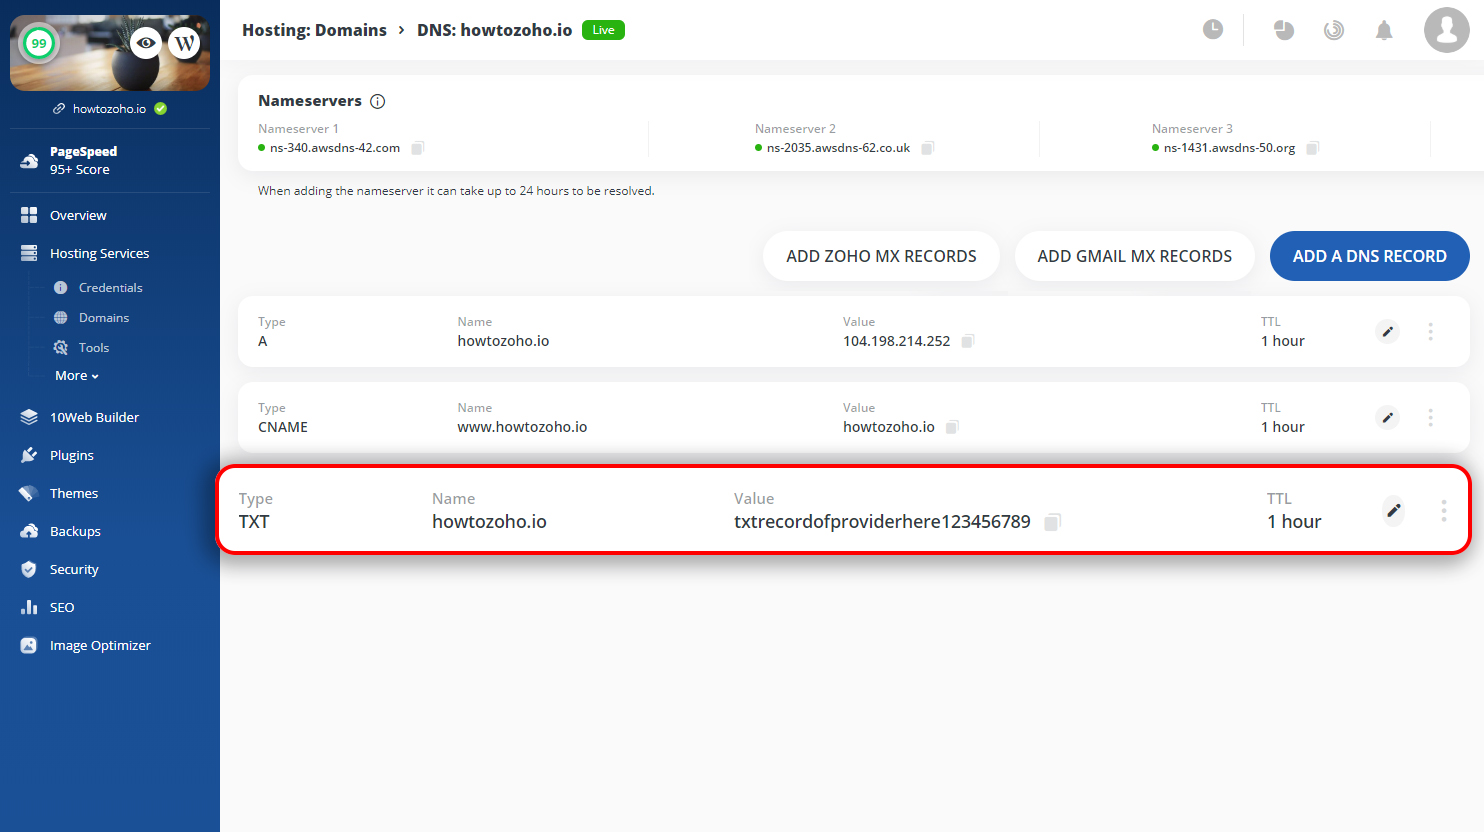
When you have finished adding the TXT record, go back to your Zoho Domain Setup and click Verify by TXT. You may need to wait for an hour or so for your domain to be verified before you move to setting up your MX records.
Setting Up MX Records
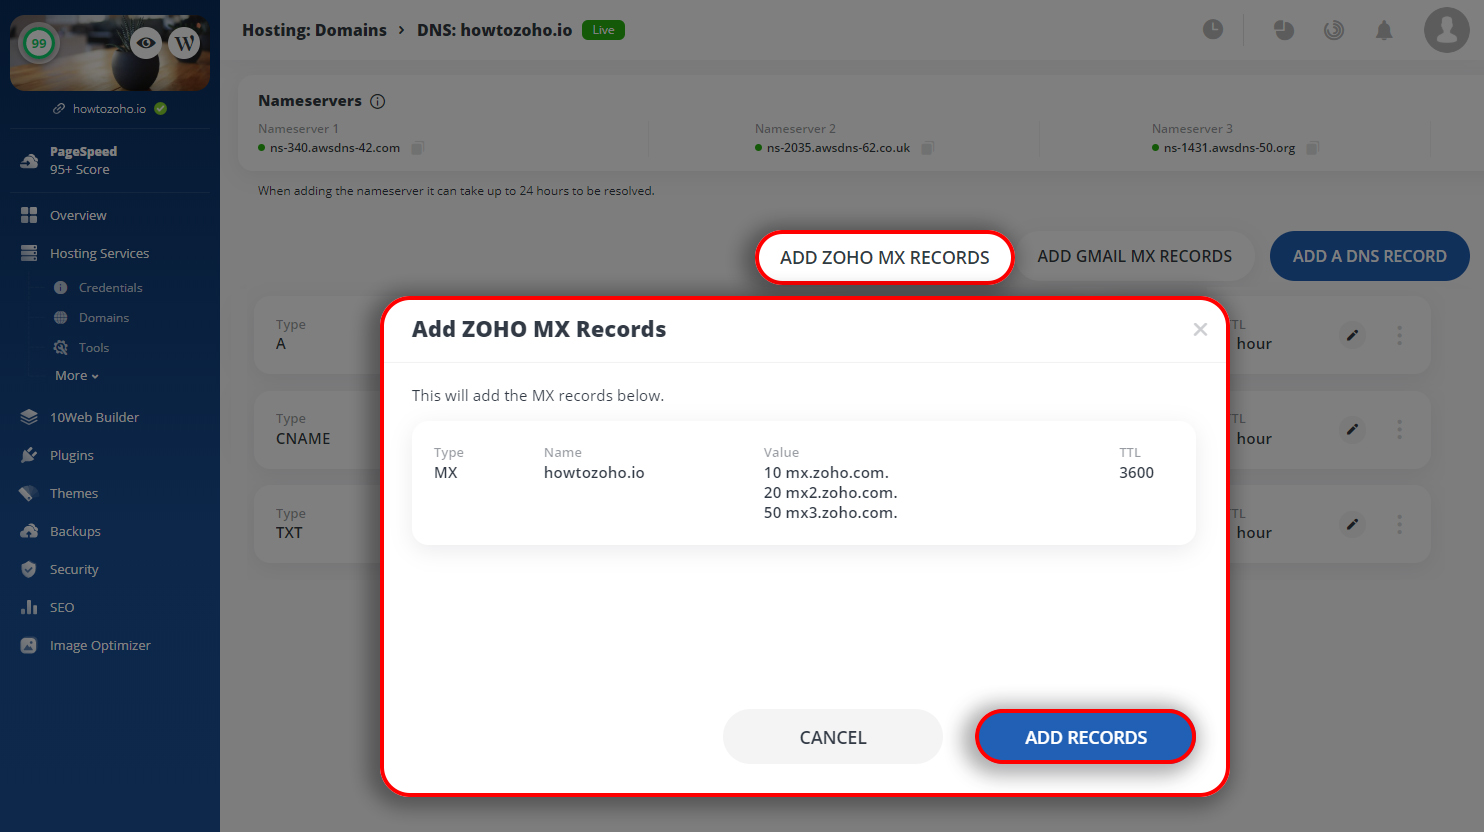
Once your TXT has been verified, you can move forward with creating the email account and setting up MX records. Type in an email you would like to use and save. At this point you can Add Users and Create Groups. If you don’t need to or want to do that, Skip to the step Configure Email Delivery to set up MX Records. Click on Add ZOHO MX Records.
A box with the records will appear. Click on Add Records to add them to your DNS records.
After clicking Add Records, the servers will appear in the records list.
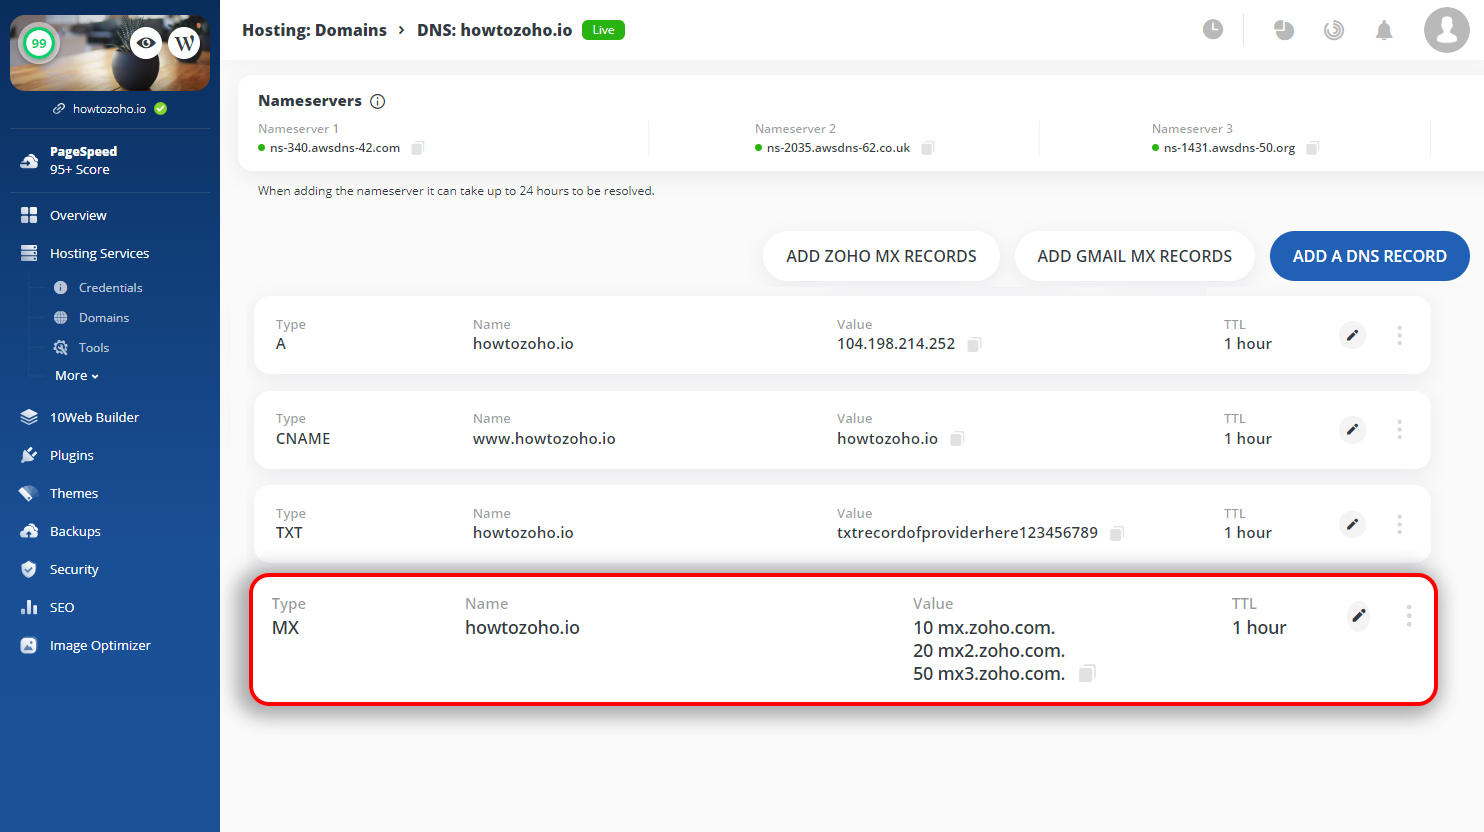
Congratulations, your business email has been set up with your domain name.
The next steps of setting up your domain with Zoho are setting up SPF/DKIM, Email migration, and Mobile Access Set Up.
Setting up SPF/DKIM
Sender Policy Framework, or SPF, is a text record that helps in detecting forged email addresses by telling mail exchanges which host is authorized to send an email for that domain. Domain Key Identified Mail, or DKIM, is a signature configured by the sender and validates that the email is sent from an authentic source.
To set up an SPF, copy the TXT values for SPF.
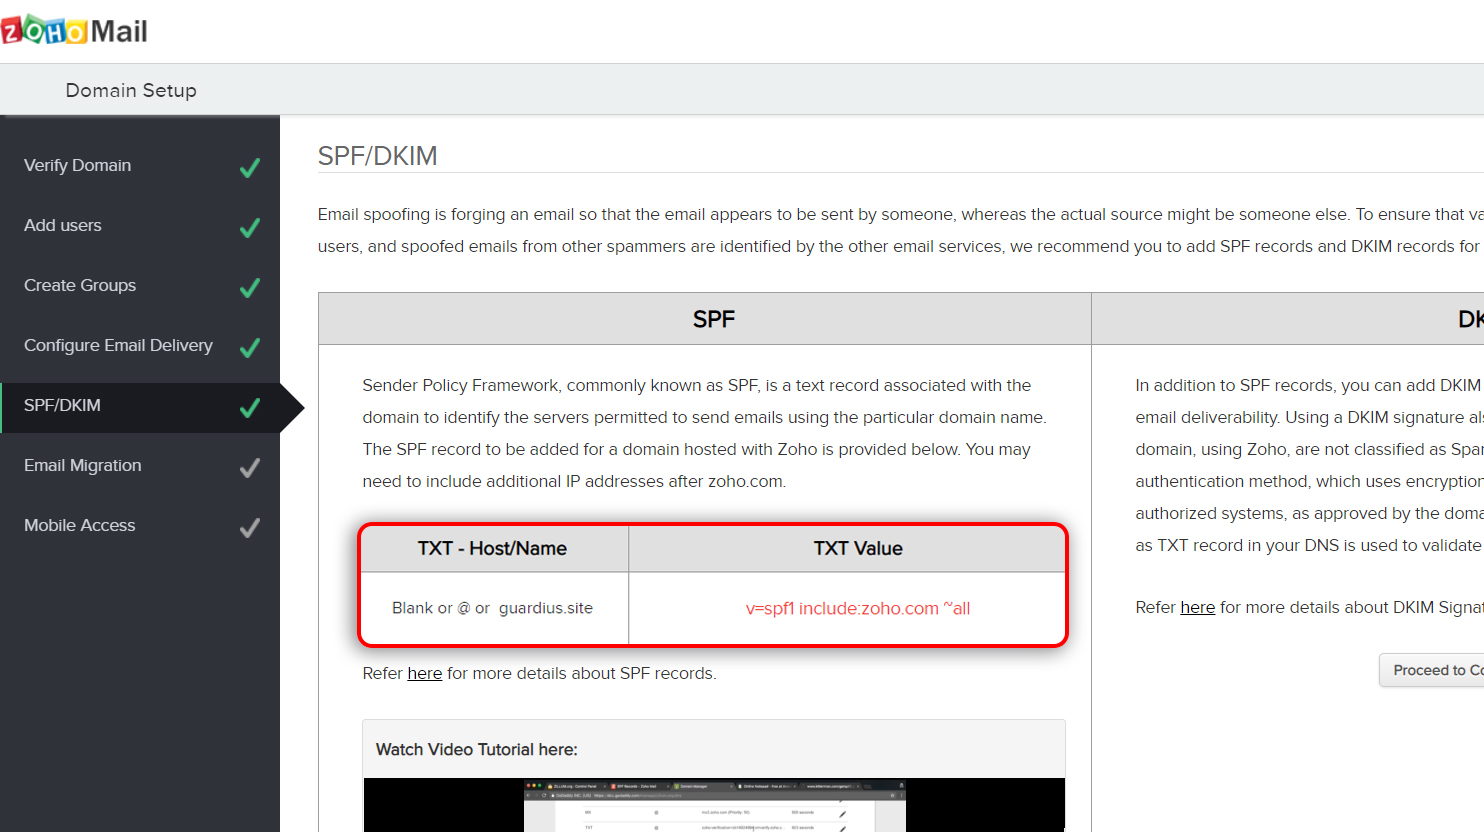
Go to your 10Web Dashboard and into your DNS records. Click on the Edit icon located to the right of your TXT record.
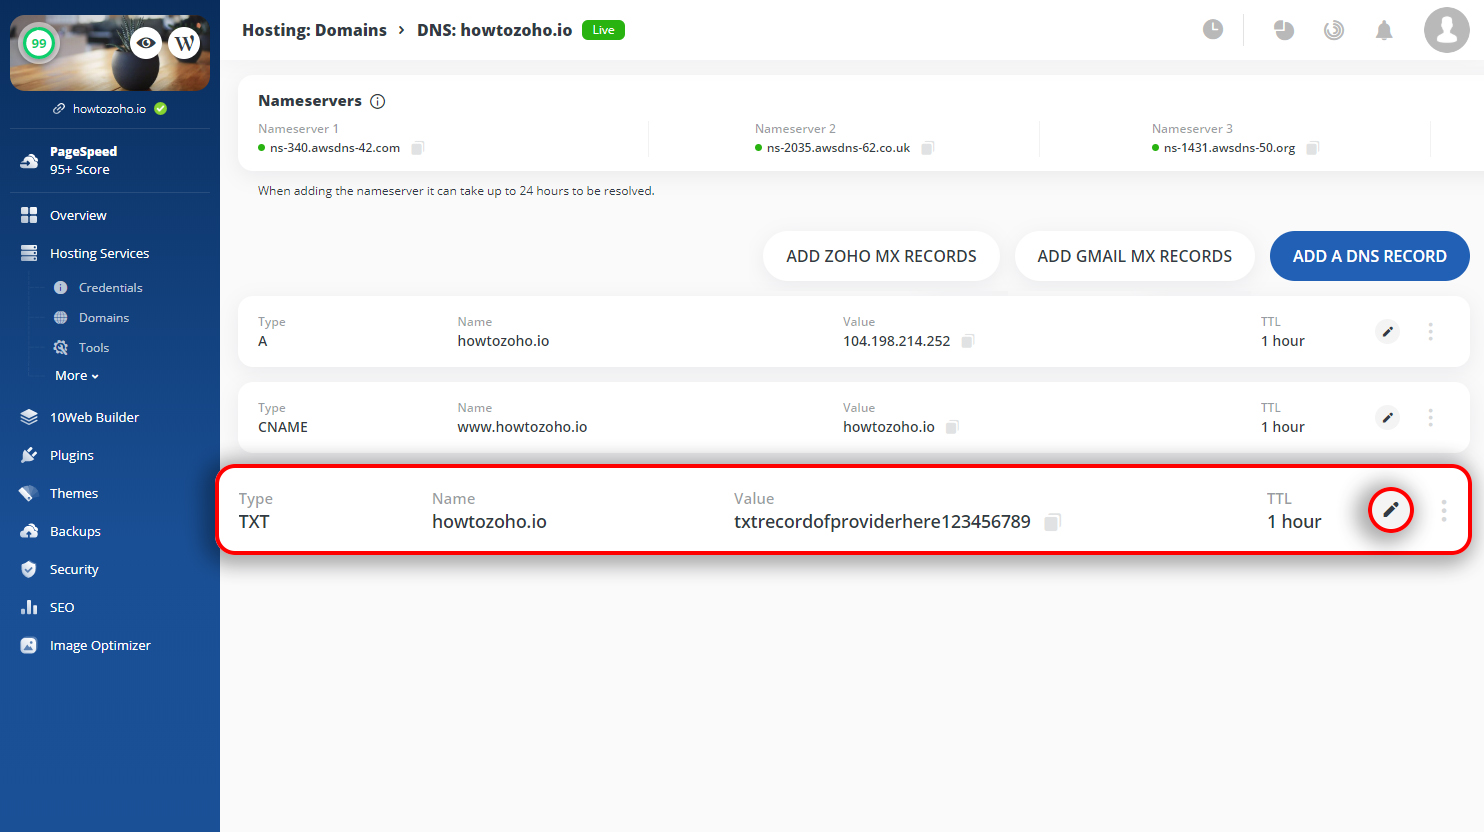
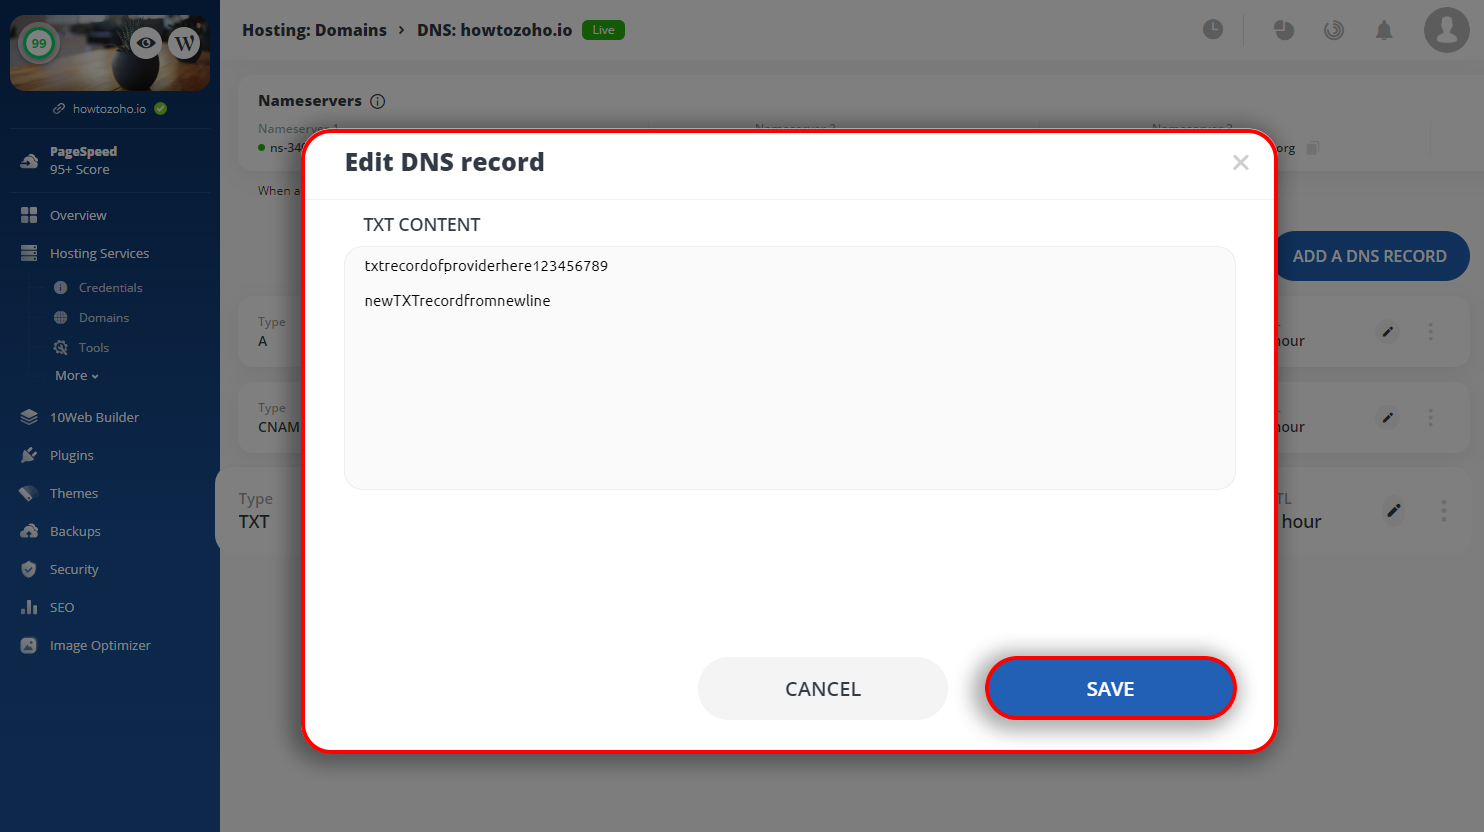
From a new line, paste the copied values in the TXT content field. Then click Save.
In your Zoho admin panel, let's move forward and configure the DKIM. Click on Proceed to Configure DKIM. You will be presented with a screen like this. 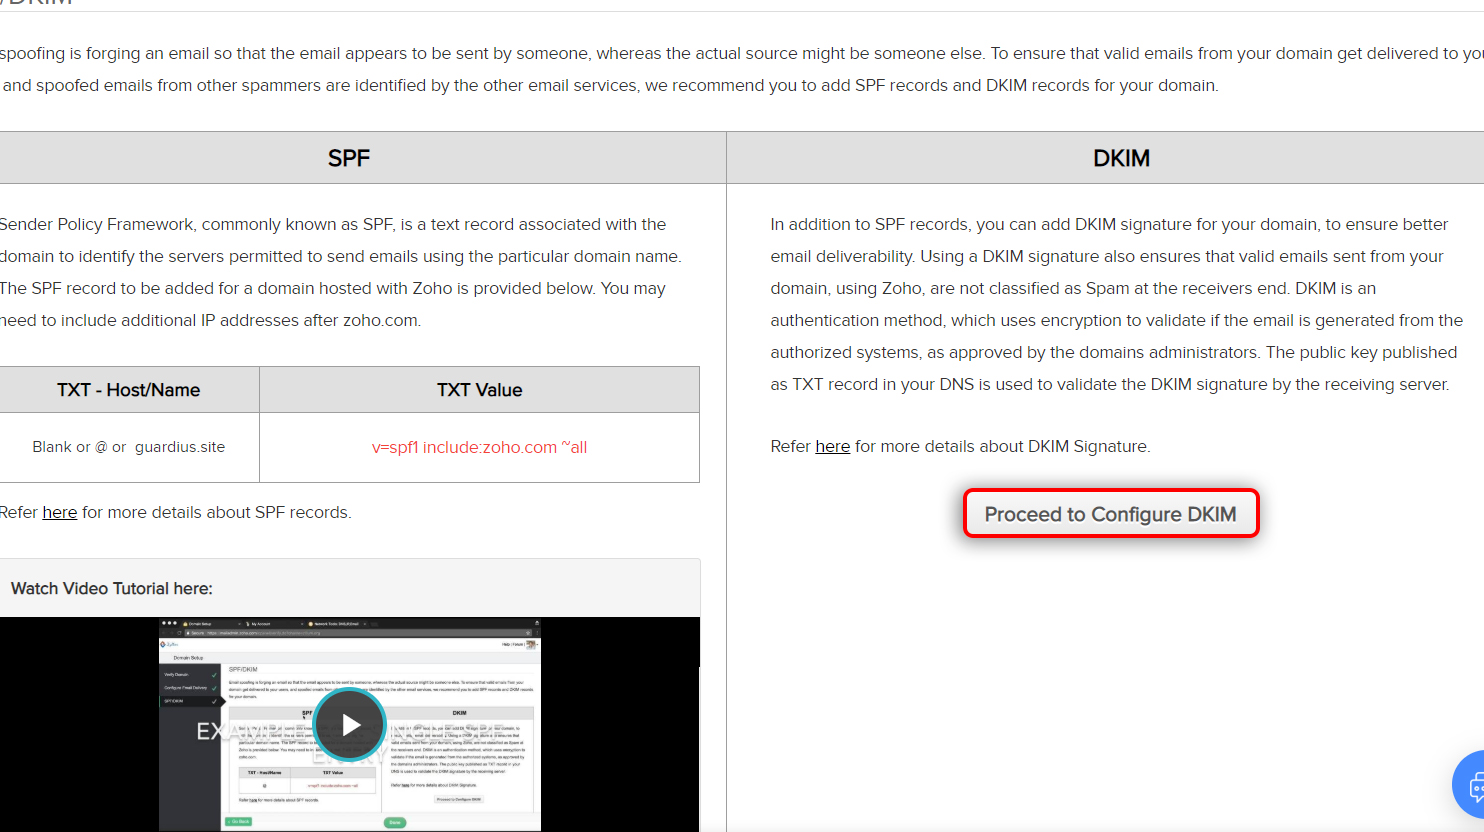
Click on Add Selector. Enter the selector name; for example, “test,” and click save. Copy the complete TXT Host/Name.
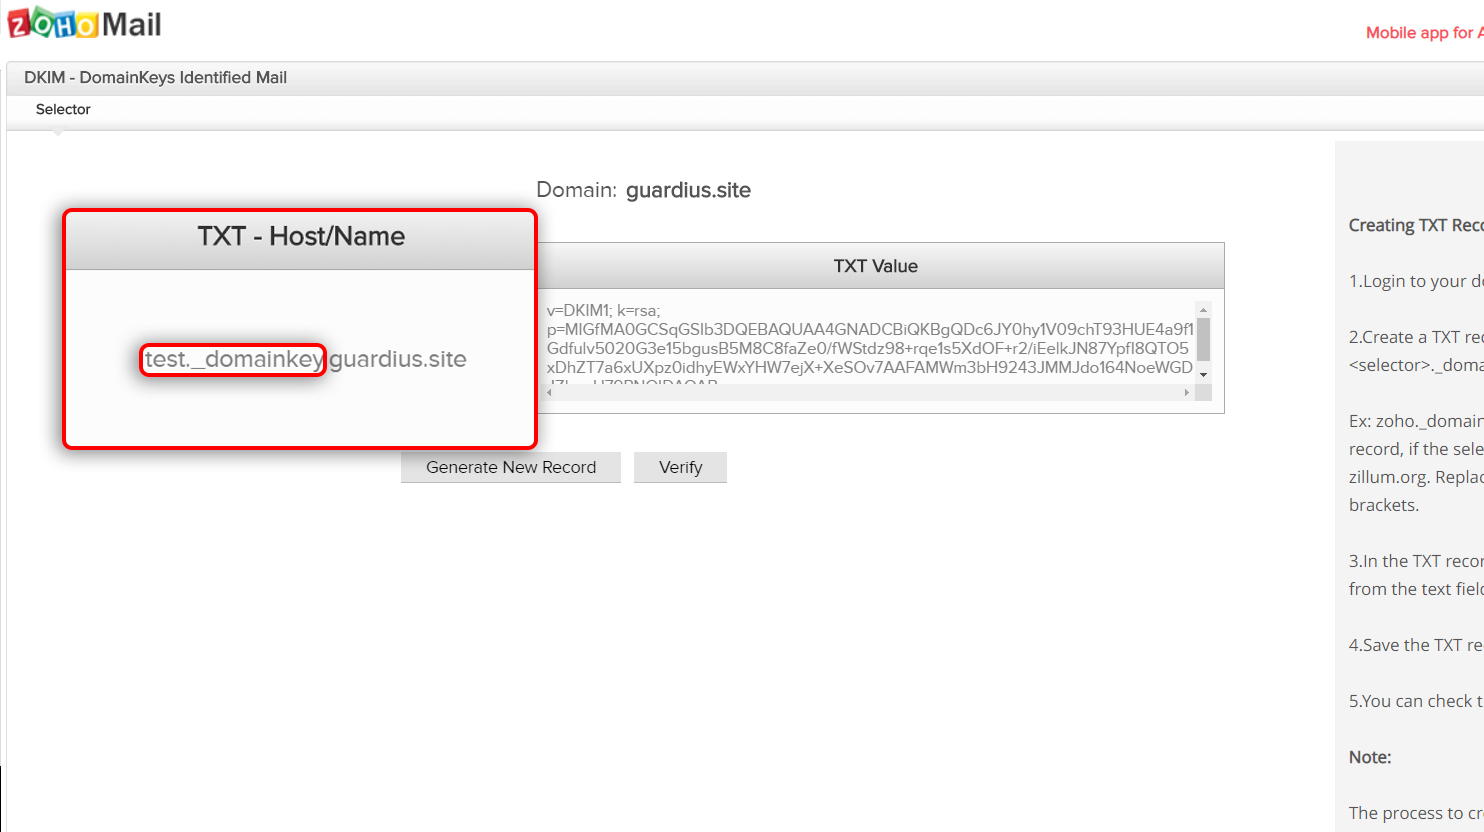
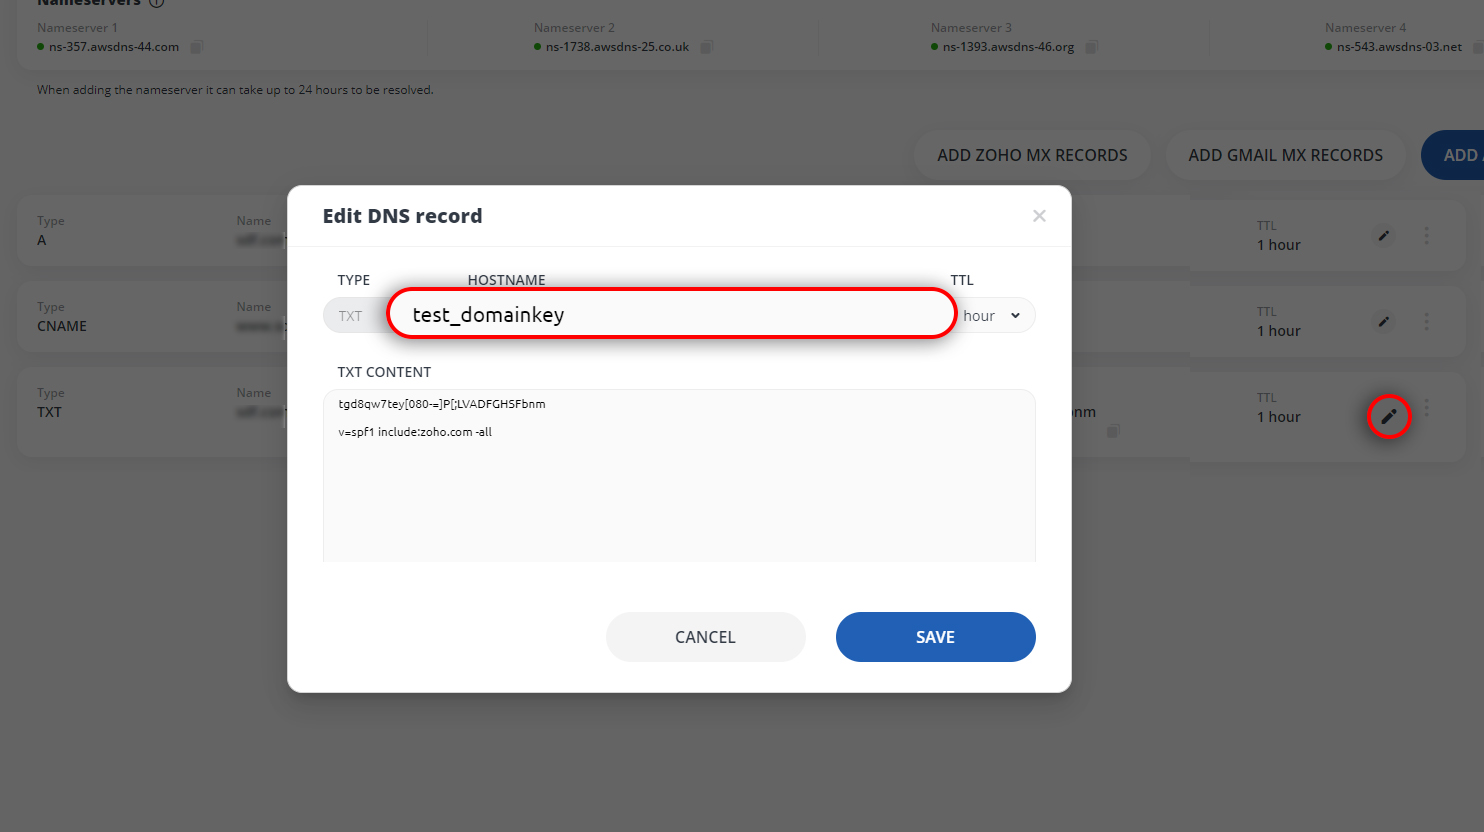
Go to your 10Web dashboard. To the far right of your TXT record, click the edit icon. In the Hostname field, paste the copied TXT host/name.
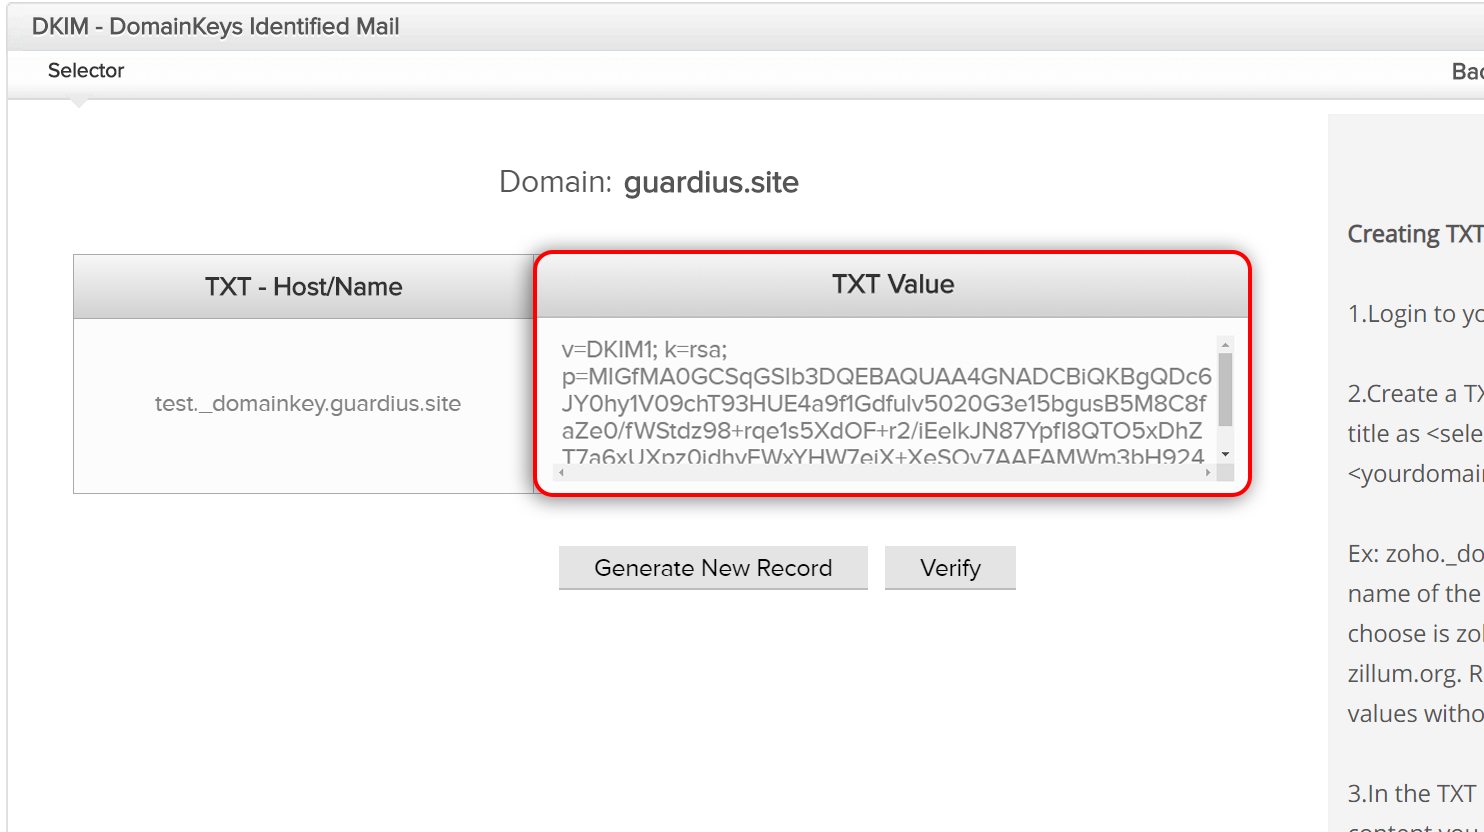
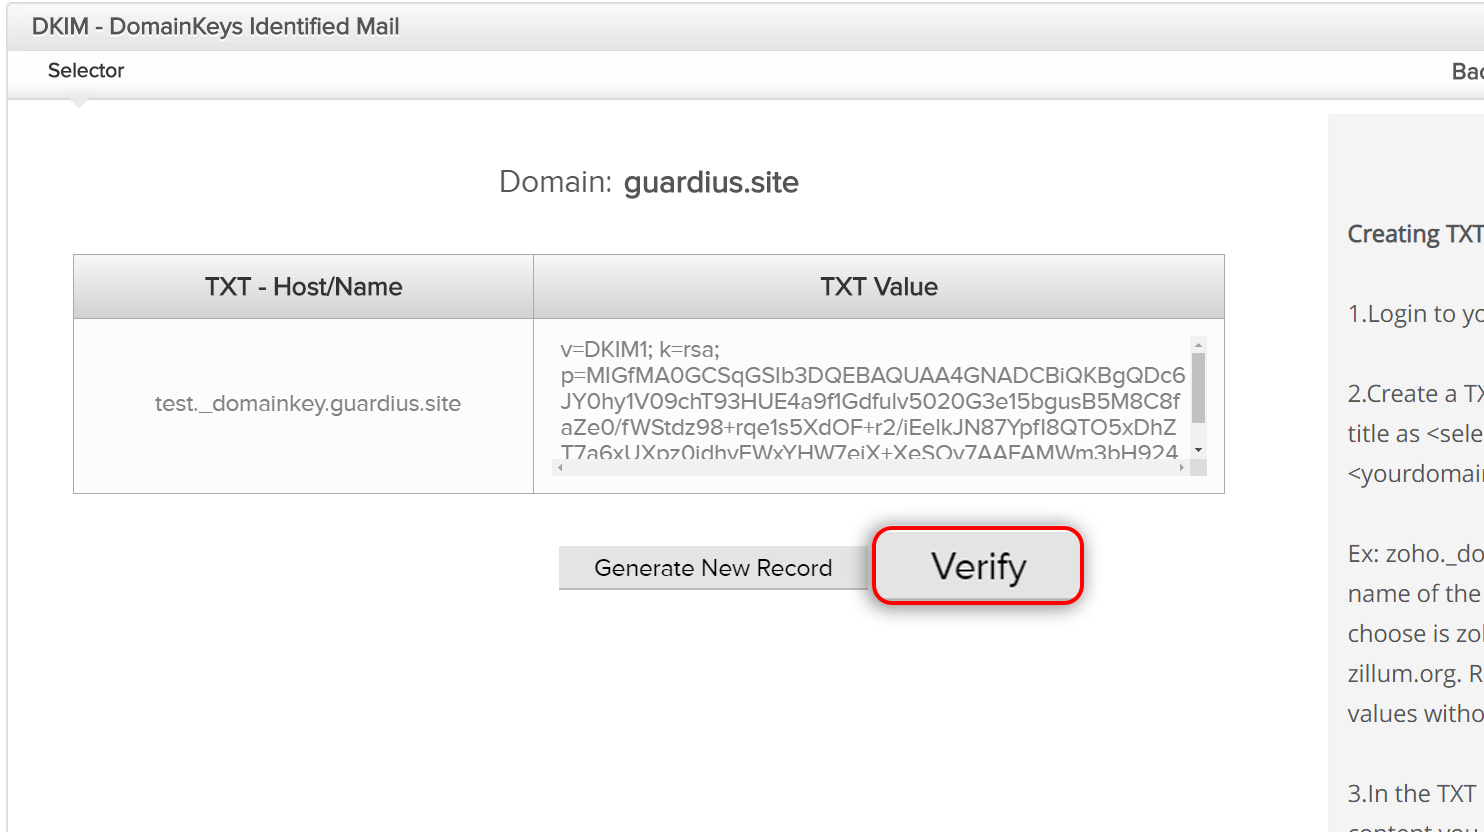
Go back to your Zoho admin control panel and copy the generated TXT value.
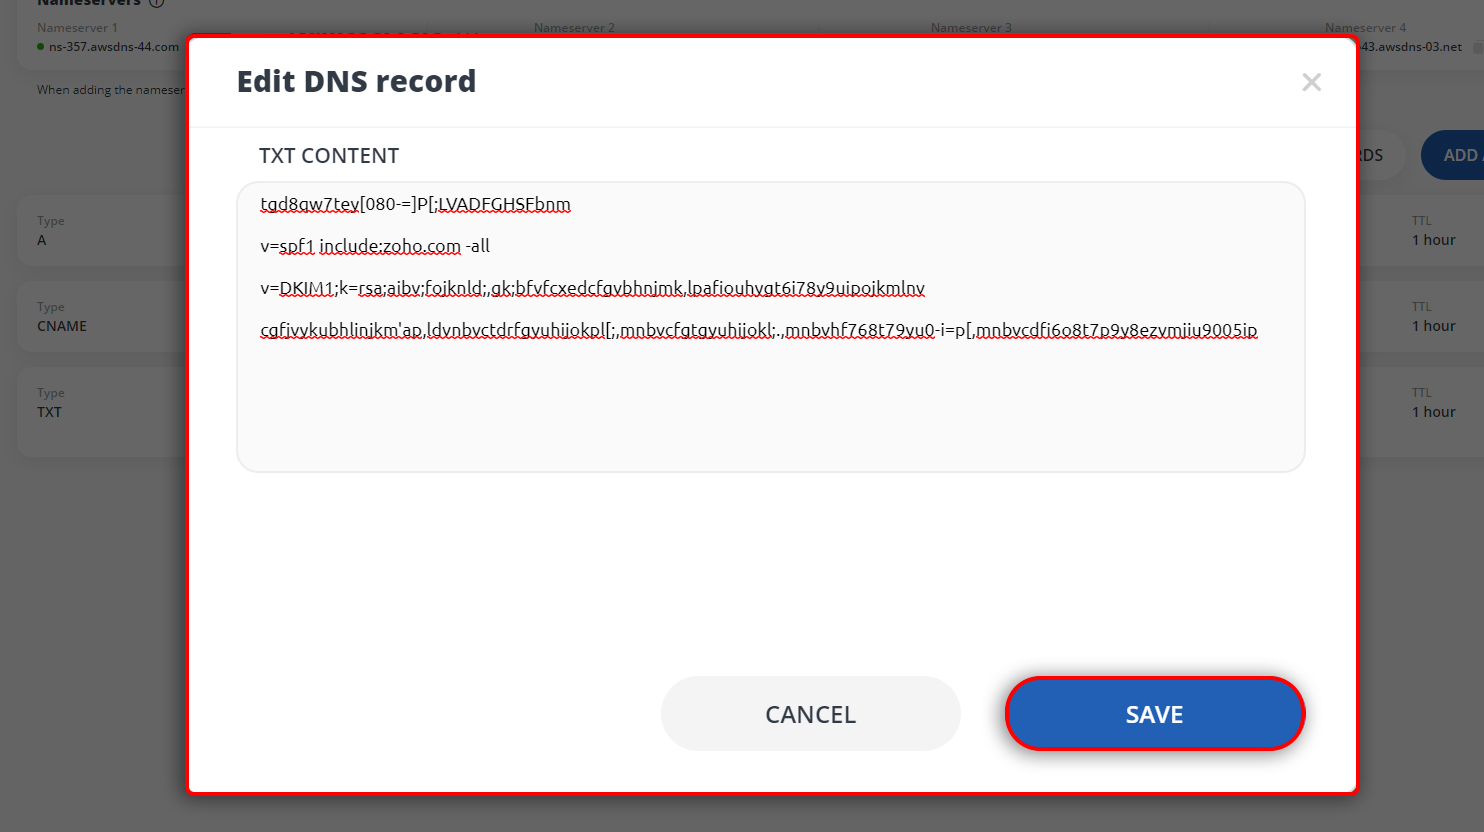
Then go to your 10Web dashboard and paste it into the TXT Content field from a new line. Click save. The record will appear in the list of your TXT records.
Once you’ve made all the changes, you may need to wait 30-45 minutes for the changes to take effect. Go back to your Zoho Admin control panel, click Verify to finish up the process.
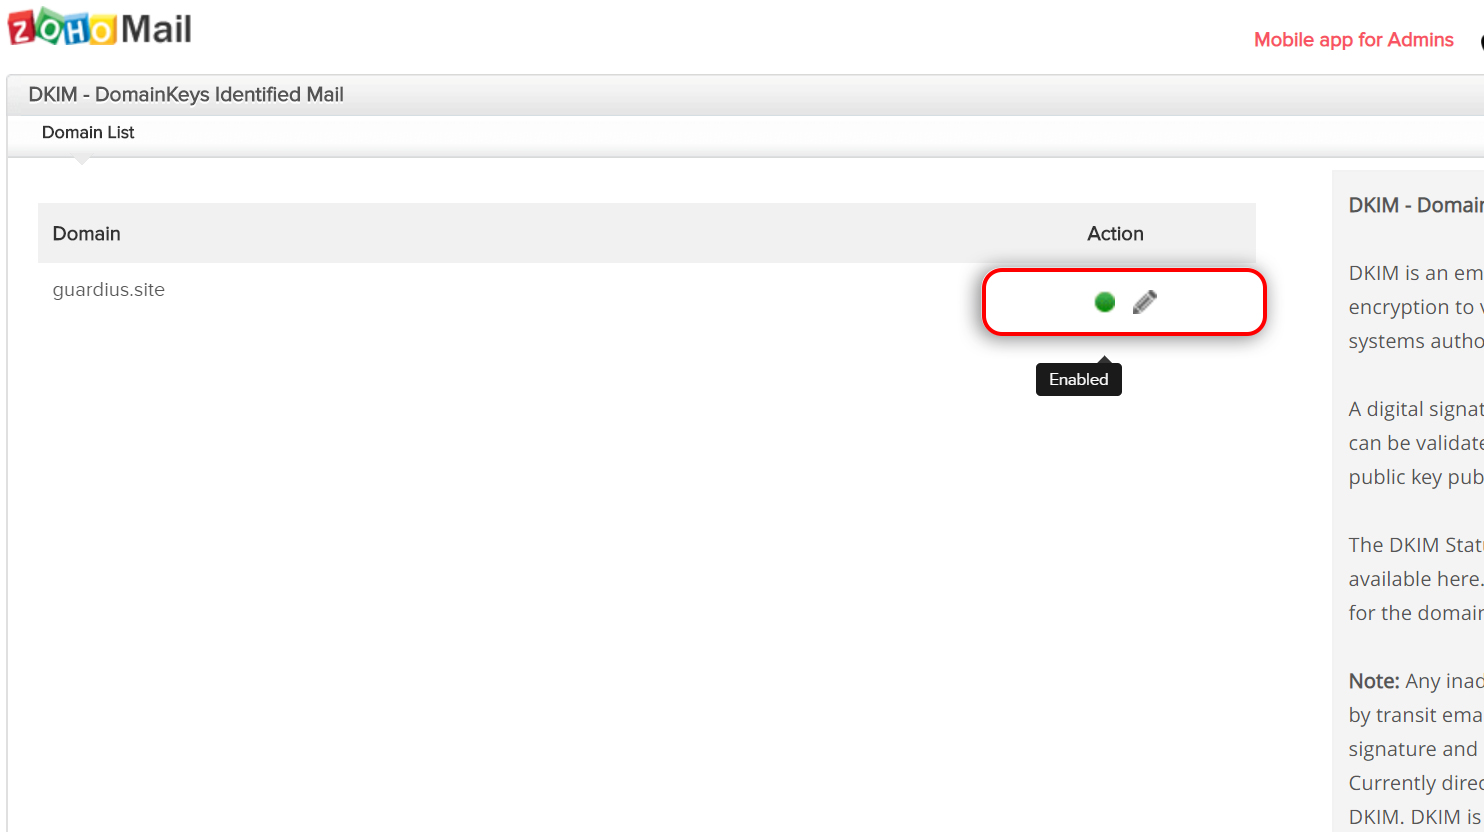
Once verification has been successfully completed, in your domain list, a green circle will appear in front of the edit icon for the domain that has been verified.
